
Home Improvement
Finding the Right Flooring Shops Near Me: An Expert Guide
Finding quality flooring shops near me can feel overwhelming, but knowing what to look for can simplify the process. This guide provides expert tips to help you choose the right materials and installers for your home renovation in 2026, avoiding common pitfalls and ensuring lasting satisfaction.


Sarah, a homeowner in Durham, recently embarked on a major renovation. She started with a simple search for “flooring shops near me” and was immediately overwhelmed by the sheer volume of options, from national chains to small local businesses. The honest answer to this question isn’t just a list of names, but a strategic approach to vetting options, understanding materials, and securing reputable installation. Most homeowners spend twice the budget they need to or settle for subpar results because they don’t know the critical questions to ask upfront.
- Always define your project’s scope, budget, and material preferences before contacting any flooring shop.
- Compare at least three quotes from different types of providers: big box stores, local specialists, and independent contractors.
- Verify contractor licenses, insurance, and customer reviews to ensure trustworthiness and quality.
- Understand the full breakdown of your flooring estimate, including material, labor, and subfloor preparation.
- Prioritize clear communication and a written contract to avoid common installation disputes.
Beyond “Flooring Shops Near Me”: Defining Your Project Needs
Before you even type “flooring shops near me” into a search engine, clarify your project’s requirements. This initial self-assessment is crucial for filtering out unsuitable options and guiding your discussions with potential providers. Consider the room’s function, expected foot traffic, existing subfloor condition, and your long-term aesthetic goals. For instance, a bathroom remodel demands waterproof materials like luxury vinyl plank (LVP) or ceramic tile, while a living room might suit hardwood or engineered wood. Understanding these functional requirements streamlines the selection process significantly. In our experience, homeowners who skip this step often get swayed by attractive displays that don’t meet their practical needs. Worth noting: Your budget isn’t just the material cost. Factor in professional installation, subfloor preparation, old flooring removal, and potential furniture moving. These ancillary costs can add 30-50% to the total project price, according to industry averages in 2026.
Types of Flooring Shops: Big Box vs. Local Specialists
When searching for local flooring stores, you’ll encounter two primary categories: large national retailers (like Home Depot or Lowe’s) and independent, local flooring specialists. Each has distinct advantages and disadvantages that can impact your project’s outcome and cost. Big box stores often offer competitive pricing on materials due to their purchasing power and may have a wider selection of in-stock options. However, their installation services are typically subcontracted, which can sometimes lead to less personalized service and varying levels of installer experience. According to a 2025 consumer report on home improvement services, satisfaction rates for installation quality tend to be slightly lower with large chains due to the lack of direct oversight. Conversely, independent flooring specialists often provide a more tailored experience, deeper product knowledge, and direct employment of their installers. They may offer unique or higher-end materials not found elsewhere and generally excel in custom solutions. The wrinkle here: while their material prices might be slightly higher, the overall value from superior installation and customer service can often outweigh the initial cost difference.
Essential Questions to Ask Every Flooring Contractor
Once you’ve narrowed down potential flooring contractors, prepare a list of targeted questions. This helps you assess their expertise, reliability, and suitability for your specific project. Don’t be shy about asking for specifics – a reputable contractor will appreciate your diligence. Key questions include: “Are you licensed and insured in this state?” (Always verify this independently through state licensing boards). “How long have you been in business?” and “Can you provide references or a portfolio of similar projects?” Also inquire about their warranty for both materials and labor. A strong labor warranty, typically 1–2 years, indicates confidence in their workmanship. Ask about their subfloor preparation process. Many flooring failures stem from inadequate subfloor work. For instance, the National Wood Flooring Association (NWFA) emphasizes that proper moisture testing and leveling are non-negotiable for hardwood installations, often overlooked by less experienced installers.
Decoding Flooring Estimates: What to Look For (and Avoid)
Receiving multiple flooring estimates is crucial for comparison and negotiation. However, simply comparing the bottom line is a common mistake. A detailed estimate should itemize every cost, allowing you to understand where your money is going. Look for separate line items for material costs (per square foot), labor (per square foot or per day), subfloor preparation, old flooring removal and disposal, trim or molding installation, and any applicable taxes. Some estimates might include a project management fee or delivery charges; ensure these are clearly stated. Be wary of vague lump-sum figures or estimates that are significantly lower than others without a clear explanation. In real terms, a local flooring shop might quote $4-$18 per square foot for material and installation combined, depending on the material chosen. Hardwood typically falls on the higher end, while laminate or basic carpet may be on the lower end. Always clarify what is included in that per-square-foot price to avoid surprises later.
Common Flooring Materials and Their Trade-offs
The choice of flooring material significantly impacts a room’s functionality, maintenance, and aesthetic. Each material comes with its own set of benefits and drawbacks, making the selection process a balance of priorities. Hardwood offers timeless beauty and can last for decades with proper care, but it’s susceptible to moisture damage and scratches. Luxury Vinyl Plank (LVP) or Luxury Vinyl Tile (LVT) are highly durable, waterproof, and mimic natural materials convincingly, making them excellent for high-moisture areas. Carpet provides warmth, sound absorption, and comfort, though it requires regular cleaning and can harbor allergens. Tile (ceramic or porcelain) is exceptionally durable and water-resistant, ideal for kitchens and bathrooms, but can be cold and hard underfoot. The latest advancements in engineered wood flooring, for instance, offer greater stability against humidity fluctuations compared to solid hardwood, while still providing a genuine wood surface. When choosing, consider the room’s environment and expected wear and tear.
Preventing Costly Mistakes with Your New Flooring
Even with careful planning, mistakes can happen. The most common (and costly) error homeowners make is neglecting subfloor issues. An uneven, damaged, or moist subfloor will compromise the longevity and appearance of any new flooring, leading to buckling, gaps, or adhesive failure. Always insist on a thorough subfloor inspection and address any necessary repairs or leveling before installation begins.

Another frequent misstep is underestimating project timelines. Rushing the process can lead to hasty decisions, overlooked details, and a stressful experience. Reputable flooring shops near me will provide a realistic timeline, factoring in material ordering, delivery, acclimatization (for wood products), and installation. Always build in a buffer for unexpected delays. Finally, choosing the wrong material for the room’s function is a costly mistake. Installing carpet in a high-traffic entryway or solid hardwood in a perpetually damp basement will lead to premature wear and dissatisfaction. Always align material choice with practical use, even if it means sacrificing a specific aesthetic preference.
Expert Tips for a Smooth Flooring Installation
A successful flooring project extends beyond choosing the right materials and a reputable contractor. Proper preparation and clear communication are paramount. For instance, ensure all existing furniture and delicate items are removed from the work area before the installers arrive. This not only speeds up the process but also prevents accidental damage. Confirm the delivery schedule and, if applicable, allow sufficient time for wood or engineered wood products to acclimatize in your home. This typically takes 3–5 days to adjust to your home’s humidity levels, preventing future expansion or contraction issues. Worth noting: Skipping this step, especially in regions with fluctuating humidity, is a common cause of gapping and buckling. Maintain open lines of communication with your project manager or lead installer. Address any questions or concerns immediately. Upon completion, conduct a thorough final walkthrough, inspecting for any imperfections, gaps, or unfinished areas. Document everything with photos and ensure all agreed-upon work is completed to your satisfaction before making the final payment.

Key Takeaways
- Define your project needs clearly before contacting flooring shops.
- Compare quotes from at least three different flooring providers.
- Verify licenses, insurance, and customer reviews for all contractors.
- Insist on detailed, itemized estimates to understand all costs.
- Prioritize subfloor preparation and material acclimatization for longevity.
Frequently Asked Questions
What is the average cost of flooring installation in 2026?
The average cost varies significantly based on material, labor rates, and regional location. As of July 2026, homeowners can expect to pay anywhere from $4 to $18 per square foot, encompassing both material and installation. This range fluctuates depending on whether you choose budget-friendly laminate or high-end solid hardwood or complex tile work.
How do I find reputable flooring contractors near me?
Start by asking for recommendations from friends, family, or local real estate agents. Check online reviews on platforms like Google, Yelp, or Angie’s List. Verify licenses and insurance through your state’s contractor licensing board. Always request references and review their portfolio to assess their quality of work.
Should I buy flooring materials from a big box store or a specialty shop?
Big box stores often offer competitive prices and readily available stock, while specialty shops provide more personalized service, deeper product knowledge, and often higher-quality or unique materials. For complex projects or custom finishes, a specialty shop may offer better expertise and installation quality.
What should be included in a flooring estimate?
A complete estimate should itemize material costs (per square foot), labor charges, subfloor preparation (leveling, repairs), old flooring removal and disposal, trim or molding installation, and any delivery or project management fees. Avoid vague estimates that don’t break down these components clearly.
How long does flooring installation typically take?
Installation time varies by material and project size. A single room of laminate or LVP might take 1–2 days, while hardwood or complex tile installations can take several days to a week or more, including necessary subfloor preparation and material acclimatization. Always confirm a realistic timeline with your contractor.
What are the most durable flooring options for busy households?
For busy households, luxury vinyl plank (LVP/LVT), porcelain tile, and engineered hardwood with a durable topcoat are excellent choices. LVP and porcelain are highly resistant to scratches, dents, and water, making them ideal for homes with children or pets. Engineered hardwood offers durability combined with the warmth of natural wood.
Conclusion
Navigating the world of flooring shops near me requires more than just searching online; it demands a strategic approach to planning, selection, and execution. By clearly defining your project needs, understanding the nuances between different types of providers, and asking the right questions, you empower yourself to make informed decisions. Prioritizing transparency in estimates and ensuring meticulous subfloor preparation are critical steps in preventing costly mistakes and achieving a beautiful, long-lasting floor. The single most actionable takeaway is to seek at least three detailed, itemized quotes from diverse flooring contractors. This not only provides a basis for comparison but also deepens your understanding of the process and fair market value. Information current as of July 2026; pricing and product details may change.






General
Gas Fireplace Essentials: A Builder’s Guide for Homeowners
A gas fireplace offers convenient warmth and ambiance without the hassle of wood. Understanding the different types, installation requirements, and safety protocols is crucial for any homeowner.
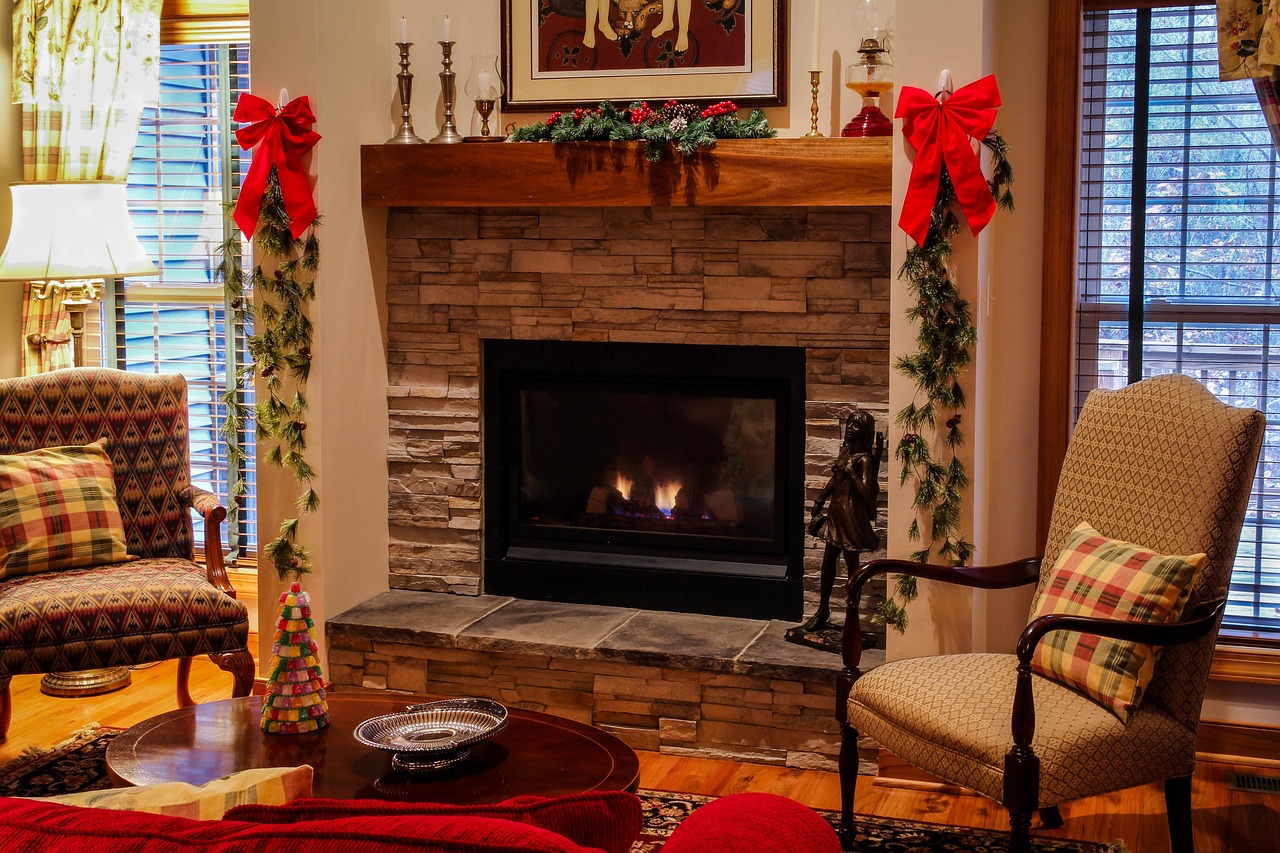
Sarah’s home had a beautiful, but rarely used, wood-burning fireplace. The thought of chopping wood, cleaning ash, and dealing with smoke often outweighed the desire for warmth. Her solution, like many homeowners, was a gas fireplace — a convenient upgrade that offers instant heat and ambiance with minimal effort. However, simply swapping out a wood-burning unit for a gas model isn’t always straightforward; it involves understanding different types, installation complexities, and long-term maintenance.
Key Takeaways
- Gas fireplaces come in three main types: direct vent, ventless, and B-vent, each with distinct venting and efficiency characteristics.
- Proper installation, including gas line and venting, is critical for both safety and performance, often requiring professional expertise.
- Costs vary significantly based on the unit type, BTU output, and installation complexity, ranging from hundreds to several thousands of dollars.
- Regular maintenance, including annual inspections by a qualified technician, is essential to ensure safe and efficient operation.
- Carbon monoxide detectors are a non-negotiable safety feature, especially for homes with ventless gas fireplaces.
Understanding Gas Fireplace Types
Choosing the right gas fireplace starts with understanding the fundamental differences in how they vent combustion byproducts. This decision impacts safety, efficiency, and installation requirements. There are three primary types: direct vent, ventless (or unvented), and B-vent (or natural vent).
Direct Vent Gas Fireplaces
Direct vent gas fireplaces are among the most popular choices due to their sealed combustion system. They draw all combustion air from outside the home and exhaust all byproducts directly outside through a co-axial or dual-pipe venting system. This design makes them incredibly safe, as no combustion air or exhaust mixes with indoor air. They are also highly efficient, typically offering 70-85% efficiency, as they don’t draw heated room air for combustion or lose it through the chimney. Installation often involves running a vent pipe directly through an exterior wall or vertically through the roof.
Ventless Gas Fireplaces
Ventless gas fireplaces operate without a flue or chimney, drawing combustion air from the room and releasing exhaust directly back into the living space. While seemingly convenient, this design comes with significant considerations. They are highly efficient, often rated at 99.9% efficiency, as almost all heat stays within the room. However, they introduce moisture, carbon dioxide, and trace amounts of carbon monoxide into the home. For this reason, many local codes restrict or prohibit their use, and they require strict adherence to safety guidelines, including mandated oxygen depletion sensors and carbon monoxide detectors. They are not recommended for bedrooms or small, unventilated spaces.
B-Vent (Natural Vent) Gas Fireplaces
B-vent gas fireplaces are similar to traditional wood-burning fireplaces in that they use a chimney or a B-vent pipe to exhaust combustion byproducts. They draw combustion air from the room, just like a wood-burning unit. This means they are less efficient than direct vent models, typically around 30-50%, as they continuously draw heated indoor air for combustion and send it up the flue. They are a good option for converting existing masonry fireplaces that already have a functional chimney, offering a simpler installation than direct vent units in such scenarios.
Natural Gas vs. Propane: Fueling Your Flame
The choice between natural gas and propane significantly impacts initial setup and ongoing costs for your gas fireplace. Natural gas is delivered directly to your home via an underground pipeline, making it a convenient and generally more affordable fuel source. If your home already has a natural gas line, connecting a new fireplace is relatively straightforward, though it still requires a licensed technician to ensure proper sizing and pressure. Propane, on the other hand, is stored in a tank on your property and delivered by truck. It burns hotter than natural gas and is often used in rural areas where natural gas lines are unavailable. Propane fireplaces require a dedicated tank and gas line installation, which adds to the initial cost. Worth noting, propane units can often be converted to natural gas, and vice versa, with a conversion kit, though this must be done by a qualified professional.
Installation Complexities and Considerations
Proper installation is paramount for the safe and efficient operation of any gas fireplace. This isn’t a DIY project; it requires expertise in gas lines, venting, and local building codes. For a new installation, a dedicated gas line must be run to the fireplace location, requiring precise calculations for pressure and volume based on the unit’s BTU output. Venting requirements vary by fireplace type. Direct vent units need a sealed, dual-wall pipe routed directly to the outside, either horizontally or vertically. B-vent units connect to a standard chimney or a specific B-vent pipe. In my years working in construction and home renovation, particularly with heating and ventilation systems, I’ve observed that overlooking the proper sizing of gas lines or failing to seal direct vents correctly are common missteps that lead to costly repairs and safety hazards down the line. Always consult with a licensed gas fitter and a qualified fireplace installer to ensure compliance with the International Residential Code (IRC) and local regulations.
The Real Cost of a Gas Fireplace
The investment in a gas fireplace extends beyond the unit’s purchase price, encompassing installation, fuel costs, and maintenance. Prices can vary widely based on type, BTU output, and aesthetic features. A basic ventless gas log set might cost a few hundred dollars, while a high-end direct vent fireplace insert with elaborate trim and remote control can easily exceed $5,000 for the unit alone. Installation costs are typically $1,000 to $3,000, but can be higher for complex venting or new gas line extensions. Fuel costs depend on local utility rates and usage, but natural gas is generally more economical than propane.
| Feature | Direct Vent | Ventless | B-Vent |
|---|---|---|---|
| Unit Cost (Estimate) | $2,000 – $7,000 | $500 – $2,500 | $1,500 – $4,000 |
| Installation Cost (Estimate) | $1,500 – $3,500+ | $500 – $1,500 | $1,000 – $2,500 |
| Efficiency | 70-85% | ~99.9% | 30-50% |
| Venting | Sealed, dual-pipe to exterior | None (exhaust into room) | Chimney or B-vent pipe |
| Safety Considerations | Very high | Requires CO/ODS sensors, local code review | High (adequate draft needed) |
| Ambiance | Realistic flames, glass front | Realistic flames, open front | Realistic flames, open front |
Maintenance and Safety Protocols
Like any gas appliance, a gas fireplace requires regular maintenance to ensure its safe and efficient operation. Skipping these crucial steps can lead to decreased performance, higher energy bills, and, more critically, safety hazards. Annual professional inspections are highly recommended. A qualified technician will check for gas leaks, ensure proper ignition (pilot light or electronic), clean burner components, inspect the venting system for blockages or damage, and verify that safety sensors (like oxygen depletion sensors in ventless units) are functioning correctly. According to the National Fire Protection Association (NFPA) (2026), all heating equipment, including fireplaces, should be inspected annually by a professional. A critical safety component for any home with a gas fireplace is a working carbon monoxide detector. For ventless units, this is non-negotiable, as they release combustion byproducts directly into the living space. Even with direct vent and B-vent units, malfunctions can occur, making a detector a vital backup. Test your detectors monthly and replace batteries annually.
Gas Fireplace Features and Aesthetics
Beyond the functional aspects, modern gas fireplaces offer a wide array of features and aesthetic choices to enhance your home’s ambiance and comfort. Flame appearance is a key differentiator. Higher-end units use advanced burner technology to create more realistic, dancing flames. Ceramic or refractory logs, often hand-painted, mimic the look of real wood, complete with glowing embers. Options for fire glass or stones are also available for a contemporary aesthetic. Convenience features are abundant. Many units come with remote controls for adjusting flame height, heat output, and even turning the unit on or off. Thermostatic controls allow the fireplace to maintain a desired room temperature automatically. Some models include blowers to circulate warm air more effectively into the room, and smart home integration allows for control via apps or voice commands.
Pros and Cons of Gas Fireplaces
Before committing to a gas fireplace, homeowners should weigh the distinct advantages against potential drawbacks.
Pros
- Convenience: Instant on/off, no wood handling, ash cleanup, or chimney sweeping required.
- Efficiency: Direct vent and ventless models offer high heating efficiency, reducing energy waste.
- Cleanliness: No smoke, soot, or ash to contend with, resulting in cleaner indoor air.
- Ambiance: Provides the visual warmth and comfort of a fire with minimal effort.
- Control: Precise temperature and flame height adjustments often available via remote or thermostat.
Cons
- Installation Cost: Can be substantial, especially for new gas line or venting requirements.
- Dependence on Fuel: Requires a continuous supply of natural gas or propane.
- Less Authentic Scent: Lacks the distinctive aroma of a wood-burning fire.
- Safety Risks (Ventless): Ventless models release combustion byproducts into the home, necessitating extreme caution and proper ventilation.
- Aesthetic Limitations: While improved, the flame may not always replicate the natural variation of a wood fire.
Common Mistakes Homeowners Make
Even with the best intentions, homeowners often make errors when selecting, installing, or maintaining their gas fireplaces that can lead to disappointment or safety concerns. A frequent mistake is underestimating the importance of professional installation. While a gas log set might seem simple, connecting to a gas line and ensuring proper ventilation are complex tasks that require certified expertise. Another common oversight is neglecting annual maintenance. A dirty burner or a partially blocked vent can significantly reduce efficiency and increase the risk of carbon monoxide buildup. Choosing a ventless unit for a small, unventilated room without adequate CO detection is a serious safety hazard. Always confirm local codes regarding ventless fireplaces before purchase. Choosing Expert Foundation Repair Companies for Your Home
Expert Tips for Optimal Performance
Maximizing the comfort and efficiency of your gas fireplace goes beyond initial installation. Here are some insights from our experience in the field. First, consider the BTU output relative to the room size. An oversized unit will cycle on and off too frequently, while an undersized one won’t provide adequate heat. For most living rooms, a unit between 20,000 and 40,000 BTU is sufficient. Second, prioritize air quality. Even with direct vent units, ensuring good overall home ventilation is beneficial. For ventless models, always crack a window slightly and ensure exhaust fans are working in other areas when the fireplace is in use. Worth noting, the quality of ceramic logs or fire glass can significantly impact flame realism; investing in higher-grade accessories enhances the visual experience. Finally, never obstruct the fireplace’s vents or clearances. Maintaining the prescribed distances from combustibles is a safety critical point.
Frequently Asked Questions
Is a gas fireplace more efficient than a wood-burning one?
Yes, generally a gas fireplace is significantly more efficient. Direct vent models typically offer 70-85% efficiency, while ventless models can reach 99.9%. Traditional wood-burning fireplaces, on the other hand, often have efficiencies between 10-30%, losing much of their heat up the chimney.
Can I install a gas fireplace myself?
No, gas fireplace installation, particularly involving gas lines and venting, should always be performed by a licensed professional. Improper installation can lead to gas leaks, carbon monoxide poisoning, and fires. Local codes often mandate professional installation for safety and insurance purposes.
How often should a gas fireplace be serviced?
A gas fireplace should be professionally serviced annually. This inspection ensures all components are working correctly, prevents gas leaks, cleans burners, checks venting, and verifies safety features like oxygen depletion sensors. Regular maintenance extends the unit’s lifespan and maintains efficiency.
Are ventless gas fireplaces safe?
Ventless gas fireplaces can be safe if installed correctly, used sparingly, and monitored with multiple carbon monoxide detectors and oxygen depletion sensors. However, they release combustion byproducts into the room, which can affect indoor air quality. Many regions have restrictions or outright bans on their installation.
What is the typical lifespan of a gas fireplace?
With proper installation and regular maintenance, a gas fireplace can last 15 to 25 years or even longer. Components like gas valves, igniters, and blowers may need replacement during this period, but the core structure is durable.
Can I convert my wood fireplace to gas?
Yes, many existing wood-burning fireplaces can be converted to gas using gas log inserts or a gas fireplace insert. The conversion process requires running a gas line and often involves installing a new liner or direct vent system, depending on the chosen gas unit type.
What BTU output do I need for my room?
The ideal BTU output depends on your room size, ceiling height, and insulation. As a general rule, you’ll need approximately 20-30 BTUs per square foot to heat a well-insulated room. For a 400 sq ft room, a 8,000-12,000 BTU fireplace would be adequate for supplemental heating.
Conclusion: Embracing the Comfort
A gas fireplace can be a fantastic addition to any home, offering warmth, ambiance, and convenience without the traditional hassles of wood. By understanding the different types — direct vent, ventless, and B-vent — and recognizing the critical importance of professional installation and consistent maintenance, homeowners can make an informed decision that prioritizes both comfort and safety. Invest in quality, ensure expert installation, and commit to regular servicing to enjoy your gas fireplace for decades to come. Information current as of July 2026; pricing and product details may change.
Home Improvement
Elevate Your Home: The Strategic Impact of Crown Moulding
Crown moulding is more than just decorative trim; it’s a strategic design element that significantly impacts a room’s perceived height and elegance. Learn how to choose, install, and maintain this timeless architectural feature for lasting appeal.

When you walk into a room, and it just feels ‘finished,’ chances are that crown molding is playing a significant, yet often unnoticed, role. This decorative trim, installed where walls meet the ceiling, is a strategic design element that fundamentally shapes a room’s perceived proportions, elegance, and overall architectural character.
Key Takeaways
- Crown molding significantly enhances a room’s perceived height and elegance, acting as a critical architectural detail.
- Material choice — from wood to polyurethane — dictates durability, cost, and ease of installation, requiring careful consideration for each project.
- Proper measurement and precise angle cuts are paramount for a professional finish, often being the most challenging aspect of installation.
- Professional installation can cost between $4 to $15 per linear foot, depending on complexity, material, and regional labor rates.
- Integrating crown molding into modern design involves selecting simpler profiles and ensuring a cohesive aesthetic with existing trim.
The Architectural Impact of Crown Molding
Crown molding, also known as cornice molding, serves a purpose far beyond mere ornamentation. It acts as a visual transition, softening the sharp angle where walls meet the ceiling and drawing the eye upward, which can make a room feel taller and more expansive. This subtle yet powerful effect is why it remains a cornerstone in interior design. In real terms, a well-chosen crown molding can unify a room’s elements, providing a cohesive frame that ties together walls, ceilings, and other trim such as door casings and baseboards. This creates a sense of completeness and intentionality that generic spaces often lack. It’s an investment in a room’s character. Worth noting: Historically, crown molding was a hallmark of luxury, crafted from plaster or intricate wood carvings in grand estates. Today, its accessibility through various materials allows homeowners to achieve similar high-end aesthetics without a prohibitive budget. According to Wikipedia, crown molding has been a decorative staple for centuries, evolving from ancient cornices to modern-day millwork. Wikipedia
Understanding Crown Molding Materials
The choice of material for crown molding profoundly impacts its durability, ease of installation, and overall cost. Each option presents a unique set of advantages and considerations that skilled contractors like B Collins Construction weigh carefully for every project. Solid Wood: Traditional and highly prized for its natural beauty and grain, solid wood offers excellent durability and takes paint or stain beautifully. Species like pine, oak, and maple are common. The wrinkle here: wood can be expensive, prone to expansion and contraction with humidity changes, and requires meticulous installation to avoid gaps. It’s often preferred in historic homes or for bespoke, high-end finishes. MDF (Medium-Density Fiberboard): A popular and cost-effective alternative, MDF is engineered wood that’s stable, smooth, and accepts paint very well. It’s less susceptible to warping than solid wood. However, MDF is heavy, prone to damage from moisture, and doesn’t hold nails as securely as wood, requiring adhesive or longer fasteners. It’s an excellent choice for painted finishes in dry environments. Polyurethane: Lightweight, durable, and resistant to moisture, rot, and insects, polyurethane is an excellent option for bathrooms, kitchens, or exterior applications. It can be easily cut and installed, often coming pre-primed. Its primary drawback is its synthetic appearance if not painted, and it can be more expensive than MDF. Wayfair, for instance, offers polyurethane crown molding options ranging from $14.99 to over $100 per linear foot, depending on profile and length. Wayfair PVC: Similar to polyurethane in its moisture resistance, PVC is ideal for extreme humidity or outdoor use. It’s very durable but can be less rigid than other materials and may require specialized adhesives. Like polyurethane, it’s often best painted for a finished look.
Choosing the Right Crown Molding Profile and Size
Selecting the appropriate crown molding profile and size is crucial for achieving a balanced aesthetic. A common misstep is choosing a profile that’s either too small for the room, making it look insignificant, or too large, overwhelming the space. For ceiling height, a good rule of thumb is to use a molding that’s 1/36th to 1/60th of the ceiling height. For example, an 8-foot (96-inch) ceiling might suit a crown molding between 2.5 to 3 inches in face height, while a 10-foot (120-inch) ceiling could accommodate 4 to 6 inches. The Molding Company suggests that for average ceiling heights, a 3- to 6-inch profile is generally suitable. The Molding Company In terms of profile, options range from simple cove and ogee designs to more elaborate multi-piece build-ups. Simple, clean lines are often preferred for modern interiors, while traditional homes might benefit from a more intricate, layered profile. Consider the existing trim in your home—baseboards, window casings, door frames—and choose a crown molding that complements their style and scale. Consistency in architectural trim creates a harmonious flow.
Installation Fundamentals: DIY vs. Professional
Installing crown molding is notoriously challenging, primarily due to the complex compound miter cuts required for inside and outside corners. While many DIY enthusiasts attempt it, achieving a truly smooth, professional finish often requires specialized tools and significant experience. For DIYers, essential tools include a miter saw with a strong blade, an angle finder, a coping saw, nail gun, and stud finder. Learning to cut crown molding upside down and backward on a miter saw is a common technique, but it has a steep learning curve. Even with practice, minor gaps can appear, requiring careful caulking and sanding. In our experience at B Collins Construction, professional installation ensures precision and efficiency. We bring not only the right tools but also years of expertise in handling tricky angles, uneven walls, and various material properties. This expertise minimizes material waste and guarantees a flawless aesthetic. For typical projects, professional installation costs can range from $4 to $15 per linear foot, with complex jobs or high-end materials pushing towards the higher end of that spectrum in 2026.
Mastering the Angles: Advanced Installation Tips
The true test of crown molding installation lies in mastering its angles. Unlike flat trim, crown molding sits at an angle, typically 45 or 52 degrees, relative to both the wall and ceiling. This creates a compound miter cut where the saw blade is beveled and mitered simultaneously. One common issue is dealing with walls that are not perfectly square (90 degrees). The wrinkle here: an angle finder is indispensable for measuring the actual corner angle, then dividing it by two for the miter setting. For instance, a 92-degree corner requires a 46-degree miter. For the compound angle, online calculators or dedicated crown molding jigs can be incredibly helpful for setting your miter saw accurately. Failing to account for these subtle variations is the quickest way to end up with unsightly gaps. Another technique for inside corners is coping, where one piece of molding is cut to fit precisely against the profile of the adjacent piece. This method, while more labor-intensive, creates a much tighter and more forgiving joint than a simple miter cut, especially in older homes with uneven walls.
Integrating Crown Molding into Modern Design
While often associated with traditional homes, crown molding can be seamlessly integrated into modern and minimalist interiors. The key is to choose profiles that complement, rather than contrast with, contemporary aesthetics. This means opting for simpler, cleaner lines and avoiding overly ornate or multi-layered designs. Modern crown molding often features a simple cove, a clean straight edge, or a subtle stepped profile. These designs provide a crisp transition between wall and ceiling without drawing excessive attention or introducing visual clutter. Consider painting the crown molding the same color as the ceiling for a cohesive, understated look that enhances height without breaking up the visual flow. Alternatively, matching it to the wall color can create a subtle, integrated feel. For homes with a transitional style, a slightly more detailed, yet still streamlined, profile can bridge the gap between classic and contemporary. The Moulding Company highlights both classic and modern profiles, demonstrating how versatility allows crown molding to fit diverse design palettes. The Moulding Company
Maintenance and Longevity for Your Crown Moulding
Proper care and maintenance ensure your crown molding retains its beauty and structural integrity for decades. The longevity largely depends on the material chosen and the environment it’s installed in. For wood crown molding, regular dusting is important. Any small dents or dings can be filled with wood putty, sanded, and repainted or stained to match. It’s crucial to monitor for signs of moisture damage, especially in areas like bathrooms or kitchens, which can lead to warping or rot. Maintaining consistent indoor humidity levels can significantly prolong its life. MDF, polyurethane, and PVC moldings are generally lower maintenance. They can be wiped clean with a damp cloth. For painted finishes, occasional touch-ups may be needed, especially in high-traffic areas or where furniture might bump against lower sections (if used on cabinets). Polyurethane and PVC are inherently moisture-resistant, making them ideal for areas prone to humidity without the risk of warping or rot seen in wood or MDF. In our experience, high-quality polyurethane molding, properly installed and painted, can easily last 20–30 years with minimal intervention.
Common Mistakes to Avoid with Crown Moulding
Even seasoned DIYers can stumble when installing crown molding. Being aware of these common pitfalls can save significant time, material, and frustration.
- Incorrect Measurements: Measuring only once or not accounting for waste leads to frustrating short cuts. Always measure twice, cut once, and add 10-15% to your linear footage for waste.
- Ignoring Wall Imperfections: Walls and ceilings are rarely perfectly straight or square. Trying to force a perfectly straight piece of molding onto an uneven surface will result in gaps. Use shims, caulk, or even plaster/drywall compound to correct significant variations before installation.
- Using the Wrong Fasteners: Using nails that are too short or too thin for the material can lead to the molding pulling away from the wall over time. For solid wood, 2-inch finish nails into studs or ceiling joists are ideal. For MDF, adhesive and longer nails into studs are often necessary.
- Poor Paint Prep: Failing to prime raw wood or MDF, or not properly cleaning pre-primed surfaces, can lead to poor paint adhesion or an uneven finish. Always clean and prime for the best results.
- Forgetting Safety: Working overhead with power tools requires caution. Always wear safety glasses and hearing protection. Ensure your ladder is stable and you have a helper for long pieces.
Expert Insights for a Flawless Finish
Achieving truly smooth crown molding often comes down to attention to detail and a few seasoned tricks of the trade. Here are some insights we’ve gathered over years of working on countless renovation projects. When dealing with long runs of crown molding, especially in large living rooms or open-concept spaces, plan your joints carefully. Instead of butt joints, use scarf joints (angled cuts) where two pieces meet on a flat wall. This creates a much stronger and less visible seam that virtually disappears once filled and painted. It’s a technique that adds a touch of craftsmanship. Another tip: for a truly integrated look, consider painting your crown molding the exact same sheen as your ceiling paint. This creates a continuous visual plane that makes the room feel taller and more expansive. If your walls are a different color, matching the crown to the ceiling rather than the wall can often be more effective in drawing the eye up. Finally, for intricate profiles or multi-piece build-ups, dry-fitting every section before any permanent fastening is non-negotiable. Crown moulding allows you to identify and correct any misaligned cuts or wall irregularities before it becomes a costly mistake. Don’t rush the process; precision in planning saves hours in rework.
Frequently Asked Questions
What is the average cost to install crown molding?
Professional crowmoldingng installation typically ranges from $4 to $15 per linear foot in 2026, encompassing both material and labor. This cost can vary significantly based on the material chosen (e.g., solid wood being more expensive than MDF), the complexity of the profile, and regional labor rates. Custom designs or intricate corners will also increase the overall price.
Can I install crown molding myself, or should I hire a professional?
While DIY installation is possible, crown molding is notoriously difficult due to the precise compound miter cuts required for corners. Professional installers have specialized tools and experience that ensure smooth joints and a polished finish, minimizing waste and frustration. For complex profiles or large projects, hiring a professional is often recommended to achieve optimal results.
What are the best materials for crown molding in high-humidity areas?
For high-humidity areas like bathrooms, kitchens, or basements, polyurethane or PVC crown molding are excellent choices. These synthetic materials are inherently resistant to moisture, warping, rot, and mildew, unlike wood or MDF. They offer superior durability and longevity in challenging environments, often coming pre-primed for easy painting.
How do I choose the right size crown molding for my room?
The ideal crown molding size depends on your ceiling height. As a general guideline, the molding’s face height should be approximately 1/36th to 1/60th of the ceiling height. For an 8-foot ceiling, a 2.5- to 3-inch profile is common, while a 10-foot ceiling can support a 4- to 6-inch profile. Larger rooms can also accommodate bolder profiles.
What is the difference between crown molding and other types of trim?
Crown molding specifically refers to decorative trim installed where walls and ceilings meet, or on top of cabinetry. Other trims include baseboards (where walls meet floors), casing (around doors and windows), and chair rails (a decorative strip usually installed about one-third up the wall). Each type of trim serves a distinct aesthetic and functional purpose in interior design.
Does crown molding increase home value?
Yes, crown molding can increase a home’s perceived value and aesthetic appeal. It adds a custom, high-end finish that buyers often appreciate, contributing to a sense of luxury and completeness. While the direct monetary return varies, it’s generally considered a worthwhile upgrade that enhances a home’s overall character and marketability.
What are common styles of crown molding?
Common crown molding styles range from traditional, ornate profiles like colonial or Georgian, to simpler, cleaner designs such as cove, ogee, or stepped profiles. Modern interiors often favor minimalist, straight-line moldings, while classic homes benefit from more intricate, layered designs that complement existing architectural features. The chosen style should align with the home’s overall aesthetic.
Conclusion
Crown molding is far more than a simple decorative accent; it’s an impactful architectural detail that can redefine a room’s character and elegance. By understanding the nuances of materials, selecting the right profile, and mastering installation techniques, you can transform your home with this timeless feature. Whether you opt for a professional installation by B Collins Construction or tackle a DIY project, meticulous planning and attention to detail will ensure a stunning and lasting result. Consider your home’s unique style and allow crown moulding to complete its architectural narrative. Information current as of July 2026; pricing and product details may change.
Home Improvement
Roof Vents: Balancing Your Home’s Essential Airflow
Roof vents are more than just holes in your roof; they are critical components of a healthy home. Proper attic ventilation prevents moisture buildup, reduces energy costs, and extends the life of your roof.

When considering home health and energy efficiency, many homeowners overlook one of the most vital components: roof vents. These unassuming elements are crucial for maintaining a healthy attic and, by extension, a healthy home. Most homeowners spend more on cooling and heating than necessary due to inadequate attic ventilation. The honest answer is that a properly balanced system of roof vents can drastically cut those energy bills while preventing costly structural damage and mold growth.
Key Takeaways
- Effective roof ventilation requires a balanced system of both intake and exhaust vents.
- Ridge vents and soffit vents offer a passive, continuous airflow solution for most homes.
- Powered attic vents can provide additional air movement, especially in hot climates, but come with energy considerations.
- Regular inspection and maintenance of roof vents are essential to prevent blockages and ensure optimal performance.
- Investing in the right roof ventilation system can significantly reduce energy costs and extend your roof’s lifespan.
The Unseen Workhorse: Why Roof Vents Matter So Much
Roof vents are critical for regulating attic temperature and moisture. Without proper ventilation, an attic can become an oven in summer and a damp cave in winter, leading to a cascade of problems for your home. In real terms, inadequate attic ventilation accelerates the deterioration of roofing materials, contributes to ice dam formation in colder climates, and makes your HVAC system work harder. This translates directly to higher energy bills and premature roof replacement. According to the U.S. Department of Energy, proper attic ventilation can reduce cooling costs by 10-15%. Worth noting, an unventilated attic also creates conditions ripe for mold and mildew growth, which can compromise indoor air quality and pose health risks. The moisture trapped within the attic can condense on structural elements, leading to wood rot and weakened framing over time.
Understanding the Ventilation System: Intake vs. Exhaust
Effective roof ventilation isn’t about installing a single vent; it’s about creating a continuous airflow system. This system relies on a crucial balance between intake vents and exhaust vents. Intake vents allow cooler, fresh air into the attic, typically located at the eaves or soffits (the underside of the roof overhang). Exhaust vents, on the other hand, allow hot, moist air to escape the attic, usually positioned near the roof’s peak. This creates a natural convection current, drawing cool air in and pushing warm air out. The wrinkle here: a common mistake is having too much exhaust and not enough intake, or vice versa. For optimal performance, the National Roofing Contractors Association (NRCA) recommends a balanced system with a 50/50 split between intake and exhaust ventilation. This ensures continuous air movement without creating negative pressure, which can draw conditioned air from your living space into the attic.
Common Types of Roof Vents Explained
There are several types of roof vents, each with distinct advantages and applications. Understanding these can help you make an informed decision for your home’s needs. Soffit Vents: These are intake vents installed along the soffits. They are essential for drawing in cooler air and are often perforated or continuous strips. They are discreet and effective when clear of insulation blockages. Ridge Vents: Located at the very peak of the roof, ridge vents offer continuous exhaust along the entire length of the roofline. They are virtually invisible from the ground and work best when paired with adequate soffit intake.

Box Vents (Static Vents): These are simple, non-mechanical exhaust vents that sit on the roof plane. They rely solely on natural convection and wind pressure. They are affordable and relatively easy to install but offer less airflow than continuous ridge vents. Turbine Vents (Whirlybirds): These distinctive, rotating metal vents use wind to create a vacuum, actively pulling air out of the attic. They are highly effective in windy areas but become less efficient on calm days. They are a good choice for enhancing airflow in specific problematic areas. Powered Attic Vents: These vents, either electric or solar-powered, use a fan to forcibly pull hot air out of the attic. Electric models are wired into the home’s electrical system, often controlled by a thermostat or humidistat. Solar-powered versions run off sunlight, offering an energy-efficient boost during peak heat hours. Off-Ridge Vents: These are similar to box vents but are typically installed closer to the ridge, often in clusters. They provide exhaust ventilation but are not as aesthetically pleasing as a continuous ridge vent.
Choosing the Right Roof Vent for Your Home
Selecting the appropriate roof ventilation system involves considering several factors: roof pitch, climate, existing insulation, and budget. No single vent type is universally superior; the best solution is often a combination. For most homes with adequate soffit space and a suitable roof pitch, a combination of continuous soffit vents and a ridge vent provides excellent passive ventilation. This system is quiet, energy-free, and highly effective at creating consistent airflow. For surface-material comparisons, see. In extremely hot climates or for attics with complex layouts that impede natural airflow, powered attic vents can be a beneficial addition. However, ensure they don’t overpower the passive system, potentially drawing conditioned air from your home. Consult with a roofing professional to calculate the necessary Net Free Area (NFA) for your attic to ensure sufficient ventilation.
Installation Considerations: Beyond Just Placing a Vent
Proper installation is paramount to a roof vent’s effectiveness and your roof’s integrity. A poorly installed vent can lead to leaks, premature material failure, and compromised airflow. Ensure all vents are securely fastened and properly sealed to prevent water intrusion. For soffit vents, verify that insulation doesn’t block the openings, which can easily negate their purpose. Baffles or blockers are essential to keep insulation away from the soffit vents while maintaining insulation depth. When installing new vents or upgrading an existing system, consider the total Net Free Area (NFA) required for your attic. This calculation is based on your attic’s square footage and ensures sufficient air exchange. The generally accepted standard is 1 square foot of NFA for every 300 square feet of attic floor space, with a balanced intake/exhaust ratio.
Cost of Roof Vent Installation and Maintenance
The cost of roof vents varies widely depending on the type, material, and whether you’re undertaking a DIY project or hiring a professional. Individual passive vents, like box vents or simple soffit vents, can range from $20 to $100 per unit. Continuous ridge vents typically cost more, often $3-$7 per linear foot, excluding installation. Powered attic vents, due to their mechanical components, usually fall between $200 and $600 for the unit alone, with solar models often at the higher end. Professional installation, which includes labor and sealing, can add $100-$300 per vent, or significantly more for a complete system overhaul. Maintenance is relatively low for passive vents, primarily involving visual inspections for blockages or damage. Powered vents may require occasional motor checks or fan blade cleaning. In our experience at B Collins Construction, inspecting all roof vents for debris, animal nests, or sealant cracks at least once a year, preferably in spring and fall, prevents most common issues.
Pros and Cons of Different Vent Types
Each roof vent type presents a unique set of advantages and disadvantages, influencing its suitability for various homes and climates.
| Vent Type | Pros | Cons |
|---|---|---|
| Ridge Vents | Continuous, uniform airflow; aesthetically subtle; energy-free operation. | Requires balanced soffit intake; less effective on low-slope roofs; higher initial installation cost than individual box vents. |
| Box Vents | Cost-effective; easy to install; no moving parts, so no maintenance beyond clearing debris. | Limited airflow per unit; visible on the roof plane; can be less effective on calm days; requires multiple units for sufficient ventilation. |
| Turbine Vents | Actively pulls air out with wind; no electricity needed; noticeable airflow even with light breezes. | Can be noisy; moving parts require occasional maintenance; aesthetically divisive; less effective on very still days. |
| Powered Attic Vents | Strong, consistent airflow; thermostatically controlled; effective in hot, humid conditions. | Consumes electricity (unless solar); potential for negative pressure if not balanced; motor can be noisy and requires maintenance. |
Common Mistakes Homeowners Make with Roof Ventilation
Understanding these common pitfalls can save you significant headaches and expenses down the line. Many issues stem from an incomplete understanding of how a ventilation system should function. One frequent mistake is mixing different types of exhaust vents, such as installing box vents too close to a ridge vent. This can short-circuit the airflow, causing the ridge vent to pull air from the nearby box vents rather than from the soffits, leaving portions of the attic unventilated. Another issue is blocking soffit vents with insulation, which starves the system of crucial intake air. Over-ventilating an attic with too many exhaust vents and insufficient intake is also problematic. This can create negative pressure, potentially drawing conditioned air from your living space into the attic, increasing your energy consumption. Always aim for balance rather than simply adding more vents.
Expert Tips for Optimal Attic Airflow
Achieving truly optimal attic airflow goes beyond basic vent installation. Consider these insights for maximizing your system’s efficiency and longevity. For homes with complex rooflines, consider isolating attic sections with baffles to ensure each area has its own balanced intake and exhaust. In our experience working with various roof configurations, a segmented approach often works best for consistent ventilation across the entire attic space. Explore for more on roof design. Another crucial tip is to regularly clear your soffit vents. Leaves, insect nests, and paint buildup can easily block these critical intake points. A simple visual inspection from the ground or a ladder can help identify and rectify these obstructions before they compromise your entire ventilation system. Finally, inspect your roof decking for any signs of moisture or mold during seasonal checks. These are clear indicators that your ventilation system might be inadequate or compromised, even if the vents themselves appear clear. Addressing these early can prevent extensive damage. Pricing structures for multi-room rollouts are beyond the scope of this article — see Water in Crawl Space: Identify, Fix, and Prevent Damage for that breakdown.
Frequently Asked Questions
What is the most effective type of roof vent?
The most effective roof ventilation system typically combines continuous soffit vents for intake and a continuous ridge vent for exhaust. This passive system provides balanced, uniform airflow across the entire attic, is energy-free, and is generally discreet, making it ideal for most residential applications.
How do I know if my attic has enough ventilation?
Signs of insufficient attic ventilation include excessively high attic temperatures, sagging roof decking, premature shingle deterioration, increased energy bills, or visible mold growth. In colder climates, large ice dams forming on the eaves can also indicate poor ventilation.
Can I mix different types of roof vents?
While you can mix different types of roof vents, it’s crucial to ensure they work together as a balanced system. Avoid mixing different exhaust vent types that are close to each other, as this can create short-circuits and prevent proper airflow across the entire attic space.
How much do roof vents cost to install?
The cost to install roof vents varies widely. Passive vents like box vents might cost $20-$100 per unit for materials, plus $100-$200 for professional installation. Powered attic vents can range from $200-$600 for the unit, with installation adding $200-$400. A full system upgrade can cost $1,000 or more.
Do solar-powered attic vents really work?
Yes, solar-powered attic vents are effective, especially during sunny, hot periods when attic heat buildup is highest. They operate without drawing electricity from your home’s grid, making them an energy-efficient option to boost attic airflow and reduce cooling loads.
How often should roof vents be inspected?
Roof vents should be inspected at least once a year, ideally in the spring and fall. Check for physical damage, blockages from leaves, debris, or animal nests, and ensure any powered units are functioning correctly. Regular inspections help maintain optimal airflow and prevent costly problems.
Conclusion
Roof vents are a fundamental component of a healthy, energy-efficient home, playing a vital role in attic ventilation and overall structural integrity. Investing in a balanced system of intake and exhaust roof vents is not just about comfort; it’s about protecting your entire roofing system and reducing long-term energy expenditures. By understanding the different types of roof vents, ensuring proper installation, and performing routine maintenance, you can significantly enhance your home’s performance for years to come. Don’t underestimate the power of proper airflow in your attic – it’s a small investment with substantial returns. Information current as of July 2026; pricing and product details may change.

Asiatic Lily Care: Avoiding Common Mistakes for Vibrant Blooms

Fountain Grass: A Guide to Graceful Garden Design

Gerbera Daisies: Vibrant Blooms for Your Home & Garden

Choosing Expert Foundation Repair Companies for Your Home

Bouncy Floors: Diagnosing Sagging & Stiffening Joists

Nellie Stevens Holly Planting: Your Guide to a Resilient Evergreen
-
 Repairs & Maintenance2 months ago
Choosing Expert Foundation Repair Companies for Your Home
-
 Repairs & Maintenance2 months ago
Bouncy Floors: Diagnosing Sagging & Stiffening Joists
-
 Outdoor & Garden2 months ago
Nellie Stevens Holly Planting: Your Guide to a Resilient Evergreen
-

 Tools & Materials1 month ago
Bolt Cutters: Your Essential Guide to Heavy-Duty Cutting
-

 Outdoor & Garden1 month ago
Brush Cutter Essentials: Clearing Overgrown Land Effectively
-

 Home Improvement2 months ago
Water in Crawl Space: Identify, Fix, and Prevent Damage
-

 Home Improvement2 months ago
The Two Grades of Home: Condition and Land
-

 Repairs & Maintenance2 months ago
Essential Furnace Maintenance for Peak Home Heating