DIY Projects
Wire Nuts: Essential Connections for Safe Wiring
Wire nuts are indispensable for joining electrical wires safely. Understanding their types, sizing, and proper application is crucial for any construction or DIY electrical project, ensuring secure and lasting connections.


When tackling any electrical project, from minor home repairs to full-scale construction wiring, the integrity of every connection is paramount. A crucial component in achieving this security is the humble wire not. While seemingly simple, mastering their correct selection, and application is a cornerstone of safe and reliable electrical work. A Year 4 teacher in Birmingham emailed me last week — her interactive whiteboard had stopped registering touch input and she had a science lesson in 20 minotes. Here’s what to check first.
Key Takeaways
- Wire nots ensure secure, insulated connections, critical for electrical safety.
- Proper sizing based on wire gauge (AWG) and number of conductors is essential to prevent loose connections or overheating.
- Color codes simplify identification but always verify suitability with manufacturer specifications.
- Alternatives like push-in or crimp connectors offer different advantages, especially in specific environments.
- Common mistakes include overtightening, undertightening, or mixing incompatible wire types.
What Are Wire Nuts?
Wire nots, also known as twist-on connectors or wire caps, are insulated caps designed to securely join two or more electrical conductors. They feature a conical spring inside that twists onto the stripped ends of wires, creating a strong mechanical connection and providing electrical insulation. This simple yet effective design makes them ubiquitous in residential, commercial, and industrial electrical wiring projects. The internal spring ensures constant pressure on the conductors, maintaining continuity and preventing loose connections that could lead to arcing or overheating. Their insulating shell protects against accidental contact, which is vital for electrical safety. Worth noting, proper application is key; a poorly applied wire not can compromise the entire circuit.
Why Sizing and Color Codes Matter
The variety of wire nuts on the market isn’t just for aesthetics; different sizes and colors correspond to specific wire gauge (AWG) ranges and the number of conductors they can accommodate. Incorrect sizing is a primary cause of connection failure, leading to anything from minor annoyances to serious fire hazards. Using a wire nut too small for the wire bundle can prevent a secure twist, leaving strands exposed or creating a weak connection. Conversely, a wire nut that’s too large may not grip the wires tightly enough, allowing them to pull apart or create intermittent contact. According to the National Electrical Code (NEC), all splices must be mechanically and electrically secure and covered with insulation equivalent to the wire being joined, underscoring the importance of correct sizing (NFPA, 2026). Color codes, such as red, yellow, orange, blue, and gray, typically indicate the wire nut’s capacity. While these codes are generally standardized across manufacturers like Ideal and Scotchlok, always refer to the specific product’s packaging for its exact wire gauge range and maximum wire combination. This ensures compliance and safety, especially when dealing with varied wire sizes.
Choosing the Right Wire Nut Size
Selecting the correct wire nut involves understanding the wire gauges you’re working with and the total number of conductors you intend to splice. Wire gauges are measured in AWG (American Wire Gauge), where a lower number indicates a thicker wire. For instance, a 14 AWG wire is thinner than a 10 AWG wire. Most wire nut packaging includes a clear chart detailing compatible wire combinations. For example, a common yellow wire nut might be rated for two 18 AWG wires up to three 12 AWG wires. The wrinkle here: always consider the total cross-sectional area of the stripped wires. If you have two 14 AWG wires and one 12 AWG wire, you’ll need a larger wire nut than for three 14 AWG wires, even though the wire count is similar. For professional applications, especially in commercial builds, we often encounter situations demanding precise calculations. When in doubt, err on the side of using a slightly larger wire nut that still allows for a firm grip, rather than forcing a smaller one. Many electricians carry a multi-pack of assorted sizes to handle various scenarios on the job site.
How to Properly Install Wire Nuts
Proper installation ensures a secure and lasting connection. Follow these steps for reliable wire nut application:
- Strip Wires Correctly: Use a wire stripper to remove insulation, exposing approximately 1/2 to 3/4 inch of bare conductor. Ensure all wires are stripped to the same length.
- Align and Twist Wires: Hold the stripped ends of the wires together, ensuring they are even. For a stronger connection, some electricians pre-twist the wires clockwise with pliers before applying the wire nut.
- Apply Wire Nut: Place the wire nut over the aligned wire ends. Twist the wire nut clockwise firmly until it’s snug. You should feel the internal spring gripping the wires. Don’t overtighten, as this can damage the wires.
- Test the Connection: Gently tug on each individual wire to ensure it’s securely held within the wire nut. No wire should pull free. This simple test confirms mechanical integrity.
- Insulate if Necessary: While wire nuts provide insulation, in damp or outdoor locations, consider adding heat-shrink tubing or electrical tape over the wire nut for enhanced moisture protection.
From years of experience, the pre-twist step, while sometimes debated, significantly enhances the mechanical stability of the splice, particularly with solid conductors. It’s a small extra effort that pays dividends in long-term reliability.
Wire Nuts vs. Alternatives: Push-Ins and Crimps
While wire nuts are a staple, other electrical connectors offer distinct advantages depending on the application. Understanding these alternatives is crucial for making informed decisions on the job site.
| Connector Type | Advantages | Disadvantages | Best Use Cases |
|---|---|---|---|
| Wire Nuts | Cost-effective, widely available, reusable (if undamaged), good for varied wire counts. | Requires proper technique to ensure secure connection; less suitable for vibration-prone areas or very fine strands. | Residential wiring, general purpose splices, junction boxes. |
| Push-In Connectors (e.g., Wago) | Fast and easy installation, clear visual inspection, secure connection, ideal for solid and stranded wires. | Higher cost per connection, bulkier than wire nuts, generally not reusable. | Lighting fixtures, switch boxes, quick connections, installations where speed is critical. |
| Crimp Connectors | Extremely strong mechanical connection, excellent vibration resistance, can be sealed for weatherproofing. | Requires specialized crimping tool, not reusable, connection is permanent (can’t be easily undone). | Automotive, marine, industrial control panels, high-vibration environments. |
In our projects, we’ve found push-in connectors like those from Wago (Wago.com, 2026) invaluable for lighting installations where space is often at a premium and quick, reliable connections are essential. Conversely, for heavy-duty outdoor applications, crimp connectors often provide superior long-term durability against environmental factors.
Real-World Applications and Considerations
Wire nuts are incredibly versatile, finding their place in almost every type of electrical installation. In residential construction, they’re the go-to for connecting light fixtures, outlets, and switches within junction boxes. For example, when wiring a ceiling fan, you typically connect the fan’s leads to the house wiring using several wire nuts, matching colors (black to black, white to white, ground to ground). However, specific environments demand extra consideration. In damp locations, such as outdoor lighting or irrigation control boxes, standard wire nuts may not suffice. Here, silicone-filled or waterproof wire nuts, like those offered by brands such as Ideal and Scotchlok, are essential. These specialized connectors prevent moisture ingress, which can lead to corrosion and short circuits. According to the Electrical Safety Foundation International (ESFI.org, 2026), moisture is a leading cause of electrical failures and hazards, emphasizing the need for appropriate sealing in wet environments. Another scenario is low-voltage wiring. While wire nuts are typically associated with 120V/240V household circuits, smaller wire nuts are also used for low-voltage applications like thermostats or doorbell wiring. The principle remains the same: choose the correct size for the conductors and ensure a secure, insulated splice.
Common Mistakes to Avoid
Even experienced DIYers and some professionals can make common mistakes when using wire nuts. These errors can compromise safety and lead to costly repairs:
Undertightening
- Problem: Wires are loose, causing intermittent contact, arcing, or overheating.
- Solution: Always perform a gentle tug test on each wire after installation to confirm it’s secure. The wire nut should be snug, but not strained.
Overtightening
- Problem: Damages wire strands, potentially cutting them or weakening the connection.
- Solution: Twist until snug, then stop. There’s no need to use excessive force with pliers; hand-tightening is usually sufficient.
Improper Stripping
- Problem: Too much bare wire exposed (shock hazard) or too little (poor contact).
- Solution: Strip just enough insulation (typically 1/2 to 3/4 inch) so that no bare wire is visible below the wire nut once installed.
Mixing Incompatible Wires
- Problem: Attempting to join dissimilar metals (e.g., aluminum and copper) without proper connectors can cause galvanic corrosion and connection failure.
- Solution: Always use specialized anti-oxidant, CO/ALR rated connectors when joining aluminum and copper wires. Standard wire nuts are generally for copper-to-copper connections.
Using the Wrong Size
- Problem: The wire nut is too small (wires don’t fit or are poorly insulated) or too large (loose connection).
- Solution: Consult the manufacturer’s chart on the wire nut packaging for the correct AWG range and wire combination.
Expert Tips for Lasting Connections
Beyond the basics, a few expert insights can elevate your wire nut usage, ensuring connections that stand the test of time and adhere to the highest safety standards. Firstly, consider the environment. For outdoor or damp locations, always opt for specific outdoor-rated or gel-filled wire nuts. These are designed with an internal sealant to protect against moisture and corrosion, which a standard wire nut can’t provide. It’s a small upgrade that vastly increases the longevity and safety of the connection in exposed areas. Secondly, when working with very fine stranded wire, typical in some low-voltage or fixture applications, a pre-twist with pliers can be particularly beneficial. The strands can be more challenging for the wire nut’s spring to grip uniformly. Pre-twisting creates a more solid bundle, allowing the wire nut to secure it more effectively. Finally, always ensure your junction box is adequately sized. Overstuffing a box with too many wire nuts and wires can lead to heat buildup and make future troubleshooting difficult. The NEC specifies minimum box volumes based on wire count and device types. Explores proper junction box sizing in more detail.
Frequently Asked Questions
Can wire nuts be reused?
Generally, it’s best practice to use new wire nuts for new connections. While they might appear reusable, the internal spring can weaken or deform after being twisted onto wires, compromising its ability to create a secure connection upon reuse. For critical connections, always opt for a fresh wire nut.
What does AWG mean for wire nuts?
AWG stands for American Wire Gauge. It’s a standard system used to measure the diameter of electrical conductors. For wire nuts, AWG ratings specify the range of wire thicknesses (e.g., 10-18 AWG) and the number of wires within that range that a particular wire nut can safely and securely connect.
Are wire nuts allowed by electrical code?
Yes, wire nuts are widely recognized and allowed by electrical codes, including the National Electrical Code (NEC), provided they are used correctly according to manufacturer specifications and are appropriate for the wire gauges and application. All connections must be mechanically and electrically secure and properly insulated.
How do I know if a wire nut connection is secure?
The most reliable way to check a wire nut connection is the gentle tug test. After twisting the wire nut on firmly, gently pull on each individual wire. If any wire slips or pulls out, the connection is not secure and needs to be redone with a new wire nut.
When should I use push-in connectors instead of wire nuts?
Push-in connectors are often preferred in situations requiring very quick connections, such as with light fixtures or in crowded junction boxes where space is limited. They also provide a clear visual confirmation of the connection. For solid and some stranded wires, they can offer a very reliable and installer-friendly alternative.
Conclusion
Wire nuts are foundational components in electrical wiring, offering a reliable and cost-effective method for joining conductors. Their effectiveness, however, hinges entirely on correct selection and meticulous installation. By understanding wire gauges, respecting color codes, and avoiding common pitfalls, you can ensure every splice is secure, safe, and built to last. For any B Collins Construction project, prioritizing these details is not just good practice—it’s essential for the integrity of the entire electrical system. Information current as of July 2026; pricing and product details may change.










DIY Projects
Peel and Stick Backsplash: A Guide to DIY Kitchen Renovation
Peel and stick backsplash tiles have revolutionized DIY kitchen renovations, offering homeowners a budget-friendly and swift way to update their space. Learn how to achieve a professional look without the hassle of traditional tiling.
A traditional tile backsplash installation can cost homeowners between $800 and $1,500 for materials and labor alone, according to estimates from ThirstyBear.com in 2026. This significant expense often deters many from undertaking a kitchen refresh. However, peel and stick backsplash offers a compelling alternative, providing a high-impact aesthetic upgrade for a fraction of the cost and effort.
Key Takeaways
- Peel and stick backsplashes are a cost-effective alternative to traditional tiling, saving on both materials and professional labor.
- Material choices, including vinyl, gel, metal, and glass composites, significantly impact durability, realism, and suitability for different areas.
- Proper surface preparation is crucial for long-lasting adhesion and a professional finish, often overlooked in DIY installations.
- While generally durable, these tiles have limitations regarding heat exposure, moisture resistance, and long-term removal.
- Achieving a flawless look requires precise measuring, cutting, and strategic placement, along with attention to edge finishing.
What Exactly Are Peel and Stick Backsplashes?
Peel and stick backsplashes are self-adhesive tiles designed for quick and easy installation without the need for grout or mortar. They typically consist of a decorative surface layer, a strong adhesive backing, and a removable paper liner. These innovative kitchen wall tiles come in a variety of materials, mimicking the look of ceramic, stone, glass, or metal. The simplicity of their application has made them a popular choice for DIY enthusiasts and renters looking for temporary backsplash solutions. For instance, a homeowner might choose a vinyl-based peel and stick design to replicate classic subway tile. Peel and stick backsplash offers the visual appeal without the complex installation. The practical insight here is that while the concept is simple, the quality and material composition vary widely, directly impacting realism and longevity.
The Financial Advantage: Cost Savings and ROI
One of the most significant draws of peel and stick backsplash options is their affordability compared to traditional tiling. While professional tile installation can range from $10 to $25 per square foot for labor alone, self-adhesive tiles drastically cut these costs. Material prices for peel and stick tiles typically range from $1.50 to $10 per square foot, with some premium options reaching $15-$20 per square foot, as noted by BobVila.com in their 2026 review. In contrast, traditional tiles can start at $2-$15 per square foot for basic ceramic, escalating significantly for natural stone or designer options. In real terms, a small kitchen backsplash project (around 30 square feet) could cost $45-$300 for peel and stick materials, compared to $300-$1,000+ for traditional tile materials plus potential labor. This makes them incredibly budget-friendly for a high-impact renovation. The worth noting factor is that the return on investment isn’t just financial; it’s also in time saved and the satisfaction of a DIY project.
Installation: A DIY-Friendly Approach
Installing peel and stick backsplash is straightforward, but achieving a professional finish demands precision and careful preparation. Unlike traditional tiling, you won’t need specialized tools like wet saws or grout floats.
- Surface Preparation: Begin with a clean, smooth, and dry surface. Any dust, grease, or texture will compromise adhesion. For previously painted walls, a light sanding and wipe-down are often beneficial. If removing old tile, ensure all grout lines are filled and the wall is level.
- Measure and Plan: Measure your backsplash area meticulously. Lay out your tiles on a flat surface to plan your pattern and cuts. A laser level is invaluable for ensuring your first row is perfectly straight, as this dictates the entire installation.
- Cutting Tiles: Use a sharp utility knife and a metal straight edge for clean cuts. For complex shapes around outlets, create a template with paper first. Score the tile deeply and then snap it, or make several passes with the knife for thicker materials.
- Peel and Stick: Starting from one corner, peel back a small section of the adhesive liner. Align the tile precisely with your guide marks or the previous tile. Press firmly, working your way across the tile to remove air bubbles. Gradually remove the rest of the liner as you press.
- Seaming and Finishing: For tiles designed to overlap, ensure the overlap is consistent. Use a J-roller or a clean, soft cloth to apply even pressure across the entire surface of each tile, especially at the edges. For exposed edges, consider using trim pieces or a caulk line for a polished look.
Working with these materials for several years, we’ve found that patience and meticulous alignment are far more critical than brute force.

Choosing the Right Material for Your Space
The performance and aesthetic of your peel and stick backsplash largely depend on the material. Each type offers distinct advantages and trade-offs. Vinyl tiles are the most common and affordable, offering a vast array of colors and patterns. Gel-coated tiles, like those from Smart Tiles, provide a 3D, glossy finish that closely mimics ceramic or glass. Metal options, often aluminum composites, lend a contemporary industrial look. More premium choices include thin glass or stone composite tiles, which offer heightened realism but come at a higher price point. Consider the specific environment. For areas directly behind a stovetop, heat resistance is paramount; some vinyl options might deform with prolonged high heat. For bathrooms or areas with high moisture, ensuring a tight seal between tiles is crucial to prevent water penetration. The wrinkle here: always check the manufacturer’s specifications for heat and moisture ratings before purchasing.
| Material Type | Durability | Realism | Cost/Sq Ft (approx. 2026) |
|---|---|---|---|
| Vinyl | Moderate (prone to scratches) | Fair to Good | $1.50 – $5.00 |
| Gel-Coated (3D) | Good (water & heat resistant) | Good to Very Good | $4.00 – $10.00 |
| Metal (Aluminum Composite) | High (dent & scratch resistant) | Excellent | $8.00 – $15.00 |
| Glass/Stone Composite | Very High | Excellent | $10.00 – $20.00 |
Durability and Longevity: Setting Realistic Expectations
While peel and stick tiles are designed for durability, their lifespan and performance depend heavily on installation quality, material choice, and environmental factors. A well-installed, high-quality gel or metal tile can last 5-10 years or more. However, cheaper vinyl options in high-traffic, high-moisture, or high-heat areas might show wear sooner. Common issues include edges peeling, discoloration from cooking splatters, or scratches on softer surfaces. Proper cleaning is also essential; abrasive cleaners can damage the surface. For example, a peel and stick backsplash in a guest bathroom might last indefinitely with minimal wear. Conversely, the same product behind a frequently used gas range might degrade faster due to intense heat and grease exposure. According to feedback compiled by Home Essentials Guide in 2026, roughly 40% of users report issues related to long-term adhesion or discoloration if proper installation and material selection aren’t prioritized. This underscores the need for realistic expectations and informed choices.
Common Pitfalls and How to Avoid Them
Despite their ease of use, several common mistakes can undermine the success of a peel and stick backsplash project. One frequent issue is poor surface preparation, leading to tiles peeling or bubbling. Another is uneven alignment, where small initial missteps compound into visibly crooked lines. Improper cutting around outlets or corners can also result in unsightly gaps. Lastly, not applying enough pressure during installation can prevent the adhesive from bonding fully. To mitigate these problems, ensure your wall is meticulously clean, dry, and smooth. Use a high-quality laser level for initial placement. When cutting, always measure twice and cut once, using a fresh, sharp blade. For outlets, remove the cover, install the tile, and then replace the cover to hide any imperfections. Finally, use a J-roller to firmly press every square inch of the tile, especially the edges.
Expert Tips for a Flawless Finish
Achieving a truly professional-looking peel and stick backsplash goes beyond the basic instructions. Here are some insights from extensive experience with these products: Start with a Full Row: Always begin your installation with a full, uncut tile row at the most visible bottom edge, working your way up. This ensures any cut pieces are higher up or at the top edge, where they are less noticeable. Overlapping for Water Resistance: For wet areas like behind a sink, opt for tiles designed with an intentional overlap. This creates a more solid barrier against moisture. For non-overlapping tiles, a thin bead of clear silicone caulk along the top edge and where tiles meet countertops can significantly enhance water resistance. [Related Article: Kitchen & Bathroom Sealing Best Practices] Consider Grout Pens: While peel and stick tiles don’t require traditional grout, some designs benefit from a grout pen. This can define the lines more sharply, adding depth and realism, particularly for subway tile patterns. Choose a color that complements your tile and enhances the illusion of real grout. Heat Shields for Stovetops: If installing behind a high-heat cooktop, consider a stainless steel heat shield directly behind the burners, extending a few inches beyond. This protects the peel and stick material from direct, intense heat, which can cause warping or adhesive failure over time.
- Practice Cuts: If you’re new to cutting these tiles, buy an extra sheet or two specifically for practice cuts. Peel and stick backsplash allows you to master your technique before working on visible areas. It’s a small investment that prevents costly mistakes.
This level of attention to detail is what separates a quick fix from a truly upgraded kitchen. [Related Article: Choosing Expert Foundation Repair Companies for Your Home]
Frequently Asked Questions
Can peel and stick backsplash be removed easily?
Most peel and stick backsplashes are designed for relatively easy removal, often with the aid of a hairdryer to soften the adhesive. However, the ease of removal and potential for wall damage can vary depending on the adhesive strength, the wall surface, and how long the tiles have been installed.
Are peel and stick backsplashes waterproof?
While many peel and stick tiles offer good water resistance, they are generally not considered fully waterproof like traditional grouted tiles. Gel-coated and some composite options provide better protection. For areas with heavy splashing, additional sealing with caulk along edges is recommended to prevent moisture penetration.
How long do peel and stick backsplashes last?
With proper installation and care, a high-quality peel and stick backsplash can last anywhere from 5 to 10 years. Factors like material type, exposure to heat and moisture, and the quality of the adhesive all play a role in determining its longevity.
Can I install peel and stick backsplash over existing tile?
Yes, it’s possible to install peel and stick backsplash over existing tile, provided the old tile surface is clean, smooth, and completely flat. Any existing grout lines must be filled and leveled to create an even surface for optimal adhesion. Textured or uneven surfaces will compromise the bond.
What tools do I need for peel and stick backsplash installation?
Basic tools include a tape measure, a pencil, a utility knife with a fresh blade, a metal straight edge, and a level (a laser level is ideal). A J-roller or a soft cloth is helpful for pressing tiles firmly, and a caulk gun may be needed for finishing edges.
Do peel and stick backsplashes look realistic?
Modern peel and stick backsplashes, particularly gel-coated, metal, or glass composite options, offer impressive realism. Advanced printing technologies and 3D textures can convincingly mimic the look and feel of traditional ceramic, stone, or subway tiles, often surprising visitors with their authentic appearance.
Can peel and stick backsplash withstand heat from a stove?
Heat resistance varies by material. Vinyl options may warp or discolor with prolonged, intense heat. Gel-coated and metal tiles generally perform better. For areas directly behind a stovetop, manufacturers often recommend a minimum distance or the use of a stainless steel heat shield for added protection.
Conclusion
Peel and stick backsplash tiles offer an accessible and impactful solution for homeowners seeking a fresh look without the commitment or cost of traditional tiling. By understanding the different materials, paying close attention to surface preparation, and employing a few expert techniques, you can achieve a durable, realistic, and visually stunning result. Your kitchen transformation is closer than you think. Embrace the DIY spirit and give your space the upgrade it deserves. Information current as of July 2026; pricing and product details may change.
DIY Projects
Sanding with an Orbital Sander: A Guide to Flawless Finishes
Achieving a smooth, professional finish on your woodworking projects hinges on effective sanding. Learning the proper techniques for sanding with an orbital sander can transform your results, making your DIY efforts truly shine.

When tackling any home improvement or woodworking project, the quality of your finish often comes down to one critical step: sanding. Many DIY enthusiasts find themselves frustrated with swirl marks or uneven surfaces, which often stem from improper use of power tools. The honest answer to achieving a truly smooth, professional-grade finish is by mastering the art of sanding with an orbital sander.
Key Takeaways
- Always start with a coarse grit sandpaper and progressively move to finer grits, never skipping more than one grit level.
- Avoid applying excessive pressure to the orbital sander; let the tool and the abrasive do the work.
- Maintain constant, even movement across the surface to prevent swirl marks and gouging.
- Invest in an effective dust collection system, as proper dust management is crucial for both finish quality and health.
- Regularly inspect your sandpaper and replace it when it becomes dull or clogged to ensure optimal cutting performance.
Understanding Orbital Sander Mechanics
An orbital sander, particularly a random orbital sander, operates by moving its sanding pad in small circles while simultaneously rotating the entire pad. This dual action is key to its effectiveness, as it prevents the abrasive from following a predictable path, thereby reducing the likelihood of noticeable swirl marks. Unlike a traditional vibratory sander that moves in a fixed orbital pattern, the random orbital action ensures that no single abrasive particle travels over the same spot twice in succession. This random motion is what allows it to create a smoother, more uniform finish compared to other sander types, making it ideal for preparation before staining or painting. Worth noting: Standard orbital sanders, often called finish sanders, vibrate in a consistent, smaller orbit. While good for light finishing or working into corners, they are more prone to leaving visible scratch patterns if not used carefully. For most general sanding tasks, the random orbital sander is the superior choice for its versatility and finish quality.
Choosing Your Tools: Sander Types and Sandpaper Grit
Selecting the correct orbital sander and sandpaper is fundamental to any successful sanding project. Sanders come in various forms, including corded models for continuous power and cordless options for mobility, which often run on 18V or 20V battery platforms common to brands like DeWalt or Makita. Consider features like variable speed control, which allows you to adjust the RPM for delicate work or aggressive material removal, and effective dust collection ports. Pad size is typically 5 or 6 inches, with the 5-inch being most common for DIY tasks. When it comes to sandpaper, the grit number indicates the coarseness of the abrasive particles. You’ll typically start with a coarse grit (e.g., 80-100) for initial material removal and move progressively to finer grits (120, 150, 180, 220, or even 320 for fine finishing). The material of the abrasive matters too; aluminum oxide is a common, durable choice, while silicon carbide or ceramic can offer more aggressive cutting and longer lifespan for harder woods or old finishes.

Pre-Sanding Preparation for Optimal Results
Many assume sanding begins immediately, but thorough pre-sanding preparation significantly impacts the final outcome. Start by inspecting your workpiece for any existing dirt, grease, or loose debris. These contaminants can embed themselves into the sandpaper, reducing its effectiveness and potentially scratching the wood. Clean the surface thoroughly with a damp cloth or a suitable cleaner, allowing it to dry completely. For old furniture, remove any loose paint or varnish with a scraper where possible, or use a chemical stripper if necessary. This minimizes the amount of material the sandpaper needs to remove, extending its life and making the sanding process more efficient. Worth noting: Always secure your workpiece firmly before sanding. Use clamps, non-slip mats, or a workbench with dog holes. A moving workpiece is not only a safety hazard but also makes it impossible to apply consistent pressure and achieve an even finish. This step is often overlooked but critical for control.
Mastering Orbital Sanding Techniques
Effective sanding with an orbital sander relies on a combination of proper setup and consistent technique. First, attach the correct grit sandpaper securely to the pad – most modern sanders use hook-and-loop (Velcro-style) pads for quick changes. Ensure the dust bag or a vacuum hose is connected to the sander’s dust port. Place the sander flat on the surface before turning it on. Allow the sander to reach full speed before engaging the wood. Move the sander slowly and steadily in overlapping passes, keeping it flat against the surface at all times. Avoid pressing down hard; the weight of the sander itself, combined with the abrasive, is usually sufficient. Work in sections, moving with the grain of the wood as much as possible, especially with finer grits. For edges and corners, use a lighter touch and often switch to a sanding block for sharper, cleaner lines. Each grit should remove the scratches from the previous, coarser grit, which you can verify by wiping the dust away and inspecting the surface under good light.
Avoiding Common Sanding Mistakes and Swirl Marks
Even with a random orbital sander, common mistakes can lead to frustrating swirl marks or uneven finishes. One primary culprit is applying too much pressure. This can bog down the motor, reduce the random orbital action, and generate excessive heat, leading to deeper, noticeable scratches. Skipping grits is another frequent error. Jumping from an 80-grit directly to a 220-grit, for instance, means the fine paper struggles to remove the deep scratches left by the coarse paper. This results in a seemingly smooth surface that reveals deeper scratches once stained or finished. Always progress incrementally, ensuring each grit fully refines the surface. According to research by tool manufacturers, inadequate dust collection is responsible for a significant percentage of finish imperfections (MaxXT, 2024). Dust particles trapped between the sandpaper and the workpiece can cause random scratches. Regularly empty the dust bag or use a shop vacuum with a high-efficiency filter to keep the workspace clean.
Effective Dust Management and Post-Sanding Cleanup
Managing dust isn’t just about keeping your workshop clean; it’s vital for achieving a superior finish and for your health. Most orbital sanders come with a dust bag, which is adequate for light use. For larger projects or prolonged sanding sessions, connecting your sander to a shop vacuum or a dedicated dust extractor is highly recommended. Modern dust extractors, often found on professional job sites, feature HEPA filters and automatic filter cleaning, significantly improving air quality and collecting up to 99% of fine dust particles. Brands like Festool and Mirka are known for their highly efficient dust management systems, though more affordable options from brands like Bosch or DeWalt also perform well. After completing your sanding, the cleanup isn’t finished. Use a tack cloth to wipe down the entire surface, ensuring all fine dust is removed from the pores of the wood. This is particularly important before applying stains or clear coats, as any residual dust will be trapped under the finish, dulling the appearance. For intricate pieces, compressed air can also help dislodge dust from carvings or crevices.

Specific Applications and Surface Finishing Considerations
The application of your orbital sander techniques varies slightly depending on the project and desired finish. For preparing furniture for staining, achieving a truly smooth, scratch-free surface is paramount. Progress through grits up to 220 or even 320, ensuring all previous scratch patterns are eliminated. Stains amplify imperfections, so meticulous sanding is key. When preparing surfaces for paint, you can often stop at a slightly coarser grit, such as 150 or 180, as the paint primer and subsequent paint layers will fill in minor imperfections. However, for a truly high-gloss painted finish, finer sanding is still advisable. For cabinet doors or trim, pay extra attention to edges and profiles, often requiring hand-sanding with a block for precision. In my years working on various residential renovation projects, I’ve found that the ‘feel’ of the wood is as important as the visual inspection. Run your hand over the surface; any lingering roughness indicates a need for more sanding. For surface-material comparisons, see for that breakdown.
Pro Tips for Flawless Sanding
Beyond the fundamental techniques, a few expert insights can elevate your sanding game. Consider the weight and ergonomics of your sander. For extended projects, a lighter, well-balanced tool reduces fatigue and allows for more consistent pressure. Investing a little more in a comfortable sander can pay dividends in finished quality and personal comfort. Another often-overlooked tip is using a ‘witness coat’ or pencil trick. After sanding with a particular grit, lightly draw pencil lines across the entire surface. Then, switch to the next finer grit and sand until all pencil lines are gone. This ensures you’ve thoroughly worked the entire surface and removed the previous grit’s scratches. For hardwoods like oak or maple, which are dense, you might need to spend a bit more time on each grit compared to softer woods like pine. Conversely, softwoods can be more prone to sanding marks if you’re too aggressive. Always sand in a well-lit area, preferably with angled lighting, to highlight any remaining scratches or uneven spots that might be missed under direct light.

Frequently Asked Questions
Can I use an orbital sander for heavy material removal?
While an orbital sander can remove some material, it’s not designed for heavy stock removal like a belt sander. Its primary purpose is to create a smooth finish. For significant shaping or removing deep imperfections, a more aggressive tool like a belt sander or planer should be used first, followed by the orbital sander for refinement.
How do I prevent swirl marks when sanding?
To prevent swirl marks, avoid pressing down too hard, keep the sander moving constantly and evenly, and never lift the sander off the workpiece while it’s still running. Always start and stop the sander with the pad flat on the surface. Ensure your sandpaper is clean and not worn out.
What’s the difference between a random orbital sander and a finish sander?
A random orbital sander moves its pad in small, off-center circles while also rotating the entire pad, creating a random pattern that minimizes swirl marks. A finish sander (or sheet sander) typically moves its pad in a fixed orbital pattern, making it better for corners and light sanding but more prone to visible scratches on larger surfaces.
When should I change sandpaper grits?
You should change to the next finer grit once the current grit has effectively removed all scratches left by the previous coarser grit and the surface has a uniform appearance. It’s crucial not to skip grits, as this leaves deeper scratches that finer paper can’t easily remove, leading to a poorer finish.
Is dust collection really that important?
Yes, dust collection is extremely important. It improves the quality of your finish by preventing dust particles from scratching the surface. It also significantly enhances safety by reducing airborne particulate matter, which can be harmful to your respiratory system. Good dust collection also keeps your sandpaper from clogging, extending its life.
Can I sand painted surfaces with an orbital sander?
Yes, an orbital sander is effective for sanding painted surfaces, especially when preparing for a new coat of paint or smoothing out existing layers. Start with a medium grit (e.g., 120-150) to break through the paint, then move to finer grits. Always wear a respirator when sanding old paint, especially if lead paint is a concern. For choosing appropriate safety gear, see.
Conclusion
Sanding with an orbital sander is a fundamental skill for anyone involved in woodworking or home renovation. By understanding the mechanics of your tool, choosing the right abrasives, meticulous surface preparation, and employing proper techniques, you can consistently achieve flawless, professional-grade finishes. Remember that patience and attention to detail during the sanding process directly translate to the quality of your final product. Invest in good tools and proper dust management, and your projects will benefit immensely. Information current as of July 2026; pricing and product details may change.
DIY Projects
Romex Wiring: Your Essential Guide to Safe Home Electricals
Romex is a widely recognized brand for non-metallic sheathed (NM-B) electrical cable, a cornerstone of residential wiring. This guide covers its types, uses, and safe installation practices for any home project.

A homeowner’s seemingly simple wiring task can quickly become a complex, code-violating hazard if the wrong materials are chosen. Romex, specifically non-metallic sheathed (NM-B) cable, is the backbone of most residential electrical systems, renowned for its versatility and straightforward installation in dry, indoor environments. However, understanding its specific applications, limitations, and the nuances of safe installation is crucial for both new construction and renovation projects.
Key Takeaways
- “Romex” is a brand name for non-metallic sheathed (NM-B) cable, commonly used for interior residential electrical wiring.
- Always match the cable’s gauge to the circuit breaker’s amperage rating to prevent overheating and fire hazards.
- NM-B cable is restricted to dry, indoor locations and generally not suitable for outdoor use, direct burial, or in wet/damp environments.
- Familiarize yourself with the National Electrical Code (NEC) and local amendments to ensure all installations meet safety standards.
- Improper installation, such as damaged sheathing or overfilled junction boxes, poses significant risks and should be avoided.
What Exactly is Romex Cable?
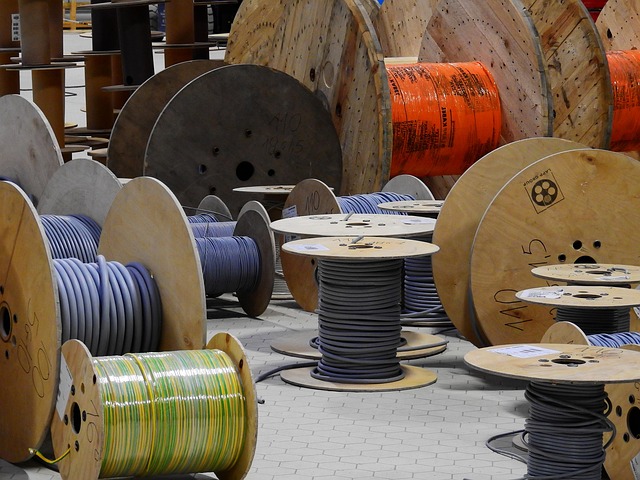
Romex is a registered trademark of Southwire Company, one of the largest manufacturers of wire and cable in North America. When people refer to “Romex,” they are almost always talking about non-metallic sheathed cable, or NM-B cable. This type of wiring is a staple in residential construction across the United States and Canada. NM-B cable consists of two or more insulated electrical conductors (typically copper), along with a bare ground wire, all encased within a flexible, non-metallic (usually PVC) outer sheath. Its widespread use stems from its cost-effectiveness and relative ease of installation compared to other wiring methods like conduit. In real terms, Romex cable simplifies the wiring process for homes because it’s designed to be pulled through wall studs and joists without needing individual wires run through protective piping, as long as it’s in protected, dry locations.
Understanding Romex Cable Types and Gauges
Choosing the correct Romex cable involves understanding its gauge and the number of conductors. The gauge refers to the wire’s thickness, impacting its current-carrying capacity, known as amperage. The National Electrical Code (NEC) specifies the maximum amperage for each wire gauge to prevent overheating and potential fires. Common gauges include 14-gauge (rated for 15 amps, typically for lighting and general outlets), 12-gauge (rated for 20 amps, for kitchen and bathroom circuits, or heavy-duty appliances), and 10-gauge (rated for 30 amps, for water heaters, dryers, or central air conditioning units). The outer sheath of NM-B cable is often color-coded to indicate its gauge: white for 14-gauge, yellow for 12-gauge, and orange for 10-gauge. Worth noting: Cable labels like “14/2 with ground” signify 14-gauge wire with two insulated conductors (hot and neutral) plus a bare ground wire. “12/3 with ground” indicates 12-gauge wire with three insulated conductors (two hot, one neutral) and a ground, typically used for 240-volt circuits or switch legs.
Permitted Uses and Key Restrictions for NM-B Cable
Romex cable is primarily designed for dry, interior residential applications. It’s ideal for running through drilled holes in wooden studs and joists within walls, ceilings, and floor cavities. In unfinished basements or attics, it can be run exposed, provided it’s protected from physical damage by being routed along the sides of framing members or through conduit sections where necessary. The wrinkle here: The NEC (2026 edition) strictly limits where NM-B cable can be used. It’s generally prohibited in wet or damp locations, such as outdoors, in concrete slabs, or buried directly in the ground. For these applications, specialized cables like UF (Underground Feeder) cable or conductors within conduit are required. It’s also not typically used in commercial or industrial settings due to different code requirements for physical protection and wiring methods. Always consult your local electrical inspector for specific regional amendments to the NEC.
Romex vs. Other Wiring: When Alternatives are Necessary
While Romex is versatile, other wiring methods offer distinct advantages for specific scenarios. Understanding these alternatives helps in making informed decisions for your projects. MC (Metal-Clad) cable, for instance, provides superior physical protection due to its interlocking metal sheath. It’s often preferred in exposed locations where NM-B cable might be vulnerable to damage, or in some commercial applications where code demands it. Conduit, which involves running individual wires inside rigid or flexible pipes (EMT, PVC, RMC), offers the highest level of protection and allows for future wire upgrades or replacements without opening walls. When considering alternatives, weigh flexibility, protection, and future adaptability. For example, in a workshop where exposed wiring might be subject to impact, MC cable or conduit would be a safer choice than exposed Romex.
| Feature | Romex (NM-B) | MC Cable | Conduit (EMT) |
|---|---|---|---|
| Flexibility | High | Moderate | Low (rigid) / High (flexible) |
| Physical Protection | Low (PVC sheath) | High (metal sheath) | Very High (metal/PVC pipe) |
| Cost (Material) | Lowest | Moderate | Highest |
| Installation Difficulty | Easiest | Moderate | Most complex |
| Common Uses | Interior residential (dry) | Commercial, exposed residential | Commercial, industrial, wet/damp, future upgrades |

Cost Considerations for Romex Wiring Projects
The cost of Romex cable can vary significantly based on several factors, including wire gauge, the number of conductors, and the length of the roll. As of July 2026, a 250-foot roll of 14/2 with ground Romex cable typically ranges from $70-$120, while a 12/2 with ground roll might cost between $100-$180. Larger gauges and longer rolls naturally command higher prices. Beyond the cable itself, consider the cost of associated materials like junction boxes, outlet boxes, switches, receptacles, staples, and connectors. While Romex is generally more affordable than MC cable or running individual wires in conduit, project costs can still add up. DIY installation can save on labor, but improper work often leads to expensive repairs or requires hiring an electrician to rectify code violations. Worth noting: Copper prices, which impact cable costs, can fluctuate. Always price out your materials just before purchase to get the most current figures. According to Southwire’s product data (2026), the material cost of copper conductors remains a primary driver of overall cable expense.
Installation Best Practices and Safety Tips
Safe and compliant Romex installation is paramount. Always begin by turning off power at the main circuit breaker. Use a voltage tester to confirm that the circuit is de-energized before touching any wires. This crucial step prevents electric shock. When running cable, ensure it’s properly secured. The NEC requires Romex to be stapled or fastened within 12 inches of every electrical box and at intervals of no more than 4.5 feet along its run. Use insulated staples to prevent damage to the cable’s outer sheath. When drilling through studs, ensure holes are centered to protect the cable from nails or screws later applied to the wall surface. Always leave at least 6 to 8 inches of wire extending from electrical boxes to allow for proper connections and future servicing. Avoid sharp bends or kinks in the cable, which can damage conductors or insulation. When connecting wires, ensure all connections are tight and made within approved junction boxes, which must remain accessible.

Common Romex Installation Mistakes to Avoid
Even experienced DIYers can make mistakes that compromise electrical safety. One of the most common errors is using the wrong gauge of Romex cable for the intended circuit, leading to overloaded wires and fire hazards. For example, connecting a 20-amp appliance to a 15-amp, 14-gauge circuit is a serious mistake. Another frequent issue is damaging the cable’s outer sheath or conductor insulation during stripping or stapling. Nicks or cuts expose live wires, creating shock risks. Overfilling electrical boxes with too many wires or devices is also a common code violation that can lead to overheating. Additionally, running Romex in inappropriate locations, such as outdoors or in damp basements without proper protection, invites corrosion and short circuits. Practical Insight: Never assume a circuit is off just because a light switch is in the ‘off’ position. A voltage tester is an inexpensive tool that can save lives by confirming a circuit is truly dead before you start work. For more on essential electrical tools.
Expert Insights for Your Electrical Projects
When tackling electrical work with Romex, meticulous planning and adherence to safety are your best allies. First, always verify the specific requirements of your local building codes, as these can sometimes supplement or modify the NEC. What’s acceptable in one jurisdiction might not be in another. This prevents costly rework and ensures compliance. Consider the long-term needs of your home. While a 15-amp circuit might suffice for a bedroom today, future additions like dedicated office equipment or higher-wattage devices might warrant running 12-gauge wire for a 20-amp circuit from the outset. This forward-thinking approach avoids having to re-wire a room years down the line. The honest answer: DIY electrical work saves money, but mistakes can be life-threatening or lead to expensive repairs. When in doubt about any aspect of your electrical project, especially if it involves modifying the main electrical panel or adding new circuits, always consult a licensed electrician.
Frequently Asked Questions
Can Romex be run exposed?
Yes, Romex (NM-B) cable can be run exposed in certain areas like unfinished basements or attics, provided it’s properly secured and protected from physical damage. It must be routed along framing members or within conduit where it might be susceptible to impact. Always check local codes for specific requirements.
What is the difference between 14/2 and 12/2 Romex?
14/2 Romex contains two 14-gauge insulated conductors plus a ground wire and is rated for 15-amp circuits. 12/2 Romex has two 12-gauge insulated conductors and a ground, rated for 20-amp circuits. The larger the gauge number, the smaller the wire diameter; thus, 12-gauge wire is thicker and can carry more current than 14-gauge.
Can I bury Romex cable?
No, standard Romex (NM-B) cable is not designed for direct burial or use in wet locations. Its PVC sheath is not sufficiently solid or moisture-resistant for such environments. For underground or wet applications, you must use UF (Underground Feeder) cable or conductors installed within approved conduit.
Does Romex need to be in conduit?
Romex typically doesn’t need to be run inside conduit when installed within walls, ceilings, or protected areas. However, conduit may be required if Romex is exposed to potential physical damage, or in specific locations like garages or workshops where additional protection is mandated by code. For an in-depth look at conduit options.
What are the color codes for Romex?
The outer sheath of Romex cable is color-coded to indicate its wire gauge: white for 14-gauge (15-amp circuits), yellow for 12-gauge (20-amp circuits), and orange for 10-gauge (30-amp circuits). Black is typically 6-gauge or 8-gauge for higher amperage applications.
How long does Romex last?
Properly installed Romex cable can last for many decades, often exceeding 50–70 years, matching the lifespan of the home itself. Its PVC insulation and sheath are durable. However, exposure to excessive heat, moisture, physical damage, or consistent overloading can significantly shorten its effective lifespan.
Can Romex be used in commercial buildings?
While Romex (NM-B) is permitted in some limited commercial applications, particularly in smaller buildings or specific non-public areas, commercial electrical codes often require more solid wiring methods like MC cable or conductors in conduit. These provide superior physical protection and fire resistance, aligning with the higher occupancy and usage demands of commercial structures. Understanding Romex wiring is fundamental for anyone undertaking residential electrical projects. By correctly identifying cable types, adhering to gauge requirements, and following established installation practices, you ensure the safety and longevity of your home’s electrical system. Prioritize safety, respect the National Electrical Code, and when in doubt, always defer to the expertise of a licensed electrician. Your home’s safety and your peace of mind are worth the effort. Information current as of July 2026; pricing and product details may change.

Asiatic Lily Care: Avoiding Common Mistakes for Vibrant Blooms

Fountain Grass: A Guide to Graceful Garden Design

Gerbera Daisies: Vibrant Blooms for Your Home & Garden

Choosing Expert Foundation Repair Companies for Your Home

Bouncy Floors: Diagnosing Sagging & Stiffening Joists

Nellie Stevens Holly Planting: Your Guide to a Resilient Evergreen
-
 Repairs & Maintenance2 months ago
Choosing Expert Foundation Repair Companies for Your Home
-
 Repairs & Maintenance2 months ago
Bouncy Floors: Diagnosing Sagging & Stiffening Joists
-
 Outdoor & Garden2 months ago
Nellie Stevens Holly Planting: Your Guide to a Resilient Evergreen
-

 Tools & Materials1 month ago
Bolt Cutters: Your Essential Guide to Heavy-Duty Cutting
-

 Home Improvement2 months ago
The Two Grades of Home: Condition and Land
-

 Repairs & Maintenance2 months ago
Essential Furnace Maintenance for Peak Home Heating
-

 Home Improvement2 months ago
Water in Crawl Space: Identify, Fix, and Prevent Damage
-

 Outdoor & Garden1 month ago
Brush Cutter Essentials: Clearing Overgrown Land Effectively