
General
How to Clean Stone Countertops: Your Guide to Lasting Beauty
Wondering how to clean stone countertops without causing damage? This guide from B Collins Construction provides practical tips and specific advice for maintaining granite, marble, and quartz surfaces, ensuring they stay beautiful for years.


Why do some stone countertops look pristine for decades while others dull prematurely or show stubborn stains? The honest answer to this question lies not in complex treatments, but in consistent, correct cleaning and care habits. For homeowners and renovators, understanding how to clean stone countertops properly is essential to protecting a significant investment and maintaining the beauty of your kitchen or bathroom.
Key Takeaways
- Always use pH-neutral cleaners and soft cloths to avoid damaging stone surfaces.
- Identify your specific stone type (granite, marble, quartz) as each has unique care requirements.
- Address spills immediately to prevent deep staining and etching, especially on porous stones.
- Regularly test and reseal natural stone countertops to maintain their protective barrier.
- Avoid acidic cleaners like vinegar or lemon juice, and abrasive scrubbers, which can cause irreparable harm.
Understanding Your Stone: Not All Countertops Are Created Equal
Before you even grab a cloth, knowing your countertop’s material is paramount. Natural stone, such as granite, marble, travertine, and limestone, is inherently porous and reactive to acids. Engineered stone, like quartz, is less porous and more resistant to stains and etching, but still requires specific care. Granite, a popular choice, is durable but still needs sealing due to its porosity. Marble, renowned for its elegance, is much softer and highly susceptible to etching from acids. Travertine and limestone are even softer and more porous, demanding the gentlest approach. Quartz, though often lumped in with natural stone, is a composite material made from crushed quartz, resin, and pigments. Its non-porous nature means it doesn’t require sealing and is generally more forgiving, but it can still be damaged by extreme heat or harsh chemicals. In real terms, treating a delicate marble surface like a solid granite can lead to irreversible damage.

Your Daily Ritual: Gentle Cleaning for Lasting Beauty
For most stone countertops, the daily cleaning routine is surprisingly simple. The goal is to remove crumbs, spills, and everyday grime without stripping the sealant or damaging the surface. Start by wiping down the counters with a soft, clean microfiber cloth. For general cleaning, a spray bottle filled with warm water and a few drops of pH-neutral dish soap is all you need. Spritz the surface lightly, then wipe with a clean, damp cloth. Immediately follow up with a dry microfiber cloth to prevent water spots, especially on darker stones or if you have hard water in your area. Worth noting: For the best results and to prevent mineral buildup, consider using filtered water for cleaning, particularly if your tap water is very hard. This simple step can make a big difference in maintaining a streak-free shine.
What to Absolutely Avoid: Protecting Your Investment
This is where many common cleaning habits go wrong. While they might work on laminate or tile, certain cleaners are disastrous for stone. Never use:
- Acidic Cleaners: Vinegar, lemon juice, ammonia, and many commercial bathroom cleaners will etch and dull marble, limestone, and travertine. Even on granite, they can degrade the sealant over time.
- Abrasive Cleaners: Scouring powders, steel wool, or rough scrubbers can scratch the surface of any stone, making it more prone to staining and reducing its natural luster.
- Harsh Chemicals: Bleach, oven cleaners, drain cleaners, and paint removers can cause discoloration, etching, or other severe damage. Always check product labels for stone-safe certifications.
- Waxes or Oils: Unless specifically designed for stone, these can build up, attract dirt, and create a hazy finish.
The wrinkle here: many common household cleaners contain these damaging ingredients. Always read labels carefully, and when in doubt, stick to specialized stone cleaners or plain soap and water.
Tackling Tough Stains: A Targeted Approach
Even with careful daily cleaning, accidents happen. The key to successful stain removal is identifying the stain type and acting quickly. Oil-Based Stains (grease, cooking oil, cosmetics): These darken the stone. Create a poultice by mixing baking soda with hydrogen peroxide to a peanut butter consistency. Apply a thick layer over the stain, cover with plastic wrap, and tape the edges. Let it sit for 24–48 hours, then remove the plastic and allow the paste to dry completely. Scrape it off gently and rinse. The poultice draws the oil out of the stone. Organic Stains (coffee, tea, wine, food): These are often lighter than the stone. Mix hydrogen peroxide (3% solution) with a few drops of ammonia (if safe for your stone type; avoid on polished marble) and baking soda to form a paste. Apply as a poultice, leaving it on for 24–48 hours. For marble, a simple baking soda and water paste might suffice. According to the Natural Stone Institute, proper poultice application is crucial for success. Water Spots / Mineral Deposits: Hard water can leave unsightly rings. For fresh spots, a gentle rub with a soft, damp cloth might work. For tougher, older deposits, a specialized pH-neutral hard water remover designed for stone can be effective. Avoid acidic descales. For minor mineral buildup, a paste of baking soda and water can be gently rubbed on, then rinsed thoroughly. Rust Stains: These appear as orange or brown spots. Only use commercial rust removers specifically labeled as safe for stone countertops. Many rust removers contain acids that will etch your stone, so careful product selection is critical.

The Critical Role of Sealing: A Preventative Shield
For most natural stone countertops (granite, marble, travertine, limestone), sealing is your first line of defense against stains. Sealers penetrate the stone, filling microscopic pores and making the surface less absorbent. To test if your stone needs resealing, perform a simple water bead test. Place a few drops of water on the surface. If the water beads up, your sealant is still effective. If it soaks into the stone within a few minutes, it’s time to reseal. The frequency varies, typically every 1–3 years depending on stone type, usage, and sealer quality. Hunker.com suggests granite countertops in high-traffic kitchens might need resealing annually. The sealing process involves thoroughly cleaning the countertop, allowing it to dry completely, applying a stone-specific penetrating sealer according to manufacturer instructions, and then wiping off any excess before it dries on the surface. Worth noting: quartz countertops don’t require sealing due to their non-porous composition.
Choosing the Right Cleaners and Tools
Selecting the correct products and tools is as important as the cleaning technique itself. Your toolkit should be simple and stone-friendly.
Recommended Tools:
- Microfiber Cloths: Soft, highly absorbent, and lint-free. They won’t scratch your stone.
- Soft Sponges: For gentle scrubbing on tougher spots before resorting to a poultice.
- Spray Bottles: Ideal for applying diluted cleaners or water evenly.
Recommended Cleaners:
- pH-Neutral Dish Soap: A few drops mixed with warm water for daily cleaning.
- Specialized Stone Cleaners: Brands like StoneTech, Weiman, or Granite Gold offer pH-neutral formulas designed to clean and protect stone without damaging sealants.
| Cleaner Type | Pros | Cons | Best For |
|---|---|---|---|
| pH-Neutral Dish Soap + Water | Affordable, readily available, gentle, safe for all stone types. | May not tackle tough, set-in stains effectively. | Daily cleaning, light spills, general surface grime. |
| Specialized Stone Cleaner | Formulated for stone, often enhances shine, safe for sealants, can have stain protectors. | More expensive, specific brands needed for best results. | Daily cleaning, enhanced shine, light stain prevention. |
| Acidic Cleaners (Vinegar, Lemon) | Effective for some non-stone surfaces, natural. | Will etch and dull natural stone, degrade sealants. | Absolutely NOT for stone countertops. |
| Abrasive Cleaners (Powders, Pads) | Good for tough scrubbing on resilient surfaces. | Will scratch and damage stone surfaces irreversibly. | Absolutely NOT for stone countertops. |
Pros & Cons of pH-Neutral Stone Cleaners
Using pH-neutral stone cleaners offers significant advantages, but they also have limitations.
Pros
- Specifically formulated to be safe for all natural and engineered stone types.
- Helps maintain the integrity of your stone’s sealant, extending its life.
- Prevents etching, dulling, and discoloration often caused by harsh chemicals.
- Often leave a streak-free finish and can enhance the stone’s natural luster.
Cons
- Generally more expensive than generic all-purpose cleaners.
- May not be powerful enough for very stubborn, deeply set stains, requiring a poultice instead.
- Requires a specific purchase, rather than using readily available household items.
Common Mistakes and How to Fix Them
Even with good intentions, simple errors can cause significant damage to your stone. Here are the most common pitfalls:
- Using the Wrong Cleaner: This is the biggest culprit. An acidic cleaner on marble can cause immediate, irreversible etching. If you’ve accidentally etched a polished surface, minor etching might be improved by a professional honing and polishing service. For DIY, specific polishing compounds for stone can sometimes lessen the appearance of light etching.
- Not Wiping Spills Immediately: Especially on porous natural stone, a spill left for even a few minutes can penetrate and become a deep stain. Always have a soft cloth handy for quick cleanups.
- Over-Wetting Surfaces: Allowing water to pool, especially around sink edges, can lead to water spots, mineral buildup, or even penetrate seams causing structural issues over time. Always dry thoroughly.
- Skipping Sealing (for natural stone): An unsealed or poorly sealed natural stone is an open invitation for stains. If you’ve neglected sealing, clean your countertops thoroughly, allow them to dry for 24 hours, then apply a high-quality penetrating sealer.
Expert Tips for Long-Term Stone Countertop Care
Beyond daily cleaning, proactive measures ensure your stone countertops remain a stunning feature for decades. In my years working with residential renovations at B Collins Construction, I’ve seen firsthand how proper preventative care dramatically extends the life and beauty of a kitchen countertop.
- Use Trivets and Hot Pads: While some stone (like granite) can withstand heat, rapid temperature changes can still cause thermal shock and cracking. Always use trivets under hot pots and pans.
- Employ Cutting Boards: Never cut directly on your stone. Not only can you dull your knives, but you risk scratching the surface.
- Coasters are Your Friends: Place coasters under glasses, especially those containing citrus juices, alcohol, or anything carbonated, to prevent etching and water rings.
- Regular Inspections: Periodically check for any small chips, cracks, or signs of sealant wear. Addressing minor issues early can prevent them from becoming costly repairs. For extensive damage or dullness, consider professional deep cleaning, honing, or polishing services every few years. This specialized work can restore the stone’s original finish and luster.
This complete care approach extends the life of your entire kitchen and preserves the aesthetic appeal of your home for years to come.

Frequently Asked Questions
Can I use Lysol or Clorox wipes on stone countertops?
It’s best to avoid Lysol or Clorox wipes on natural stone. Many of these wipes contain acidic ingredients or harsh chemicals that can etch, dull, or degrade the sealant on granite, marble, and other porous stones. Stick to pH-neutral cleaners or plain soap and water for safety and longevity.
How often should I clean my stone countertops?
For optimal hygiene and appearance, clean your stone countertops daily with a soft cloth and a mild, pH-neutral solution. Promptly wipe up any spills. Deep cleaning or addressing specific stains can be done as needed, typically weekly or monthly depending on usage.
What should I do if my marble countertop gets etched?
If your marble countertop gets etched by an acidic spill, don’t scrub it. For minor etching, a specialized marble polishing powder or paste might help to restore the finish. For deeper or widespread etching, professional honing and polishing by a stone restoration expert is often required to repair the damage.
Are there natural cleaners safe for stone?
The safest natural cleaner for stone countertops is a mixture of warm water and a few drops of pH-neutral dish soap. While ingredients like baking soda can be used in poultices for specific stains, acidic natural cleaners like vinegar or lemon juice should never be used on natural stone.
Does sealing stone countertops prevent all stains?
Sealing significantly reduces the porosity of natural stone, making it highly resistant to stains, but it doesn’t make it stain-proof. Spills, especially acidic or oil-based ones, should still be wiped up immediately. Sealing provides a protective barrier, buying you time to clean before a stain sets.
Can I use glass cleaner on my stone countertops?
Most glass cleaners contain ammonia or other chemicals that are too harsh for natural stone countertops and can degrade their sealant or cause etching. While they might be acceptable for engineered quartz in small amounts, it’s safer and better for the stone’s longevity to use a pH-neutral stone cleaner.
Conclusion
Proper care for your stone countertops doesn’t have to be complicated. By understanding your specific stone type, committing to a simple daily cleaning routine with pH-neutral products, avoiding harsh chemicals, and maintaining your sealant, you can ensure your countertops remain a beautiful, durable part of your home for years to come. A little knowledge and consistent effort go a long way in preserving your investment. Information current as of August 2026; pricing and product details may change.








DIY Projects
Peel and Stick Backsplash: A Guide to DIY Kitchen Renovation
Peel and stick backsplash tiles have revolutionized DIY kitchen renovations, offering homeowners a budget-friendly and swift way to update their space. Learn how to achieve a professional look without the hassle of traditional tiling.
A traditional tile backsplash installation can cost homeowners between $800 and $1,500 for materials and labor alone, according to estimates from ThirstyBear.com in 2026. This significant expense often deters many from undertaking a kitchen refresh. However, peel and stick backsplash offers a compelling alternative, providing a high-impact aesthetic upgrade for a fraction of the cost and effort.
Key Takeaways
- Peel and stick backsplashes are a cost-effective alternative to traditional tiling, saving on both materials and professional labor.
- Material choices, including vinyl, gel, metal, and glass composites, significantly impact durability, realism, and suitability for different areas.
- Proper surface preparation is crucial for long-lasting adhesion and a professional finish, often overlooked in DIY installations.
- While generally durable, these tiles have limitations regarding heat exposure, moisture resistance, and long-term removal.
- Achieving a flawless look requires precise measuring, cutting, and strategic placement, along with attention to edge finishing.
What Exactly Are Peel and Stick Backsplashes?
Peel and stick backsplashes are self-adhesive tiles designed for quick and easy installation without the need for grout or mortar. They typically consist of a decorative surface layer, a strong adhesive backing, and a removable paper liner. These innovative kitchen wall tiles come in a variety of materials, mimicking the look of ceramic, stone, glass, or metal. The simplicity of their application has made them a popular choice for DIY enthusiasts and renters looking for temporary backsplash solutions. For instance, a homeowner might choose a vinyl-based peel and stick design to replicate classic subway tile. Peel and stick backsplash offers the visual appeal without the complex installation. The practical insight here is that while the concept is simple, the quality and material composition vary widely, directly impacting realism and longevity.
The Financial Advantage: Cost Savings and ROI
One of the most significant draws of peel and stick backsplash options is their affordability compared to traditional tiling. While professional tile installation can range from $10 to $25 per square foot for labor alone, self-adhesive tiles drastically cut these costs. Material prices for peel and stick tiles typically range from $1.50 to $10 per square foot, with some premium options reaching $15-$20 per square foot, as noted by BobVila.com in their 2026 review. In contrast, traditional tiles can start at $2-$15 per square foot for basic ceramic, escalating significantly for natural stone or designer options. In real terms, a small kitchen backsplash project (around 30 square feet) could cost $45-$300 for peel and stick materials, compared to $300-$1,000+ for traditional tile materials plus potential labor. This makes them incredibly budget-friendly for a high-impact renovation. The worth noting factor is that the return on investment isn’t just financial; it’s also in time saved and the satisfaction of a DIY project.
Installation: A DIY-Friendly Approach
Installing peel and stick backsplash is straightforward, but achieving a professional finish demands precision and careful preparation. Unlike traditional tiling, you won’t need specialized tools like wet saws or grout floats.
- Surface Preparation: Begin with a clean, smooth, and dry surface. Any dust, grease, or texture will compromise adhesion. For previously painted walls, a light sanding and wipe-down are often beneficial. If removing old tile, ensure all grout lines are filled and the wall is level.
- Measure and Plan: Measure your backsplash area meticulously. Lay out your tiles on a flat surface to plan your pattern and cuts. A laser level is invaluable for ensuring your first row is perfectly straight, as this dictates the entire installation.
- Cutting Tiles: Use a sharp utility knife and a metal straight edge for clean cuts. For complex shapes around outlets, create a template with paper first. Score the tile deeply and then snap it, or make several passes with the knife for thicker materials.
- Peel and Stick: Starting from one corner, peel back a small section of the adhesive liner. Align the tile precisely with your guide marks or the previous tile. Press firmly, working your way across the tile to remove air bubbles. Gradually remove the rest of the liner as you press.
- Seaming and Finishing: For tiles designed to overlap, ensure the overlap is consistent. Use a J-roller or a clean, soft cloth to apply even pressure across the entire surface of each tile, especially at the edges. For exposed edges, consider using trim pieces or a caulk line for a polished look.
Working with these materials for several years, we’ve found that patience and meticulous alignment are far more critical than brute force.
Choosing the Right Material for Your Space
The performance and aesthetic of your peel and stick backsplash largely depend on the material. Each type offers distinct advantages and trade-offs. Vinyl tiles are the most common and affordable, offering a vast array of colors and patterns. Gel-coated tiles, like those from Smart Tiles, provide a 3D, glossy finish that closely mimics ceramic or glass. Metal options, often aluminum composites, lend a contemporary industrial look. More premium choices include thin glass or stone composite tiles, which offer heightened realism but come at a higher price point. Consider the specific environment. For areas directly behind a stovetop, heat resistance is paramount; some vinyl options might deform with prolonged high heat. For bathrooms or areas with high moisture, ensuring a tight seal between tiles is crucial to prevent water penetration. The wrinkle here: always check the manufacturer’s specifications for heat and moisture ratings before purchasing.
| Material Type | Durability | Realism | Cost/Sq Ft (approx. 2026) |
|---|---|---|---|
| Vinyl | Moderate (prone to scratches) | Fair to Good | $1.50 – $5.00 |
| Gel-Coated (3D) | Good (water & heat resistant) | Good to Very Good | $4.00 – $10.00 |
| Metal (Aluminum Composite) | High (dent & scratch resistant) | Excellent | $8.00 – $15.00 |
| Glass/Stone Composite | Very High | Excellent | $10.00 – $20.00 |
Durability and Longevity: Setting Realistic Expectations
While peel and stick tiles are designed for durability, their lifespan and performance depend heavily on installation quality, material choice, and environmental factors. A well-installed, high-quality gel or metal tile can last 5-10 years or more. However, cheaper vinyl options in high-traffic, high-moisture, or high-heat areas might show wear sooner. Common issues include edges peeling, discoloration from cooking splatters, or scratches on softer surfaces. Proper cleaning is also essential; abrasive cleaners can damage the surface. For example, a peel and stick backsplash in a guest bathroom might last indefinitely with minimal wear. Conversely, the same product behind a frequently used gas range might degrade faster due to intense heat and grease exposure. According to feedback compiled by Home Essentials Guide in 2026, roughly 40% of users report issues related to long-term adhesion or discoloration if proper installation and material selection aren’t prioritized. This underscores the need for realistic expectations and informed choices.
Common Pitfalls and How to Avoid Them
Despite their ease of use, several common mistakes can undermine the success of a peel and stick backsplash project. One frequent issue is poor surface preparation, leading to tiles peeling or bubbling. Another is uneven alignment, where small initial missteps compound into visibly crooked lines. Improper cutting around outlets or corners can also result in unsightly gaps. Lastly, not applying enough pressure during installation can prevent the adhesive from bonding fully. To mitigate these problems, ensure your wall is meticulously clean, dry, and smooth. Use a high-quality laser level for initial placement. When cutting, always measure twice and cut once, using a fresh, sharp blade. For outlets, remove the cover, install the tile, and then replace the cover to hide any imperfections. Finally, use a J-roller to firmly press every square inch of the tile, especially the edges.
Expert Tips for a Flawless Finish
Achieving a truly professional-looking peel and stick backsplash goes beyond the basic instructions. Here are some insights from extensive experience with these products: Start with a Full Row: Always begin your installation with a full, uncut tile row at the most visible bottom edge, working your way up. This ensures any cut pieces are higher up or at the top edge, where they are less noticeable. Overlapping for Water Resistance: For wet areas like behind a sink, opt for tiles designed with an intentional overlap. This creates a more solid barrier against moisture. For non-overlapping tiles, a thin bead of clear silicone caulk along the top edge and where tiles meet countertops can significantly enhance water resistance. [Related Article: Kitchen & Bathroom Sealing Best Practices] Consider Grout Pens: While peel and stick tiles don’t require traditional grout, some designs benefit from a grout pen. This can define the lines more sharply, adding depth and realism, particularly for subway tile patterns. Choose a color that complements your tile and enhances the illusion of real grout. Heat Shields for Stovetops: If installing behind a high-heat cooktop, consider a stainless steel heat shield directly behind the burners, extending a few inches beyond. This protects the peel and stick material from direct, intense heat, which can cause warping or adhesive failure over time.
- Practice Cuts: If you’re new to cutting these tiles, buy an extra sheet or two specifically for practice cuts. Peel and stick backsplash allows you to master your technique before working on visible areas. It’s a small investment that prevents costly mistakes.
This level of attention to detail is what separates a quick fix from a truly upgraded kitchen. [Related Article: Choosing Expert Foundation Repair Companies for Your Home]
Frequently Asked Questions
Can peel and stick backsplash be removed easily?
Most peel and stick backsplashes are designed for relatively easy removal, often with the aid of a hairdryer to soften the adhesive. However, the ease of removal and potential for wall damage can vary depending on the adhesive strength, the wall surface, and how long the tiles have been installed.
Are peel and stick backsplashes waterproof?
While many peel and stick tiles offer good water resistance, they are generally not considered fully waterproof like traditional grouted tiles. Gel-coated and some composite options provide better protection. For areas with heavy splashing, additional sealing with caulk along edges is recommended to prevent moisture penetration.
How long do peel and stick backsplashes last?
With proper installation and care, a high-quality peel and stick backsplash can last anywhere from 5 to 10 years. Factors like material type, exposure to heat and moisture, and the quality of the adhesive all play a role in determining its longevity.
Can I install peel and stick backsplash over existing tile?
Yes, it’s possible to install peel and stick backsplash over existing tile, provided the old tile surface is clean, smooth, and completely flat. Any existing grout lines must be filled and leveled to create an even surface for optimal adhesion. Textured or uneven surfaces will compromise the bond.
What tools do I need for peel and stick backsplash installation?
Basic tools include a tape measure, a pencil, a utility knife with a fresh blade, a metal straight edge, and a level (a laser level is ideal). A J-roller or a soft cloth is helpful for pressing tiles firmly, and a caulk gun may be needed for finishing edges.
Do peel and stick backsplashes look realistic?
Modern peel and stick backsplashes, particularly gel-coated, metal, or glass composite options, offer impressive realism. Advanced printing technologies and 3D textures can convincingly mimic the look and feel of traditional ceramic, stone, or subway tiles, often surprising visitors with their authentic appearance.
Can peel and stick backsplash withstand heat from a stove?
Heat resistance varies by material. Vinyl options may warp or discolor with prolonged, intense heat. Gel-coated and metal tiles generally perform better. For areas directly behind a stovetop, manufacturers often recommend a minimum distance or the use of a stainless steel heat shield for added protection.
Conclusion
Peel and stick backsplash tiles offer an accessible and impactful solution for homeowners seeking a fresh look without the commitment or cost of traditional tiling. By understanding the different materials, paying close attention to surface preparation, and employing a few expert techniques, you can achieve a durable, realistic, and visually stunning result. Your kitchen transformation is closer than you think. Embrace the DIY spirit and give your space the upgrade it deserves. Information current as of July 2026; pricing and product details may change.
General
Gas Fireplace Essentials: A Builder’s Guide for Homeowners
A gas fireplace offers convenient warmth and ambiance without the hassle of wood. Understanding the different types, installation requirements, and safety protocols is crucial for any homeowner.
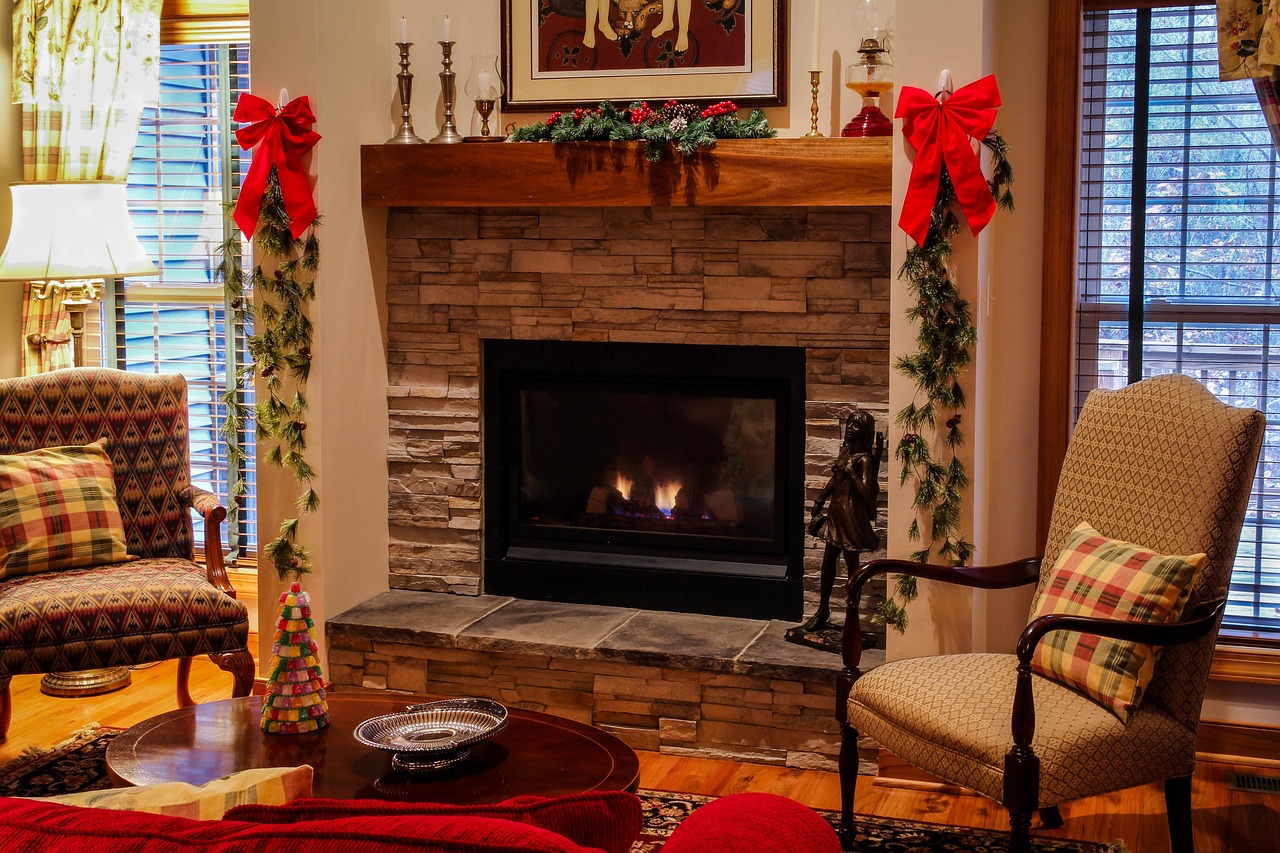
Sarah’s home had a beautiful, but rarely used, wood-burning fireplace. The thought of chopping wood, cleaning ash, and dealing with smoke often outweighed the desire for warmth. Her solution, like many homeowners, was a gas fireplace — a convenient upgrade that offers instant heat and ambiance with minimal effort. However, simply swapping out a wood-burning unit for a gas model isn’t always straightforward; it involves understanding different types, installation complexities, and long-term maintenance.
Key Takeaways
- Gas fireplaces come in three main types: direct vent, ventless, and B-vent, each with distinct venting and efficiency characteristics.
- Proper installation, including gas line and venting, is critical for both safety and performance, often requiring professional expertise.
- Costs vary significantly based on the unit type, BTU output, and installation complexity, ranging from hundreds to several thousands of dollars.
- Regular maintenance, including annual inspections by a qualified technician, is essential to ensure safe and efficient operation.
- Carbon monoxide detectors are a non-negotiable safety feature, especially for homes with ventless gas fireplaces.
Understanding Gas Fireplace Types
Choosing the right gas fireplace starts with understanding the fundamental differences in how they vent combustion byproducts. This decision impacts safety, efficiency, and installation requirements. There are three primary types: direct vent, ventless (or unvented), and B-vent (or natural vent).
Direct Vent Gas Fireplaces
Direct vent gas fireplaces are among the most popular choices due to their sealed combustion system. They draw all combustion air from outside the home and exhaust all byproducts directly outside through a co-axial or dual-pipe venting system. This design makes them incredibly safe, as no combustion air or exhaust mixes with indoor air. They are also highly efficient, typically offering 70-85% efficiency, as they don’t draw heated room air for combustion or lose it through the chimney. Installation often involves running a vent pipe directly through an exterior wall or vertically through the roof.
Ventless Gas Fireplaces
Ventless gas fireplaces operate without a flue or chimney, drawing combustion air from the room and releasing exhaust directly back into the living space. While seemingly convenient, this design comes with significant considerations. They are highly efficient, often rated at 99.9% efficiency, as almost all heat stays within the room. However, they introduce moisture, carbon dioxide, and trace amounts of carbon monoxide into the home. For this reason, many local codes restrict or prohibit their use, and they require strict adherence to safety guidelines, including mandated oxygen depletion sensors and carbon monoxide detectors. They are not recommended for bedrooms or small, unventilated spaces.
B-Vent (Natural Vent) Gas Fireplaces
B-vent gas fireplaces are similar to traditional wood-burning fireplaces in that they use a chimney or a B-vent pipe to exhaust combustion byproducts. They draw combustion air from the room, just like a wood-burning unit. This means they are less efficient than direct vent models, typically around 30-50%, as they continuously draw heated indoor air for combustion and send it up the flue. They are a good option for converting existing masonry fireplaces that already have a functional chimney, offering a simpler installation than direct vent units in such scenarios.
Natural Gas vs. Propane: Fueling Your Flame
The choice between natural gas and propane significantly impacts initial setup and ongoing costs for your gas fireplace. Natural gas is delivered directly to your home via an underground pipeline, making it a convenient and generally more affordable fuel source. If your home already has a natural gas line, connecting a new fireplace is relatively straightforward, though it still requires a licensed technician to ensure proper sizing and pressure. Propane, on the other hand, is stored in a tank on your property and delivered by truck. It burns hotter than natural gas and is often used in rural areas where natural gas lines are unavailable. Propane fireplaces require a dedicated tank and gas line installation, which adds to the initial cost. Worth noting, propane units can often be converted to natural gas, and vice versa, with a conversion kit, though this must be done by a qualified professional.
Installation Complexities and Considerations
Proper installation is paramount for the safe and efficient operation of any gas fireplace. This isn’t a DIY project; it requires expertise in gas lines, venting, and local building codes. For a new installation, a dedicated gas line must be run to the fireplace location, requiring precise calculations for pressure and volume based on the unit’s BTU output. Venting requirements vary by fireplace type. Direct vent units need a sealed, dual-wall pipe routed directly to the outside, either horizontally or vertically. B-vent units connect to a standard chimney or a specific B-vent pipe. In my years working in construction and home renovation, particularly with heating and ventilation systems, I’ve observed that overlooking the proper sizing of gas lines or failing to seal direct vents correctly are common missteps that lead to costly repairs and safety hazards down the line. Always consult with a licensed gas fitter and a qualified fireplace installer to ensure compliance with the International Residential Code (IRC) and local regulations.
The Real Cost of a Gas Fireplace
The investment in a gas fireplace extends beyond the unit’s purchase price, encompassing installation, fuel costs, and maintenance. Prices can vary widely based on type, BTU output, and aesthetic features. A basic ventless gas log set might cost a few hundred dollars, while a high-end direct vent fireplace insert with elaborate trim and remote control can easily exceed $5,000 for the unit alone. Installation costs are typically $1,000 to $3,000, but can be higher for complex venting or new gas line extensions. Fuel costs depend on local utility rates and usage, but natural gas is generally more economical than propane.
| Feature | Direct Vent | Ventless | B-Vent |
|---|---|---|---|
| Unit Cost (Estimate) | $2,000 – $7,000 | $500 – $2,500 | $1,500 – $4,000 |
| Installation Cost (Estimate) | $1,500 – $3,500+ | $500 – $1,500 | $1,000 – $2,500 |
| Efficiency | 70-85% | ~99.9% | 30-50% |
| Venting | Sealed, dual-pipe to exterior | None (exhaust into room) | Chimney or B-vent pipe |
| Safety Considerations | Very high | Requires CO/ODS sensors, local code review | High (adequate draft needed) |
| Ambiance | Realistic flames, glass front | Realistic flames, open front | Realistic flames, open front |
Maintenance and Safety Protocols
Like any gas appliance, a gas fireplace requires regular maintenance to ensure its safe and efficient operation. Skipping these crucial steps can lead to decreased performance, higher energy bills, and, more critically, safety hazards. Annual professional inspections are highly recommended. A qualified technician will check for gas leaks, ensure proper ignition (pilot light or electronic), clean burner components, inspect the venting system for blockages or damage, and verify that safety sensors (like oxygen depletion sensors in ventless units) are functioning correctly. According to the National Fire Protection Association (NFPA) (2026), all heating equipment, including fireplaces, should be inspected annually by a professional. A critical safety component for any home with a gas fireplace is a working carbon monoxide detector. For ventless units, this is non-negotiable, as they release combustion byproducts directly into the living space. Even with direct vent and B-vent units, malfunctions can occur, making a detector a vital backup. Test your detectors monthly and replace batteries annually.
Gas Fireplace Features and Aesthetics
Beyond the functional aspects, modern gas fireplaces offer a wide array of features and aesthetic choices to enhance your home’s ambiance and comfort. Flame appearance is a key differentiator. Higher-end units use advanced burner technology to create more realistic, dancing flames. Ceramic or refractory logs, often hand-painted, mimic the look of real wood, complete with glowing embers. Options for fire glass or stones are also available for a contemporary aesthetic. Convenience features are abundant. Many units come with remote controls for adjusting flame height, heat output, and even turning the unit on or off. Thermostatic controls allow the fireplace to maintain a desired room temperature automatically. Some models include blowers to circulate warm air more effectively into the room, and smart home integration allows for control via apps or voice commands.
Pros and Cons of Gas Fireplaces
Before committing to a gas fireplace, homeowners should weigh the distinct advantages against potential drawbacks.
Pros
- Convenience: Instant on/off, no wood handling, ash cleanup, or chimney sweeping required.
- Efficiency: Direct vent and ventless models offer high heating efficiency, reducing energy waste.
- Cleanliness: No smoke, soot, or ash to contend with, resulting in cleaner indoor air.
- Ambiance: Provides the visual warmth and comfort of a fire with minimal effort.
- Control: Precise temperature and flame height adjustments often available via remote or thermostat.
Cons
- Installation Cost: Can be substantial, especially for new gas line or venting requirements.
- Dependence on Fuel: Requires a continuous supply of natural gas or propane.
- Less Authentic Scent: Lacks the distinctive aroma of a wood-burning fire.
- Safety Risks (Ventless): Ventless models release combustion byproducts into the home, necessitating extreme caution and proper ventilation.
- Aesthetic Limitations: While improved, the flame may not always replicate the natural variation of a wood fire.
Common Mistakes Homeowners Make
Even with the best intentions, homeowners often make errors when selecting, installing, or maintaining their gas fireplaces that can lead to disappointment or safety concerns. A frequent mistake is underestimating the importance of professional installation. While a gas log set might seem simple, connecting to a gas line and ensuring proper ventilation are complex tasks that require certified expertise. Another common oversight is neglecting annual maintenance. A dirty burner or a partially blocked vent can significantly reduce efficiency and increase the risk of carbon monoxide buildup. Choosing a ventless unit for a small, unventilated room without adequate CO detection is a serious safety hazard. Always confirm local codes regarding ventless fireplaces before purchase. Choosing Expert Foundation Repair Companies for Your Home
Expert Tips for Optimal Performance
Maximizing the comfort and efficiency of your gas fireplace goes beyond initial installation. Here are some insights from our experience in the field. First, consider the BTU output relative to the room size. An oversized unit will cycle on and off too frequently, while an undersized one won’t provide adequate heat. For most living rooms, a unit between 20,000 and 40,000 BTU is sufficient. Second, prioritize air quality. Even with direct vent units, ensuring good overall home ventilation is beneficial. For ventless models, always crack a window slightly and ensure exhaust fans are working in other areas when the fireplace is in use. Worth noting, the quality of ceramic logs or fire glass can significantly impact flame realism; investing in higher-grade accessories enhances the visual experience. Finally, never obstruct the fireplace’s vents or clearances. Maintaining the prescribed distances from combustibles is a safety critical point.
Frequently Asked Questions
Is a gas fireplace more efficient than a wood-burning one?
Yes, generally a gas fireplace is significantly more efficient. Direct vent models typically offer 70-85% efficiency, while ventless models can reach 99.9%. Traditional wood-burning fireplaces, on the other hand, often have efficiencies between 10-30%, losing much of their heat up the chimney.
Can I install a gas fireplace myself?
No, gas fireplace installation, particularly involving gas lines and venting, should always be performed by a licensed professional. Improper installation can lead to gas leaks, carbon monoxide poisoning, and fires. Local codes often mandate professional installation for safety and insurance purposes.
How often should a gas fireplace be serviced?
A gas fireplace should be professionally serviced annually. This inspection ensures all components are working correctly, prevents gas leaks, cleans burners, checks venting, and verifies safety features like oxygen depletion sensors. Regular maintenance extends the unit’s lifespan and maintains efficiency.
Are ventless gas fireplaces safe?
Ventless gas fireplaces can be safe if installed correctly, used sparingly, and monitored with multiple carbon monoxide detectors and oxygen depletion sensors. However, they release combustion byproducts into the room, which can affect indoor air quality. Many regions have restrictions or outright bans on their installation.
What is the typical lifespan of a gas fireplace?
With proper installation and regular maintenance, a gas fireplace can last 15 to 25 years or even longer. Components like gas valves, igniters, and blowers may need replacement during this period, but the core structure is durable.
Can I convert my wood fireplace to gas?
Yes, many existing wood-burning fireplaces can be converted to gas using gas log inserts or a gas fireplace insert. The conversion process requires running a gas line and often involves installing a new liner or direct vent system, depending on the chosen gas unit type.
What BTU output do I need for my room?
The ideal BTU output depends on your room size, ceiling height, and insulation. As a general rule, you’ll need approximately 20-30 BTUs per square foot to heat a well-insulated room. For a 400 sq ft room, a 8,000-12,000 BTU fireplace would be adequate for supplemental heating.
Conclusion: Embracing the Comfort
A gas fireplace can be a fantastic addition to any home, offering warmth, ambiance, and convenience without the traditional hassles of wood. By understanding the different types — direct vent, ventless, and B-vent — and recognizing the critical importance of professional installation and consistent maintenance, homeowners can make an informed decision that prioritizes both comfort and safety. Invest in quality, ensure expert installation, and commit to regular servicing to enjoy your gas fireplace for decades to come. Information current as of July 2026; pricing and product details may change.
DIY Projects
Romex Wiring: Your Essential Guide to Safe Home Electricals
Romex is a widely recognized brand for non-metallic sheathed (NM-B) electrical cable, a cornerstone of residential wiring. This guide covers its types, uses, and safe installation practices for any home project.

A homeowner’s seemingly simple wiring task can quickly become a complex, code-violating hazard if the wrong materials are chosen. Romex, specifically non-metallic sheathed (NM-B) cable, is the backbone of most residential electrical systems, renowned for its versatility and straightforward installation in dry, indoor environments. However, understanding its specific applications, limitations, and the nuances of safe installation is crucial for both new construction and renovation projects.
Key Takeaways
- “Romex” is a brand name for non-metallic sheathed (NM-B) cable, commonly used for interior residential electrical wiring.
- Always match the cable’s gauge to the circuit breaker’s amperage rating to prevent overheating and fire hazards.
- NM-B cable is restricted to dry, indoor locations and generally not suitable for outdoor use, direct burial, or in wet/damp environments.
- Familiarize yourself with the National Electrical Code (NEC) and local amendments to ensure all installations meet safety standards.
- Improper installation, such as damaged sheathing or overfilled junction boxes, poses significant risks and should be avoided.
What Exactly is Romex Cable?
Romex is a registered trademark of Southwire Company, one of the largest manufacturers of wire and cable in North America. When people refer to “Romex,” they are almost always talking about non-metallic sheathed cable, or NM-B cable. This type of wiring is a staple in residential construction across the United States and Canada. NM-B cable consists of two or more insulated electrical conductors (typically copper), along with a bare ground wire, all encased within a flexible, non-metallic (usually PVC) outer sheath. Its widespread use stems from its cost-effectiveness and relative ease of installation compared to other wiring methods like conduit. In real terms, Romex cable simplifies the wiring process for homes because it’s designed to be pulled through wall studs and joists without needing individual wires run through protective piping, as long as it’s in protected, dry locations.
Understanding Romex Cable Types and Gauges
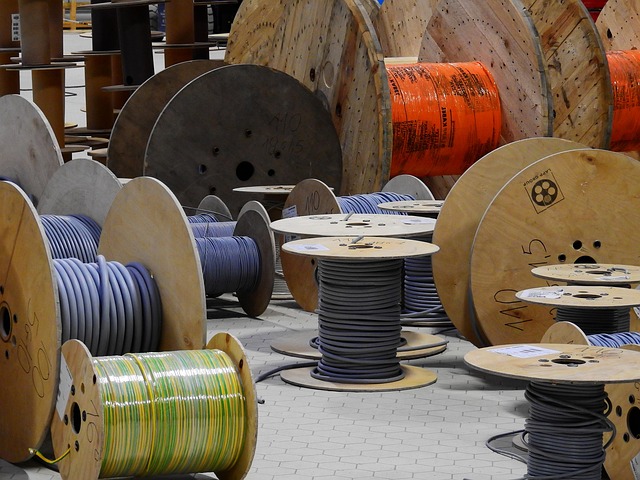
Choosing the correct Romex cable involves understanding its gauge and the number of conductors. The gauge refers to the wire’s thickness, impacting its current-carrying capacity, known as amperage. The National Electrical Code (NEC) specifies the maximum amperage for each wire gauge to prevent overheating and potential fires. Common gauges include 14-gauge (rated for 15 amps, typically for lighting and general outlets), 12-gauge (rated for 20 amps, for kitchen and bathroom circuits, or heavy-duty appliances), and 10-gauge (rated for 30 amps, for water heaters, dryers, or central air conditioning units). The outer sheath of NM-B cable is often color-coded to indicate its gauge: white for 14-gauge, yellow for 12-gauge, and orange for 10-gauge. Worth noting: Cable labels like “14/2 with ground” signify 14-gauge wire with two insulated conductors (hot and neutral) plus a bare ground wire. “12/3 with ground” indicates 12-gauge wire with three insulated conductors (two hot, one neutral) and a ground, typically used for 240-volt circuits or switch legs.
Permitted Uses and Key Restrictions for NM-B Cable
Romex cable is primarily designed for dry, interior residential applications. It’s ideal for running through drilled holes in wooden studs and joists within walls, ceilings, and floor cavities. In unfinished basements or attics, it can be run exposed, provided it’s protected from physical damage by being routed along the sides of framing members or through conduit sections where necessary. The wrinkle here: The NEC (2026 edition) strictly limits where NM-B cable can be used. It’s generally prohibited in wet or damp locations, such as outdoors, in concrete slabs, or buried directly in the ground. For these applications, specialized cables like UF (Underground Feeder) cable or conductors within conduit are required. It’s also not typically used in commercial or industrial settings due to different code requirements for physical protection and wiring methods. Always consult your local electrical inspector for specific regional amendments to the NEC.
Romex vs. Other Wiring: When Alternatives are Necessary
While Romex is versatile, other wiring methods offer distinct advantages for specific scenarios. Understanding these alternatives helps in making informed decisions for your projects. MC (Metal-Clad) cable, for instance, provides superior physical protection due to its interlocking metal sheath. It’s often preferred in exposed locations where NM-B cable might be vulnerable to damage, or in some commercial applications where code demands it. Conduit, which involves running individual wires inside rigid or flexible pipes (EMT, PVC, RMC), offers the highest level of protection and allows for future wire upgrades or replacements without opening walls. When considering alternatives, weigh flexibility, protection, and future adaptability. For example, in a workshop where exposed wiring might be subject to impact, MC cable or conduit would be a safer choice than exposed Romex.
| Feature | Romex (NM-B) | MC Cable | Conduit (EMT) |
|---|---|---|---|
| Flexibility | High | Moderate | Low (rigid) / High (flexible) |
| Physical Protection | Low (PVC sheath) | High (metal sheath) | Very High (metal/PVC pipe) |
| Cost (Material) | Lowest | Moderate | Highest |
| Installation Difficulty | Easiest | Moderate | Most complex |
| Common Uses | Interior residential (dry) | Commercial, exposed residential | Commercial, industrial, wet/damp, future upgrades |

Cost Considerations for Romex Wiring Projects
The cost of Romex cable can vary significantly based on several factors, including wire gauge, the number of conductors, and the length of the roll. As of July 2026, a 250-foot roll of 14/2 with ground Romex cable typically ranges from $70-$120, while a 12/2 with ground roll might cost between $100-$180. Larger gauges and longer rolls naturally command higher prices. Beyond the cable itself, consider the cost of associated materials like junction boxes, outlet boxes, switches, receptacles, staples, and connectors. While Romex is generally more affordable than MC cable or running individual wires in conduit, project costs can still add up. DIY installation can save on labor, but improper work often leads to expensive repairs or requires hiring an electrician to rectify code violations. Worth noting: Copper prices, which impact cable costs, can fluctuate. Always price out your materials just before purchase to get the most current figures. According to Southwire’s product data (2026), the material cost of copper conductors remains a primary driver of overall cable expense.
Installation Best Practices and Safety Tips
Safe and compliant Romex installation is paramount. Always begin by turning off power at the main circuit breaker. Use a voltage tester to confirm that the circuit is de-energized before touching any wires. This crucial step prevents electric shock. When running cable, ensure it’s properly secured. The NEC requires Romex to be stapled or fastened within 12 inches of every electrical box and at intervals of no more than 4.5 feet along its run. Use insulated staples to prevent damage to the cable’s outer sheath. When drilling through studs, ensure holes are centered to protect the cable from nails or screws later applied to the wall surface. Always leave at least 6 to 8 inches of wire extending from electrical boxes to allow for proper connections and future servicing. Avoid sharp bends or kinks in the cable, which can damage conductors or insulation. When connecting wires, ensure all connections are tight and made within approved junction boxes, which must remain accessible.

Common Romex Installation Mistakes to Avoid
Even experienced DIYers can make mistakes that compromise electrical safety. One of the most common errors is using the wrong gauge of Romex cable for the intended circuit, leading to overloaded wires and fire hazards. For example, connecting a 20-amp appliance to a 15-amp, 14-gauge circuit is a serious mistake. Another frequent issue is damaging the cable’s outer sheath or conductor insulation during stripping or stapling. Nicks or cuts expose live wires, creating shock risks. Overfilling electrical boxes with too many wires or devices is also a common code violation that can lead to overheating. Additionally, running Romex in inappropriate locations, such as outdoors or in damp basements without proper protection, invites corrosion and short circuits. Practical Insight: Never assume a circuit is off just because a light switch is in the ‘off’ position. A voltage tester is an inexpensive tool that can save lives by confirming a circuit is truly dead before you start work. For more on essential electrical tools.
Expert Insights for Your Electrical Projects
When tackling electrical work with Romex, meticulous planning and adherence to safety are your best allies. First, always verify the specific requirements of your local building codes, as these can sometimes supplement or modify the NEC. What’s acceptable in one jurisdiction might not be in another. This prevents costly rework and ensures compliance. Consider the long-term needs of your home. While a 15-amp circuit might suffice for a bedroom today, future additions like dedicated office equipment or higher-wattage devices might warrant running 12-gauge wire for a 20-amp circuit from the outset. This forward-thinking approach avoids having to re-wire a room years down the line. The honest answer: DIY electrical work saves money, but mistakes can be life-threatening or lead to expensive repairs. When in doubt about any aspect of your electrical project, especially if it involves modifying the main electrical panel or adding new circuits, always consult a licensed electrician.
Frequently Asked Questions
Can Romex be run exposed?
Yes, Romex (NM-B) cable can be run exposed in certain areas like unfinished basements or attics, provided it’s properly secured and protected from physical damage. It must be routed along framing members or within conduit where it might be susceptible to impact. Always check local codes for specific requirements.
What is the difference between 14/2 and 12/2 Romex?
14/2 Romex contains two 14-gauge insulated conductors plus a ground wire and is rated for 15-amp circuits. 12/2 Romex has two 12-gauge insulated conductors and a ground, rated for 20-amp circuits. The larger the gauge number, the smaller the wire diameter; thus, 12-gauge wire is thicker and can carry more current than 14-gauge.
Can I bury Romex cable?
No, standard Romex (NM-B) cable is not designed for direct burial or use in wet locations. Its PVC sheath is not sufficiently solid or moisture-resistant for such environments. For underground or wet applications, you must use UF (Underground Feeder) cable or conductors installed within approved conduit.
Does Romex need to be in conduit?
Romex typically doesn’t need to be run inside conduit when installed within walls, ceilings, or protected areas. However, conduit may be required if Romex is exposed to potential physical damage, or in specific locations like garages or workshops where additional protection is mandated by code. For an in-depth look at conduit options.
What are the color codes for Romex?
The outer sheath of Romex cable is color-coded to indicate its wire gauge: white for 14-gauge (15-amp circuits), yellow for 12-gauge (20-amp circuits), and orange for 10-gauge (30-amp circuits). Black is typically 6-gauge or 8-gauge for higher amperage applications.
How long does Romex last?
Properly installed Romex cable can last for many decades, often exceeding 50–70 years, matching the lifespan of the home itself. Its PVC insulation and sheath are durable. However, exposure to excessive heat, moisture, physical damage, or consistent overloading can significantly shorten its effective lifespan.
Can Romex be used in commercial buildings?
While Romex (NM-B) is permitted in some limited commercial applications, particularly in smaller buildings or specific non-public areas, commercial electrical codes often require more solid wiring methods like MC cable or conductors in conduit. These provide superior physical protection and fire resistance, aligning with the higher occupancy and usage demands of commercial structures. Understanding Romex wiring is fundamental for anyone undertaking residential electrical projects. By correctly identifying cable types, adhering to gauge requirements, and following established installation practices, you ensure the safety and longevity of your home’s electrical system. Prioritize safety, respect the National Electrical Code, and when in doubt, always defer to the expertise of a licensed electrician. Your home’s safety and your peace of mind are worth the effort. Information current as of July 2026; pricing and product details may change.

Asiatic Lily Care: Avoiding Common Mistakes for Vibrant Blooms

Fountain Grass: A Guide to Graceful Garden Design

Gerbera Daisies: Vibrant Blooms for Your Home & Garden

Choosing Expert Foundation Repair Companies for Your Home

Bouncy Floors: Diagnosing Sagging & Stiffening Joists

Nellie Stevens Holly Planting: Your Guide to a Resilient Evergreen
-
 Repairs & Maintenance2 months ago
Choosing Expert Foundation Repair Companies for Your Home
-
 Repairs & Maintenance2 months ago
Bouncy Floors: Diagnosing Sagging & Stiffening Joists
-
 Outdoor & Garden2 months ago
Nellie Stevens Holly Planting: Your Guide to a Resilient Evergreen
-

 Tools & Materials2 months ago
Bolt Cutters: Your Essential Guide to Heavy-Duty Cutting
-

 Home Improvement2 months ago
The Two Grades of Home: Condition and Land
-

 Outdoor & Garden2 months ago
Brush Cutter Essentials: Clearing Overgrown Land Effectively
-

 Repairs & Maintenance2 months ago
Essential Furnace Maintenance for Peak Home Heating
-

 Home Improvement2 months ago
Water Softener Costs: Your Investment Guide