
Repairs & Maintenance
Electrical Box Extenders: Ensuring Safe, Code-Compliant
An electrical box extender is a simple yet critical component for safely mounting outlets and switches. It ensures your electrical devices sit flush with the wall, preventing hazards and meeting crucial code requirements for any home renovation or new construction project.


Sarah, a homeowner in Phoenix, recently upgraded her kitchen backsplash with beautiful new subway tiles. She quickly realized her electrical outlets, once flush with the old drywall, now sat deeply recessed behind the tile. This wasn’t just an aesthetic issue; it was a serious safety concern. The honest answer to this problem, common in countless renovation projects, lies in understanding, and correctly using an electrical box extender.
Key Takeaways
- Electrical box extenders are essential for safety and code compliance when wall surfaces are thickened.
- They ensure electrical devices mount flush, preventing exposed wiring and fire hazards.
- Extenders come in various materials (plastic, metal, phenolic) and sizes, each suited for different applications.
- Proper installation involves turning off power, selecting the right size, and securing the extender before device mounting.
- Always adhere to local electrical codes, especially NEC Article 314.20, regarding flush mounting.
What is an Electrical Box Extender?
An electrical box extender, sometimes called a mud ring or box spacer, is a device designed to increase the depth of an existing electrical box. Its primary purpose is to bring the front edge of a recessed electrical box flush with the finished surface of a wall or ceiling. This is critical for the safe and secure mounting of electrical devices like outlets, switches, or light fixtures. The need for an extender typically arises when new wall finishes, such as thicker drywall, tile, paneling, or stone veneers, are added over existing walls. Without an extender, the electrical device would sit recessed, leaving a gap around the device plate and exposing wiring, which poses significant shock and fire risks.
Why Are Electrical Box Extenders Critical for Safety and Code?
Using an electrical box extender isn’t just about aesthetics; it’s a fundamental safety requirement dictated by electrical codes. The National Electrical Code (NEC), specifically Article 314.20, mandates that the front edge of any electrical box or fitting must be set back no more than 1/4 inch from the finished surface of combustible walls and ceilings, and be flush with noncombustible surfaces. This ensures that electrical devices can be properly secured, and cover plates can fully enclose the box, preventing access to live conductors. When an electrical box is recessed too deeply, conductors within the box can become exposed. This creates a direct path for debris or accidental contact, leading to short circuits, electrical shocks, or even arc faults that ignite nearby combustible materials. According to the Electrical Safety Foundation International (ESFI), electrical failures and malfunctions are a leading cause of home fires, highlighting the importance of proper electrical installations like flush-mounted boxes.
Common Scenarios Requiring an Electrical Box Extender
Several home improvement projects frequently necessitate the use of an electrical box extender. Understanding these situations upfront can save considerable time and ensure safety.
- Thicker Drywall Installation: Upgrading from 1/2-inch to 5/8-inch drywall, or adding a second layer for soundproofing, will recess existing boxes.
- Tile Backsplashes or Walls: As Sarah discovered, adding ceramic, porcelain, or stone tile to a wall significantly increases its thickness, making extenders indispensable for kitchen and bathroom renovations.
- Wood Paneling or Shiplap: Decorative wood finishes often add 1/4 inch to 3/4 inch or more to the wall depth, pushing electrical boxes further back.
- Furring Strips and Insulation: When furring strips are added to walls for insulation or to create a level surface, they extend the wall plane beyond the original box depth.
- Surface-Mounted Materials: Any application where a material is directly applied to an existing wall (e.g., decorative stone veneer, wainscoting) will likely require an extender.
In our years working in residential construction, we’ve encountered countless situations where a simple change in wall finish created a significant electrical challenge. Proactive planning for box depth is always better than reacting to a recessed box.
Types of Electrical Box Extenders: Materials and Design
Electrical box extenders are available in various materials and designs, each suited for specific applications and box types. The choice depends on the existing electrical box material and the desired depth. The most common types include:
- Plastic Box Extenders: Often made from PVC or polycarbonate, these are typically used with plastic electrical boxes. They are lightweight, non-conductive, and simple to install. Many plastic extenders are stackable, allowing you to achieve precise depths by combining multiple units. Brands like Carlon and Arlington offer popular options.
- Metal Box Extenders: Constructed from galvanized steel, these are designed for use with metal electrical boxes. They offer solid protection and maintain the grounding integrity of the metal box system. Metal extenders are generally single-piece units, available in various fixed depths.
- Phenolic Box Extenders: Made from a thermoset plastic composite, phenolic extenders are durable and often used in commercial or industrial settings, or where a fire rating is a concern. They can be used with both metal and plastic boxes and are known for their rigidity.
Worth noting: Fire-rated extenders are crucial in specific applications, particularly in multi-family dwellings or commercial buildings. These are designed to maintain the fire-resistance rating of a wall assembly. Always check local building codes for specific requirements.

Choosing the Right Extender: A Comparison
Selecting the correct electrical box extender involves considering the existing box material, the required depth, and local code requirements. Here’s a quick comparison to guide your choice:
| Feature | Plastic Extender (e.g., PVC) | Metal Extender (e.g., Galvanized Steel) | Phenolic Extender |
|---|---|---|---|
| Compatibility | Plastic boxes (can sometimes be used with metal boxes if properly insulated) | Metal boxes | Both plastic and metal boxes |
| Depth Adjustment | Stackable, flexible depth | Fixed depths, not stackable | Fixed depths, not stackable |
| Insulation | Non-conductive, inherent insulation | Conductive, requires careful grounding | Good insulation properties |
| Fire Rating | Standard, some fire-rated versions exist | Standard, maintains box integrity | Often fire-rated, high heat resistance |
| Cost (as of July 2026) | Inexpensive, typically $2-$5 per unit | Moderate, typically $4-$8 per unit | Higher, typically $6-$12 per unit |
| Installation Ease | Very easy (snaps/screws) | Easy (screws) | Easy (screws) |
The wrinkle here: While plastic extenders are versatile, using them with metal boxes sometimes requires additional steps to ensure proper grounding continuity, especially if they fully encase the metal box without allowing for a grounding connection to the device. Always consult the manufacturer’s instructions and local codes.
Step-by-Step Installation Process
Installing an electrical box extender is a straightforward task for most DIYers, but precision and safety are paramount. Always prioritize safety by following these steps:
- Turn Off Power: Locate the circuit breaker panel and switch off the power to the circuit feeding the electrical box you’re working on. Verify with a non-contact voltage tester that the power is indeed off. This is non-negotiable for electrical safety.
- Remove Device and Existing Cover: Unscrew and carefully pull out the existing outlet or switch from the electrical box. Don’t disconnect any wires yet. Remove the device’s faceplate.
- Assess Required Depth: Measure the gap between the front edge of the electrical box and the finished wall surface. This measurement dictates the thickness of the extender you need.
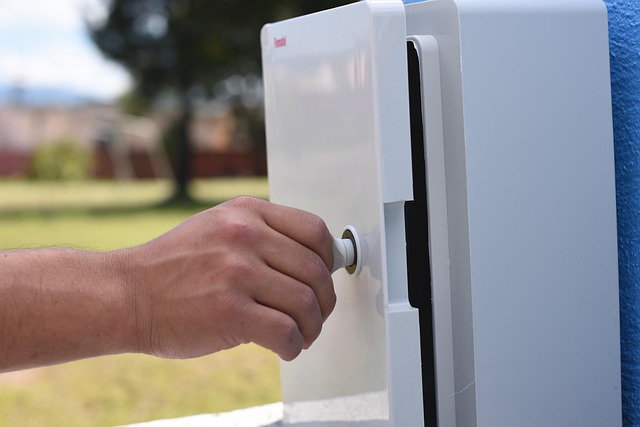
- Install the Extender: Slide the electrical box extender over the existing box. Align the screw holes on the extender with those on the box. Use longer screws (typically provided with the extender or purchased separately) to secure the extender to the existing box. Ensure it sits flush with the new wall surface.
- Reinstall Device: Carefully push the wires back into the extended box. Reattach the electrical device (outlet or switch) to the extender using the appropriate screws. Ensure all wires are neatly tucked away and no bare conductors are exposed.
- Attach Faceplate: Secure the device’s faceplate. It should sit flush against the wall and the device.
- Restore Power: Return to the circuit breaker panel and turn the power back on. Test the outlet or switch to ensure it functions correctly.
In our experience, a common mistake is not using long enough screws, leading to a loose device. Always ensure a secure fit.
Common Mistakes and How to Avoid Them
Even with a seemingly simple task like installing an electrical box extender, several common pitfalls can compromise safety and compliance. Being aware of these can prevent future issues:
- Not Turning Off Power: This is the most dangerous mistake. Always verify power is off with a voltage tester before touching any wires or components.
- Incorrect Extender Size: Using an extender that’s too thin leaves the device recessed, while one that’s too thick causes the device to protrude awkwardly. Measure carefully.
- Improper Wire Management: Jamming wires into the extended box can damage insulation or create excessive heat. Ensure wires are neatly folded and have enough space, adhering to box fill calculations where necessary.
- Ignoring Box Material Compatibility: Mixing plastic extenders with metal boxes without proper grounding considerations can create safety hazards. Always ensure grounding continuity for metal systems.
- Over-tightening Screws: This can strip threads in plastic boxes or crack plastic extenders, leading to a loose, unsafe installation. Tighten until snug, then a quarter turn more.
- Failing to Check Code Compliance: Different jurisdictions may have specific requirements for box depth, material, or fire rating. Always consult your local authority’s electrical code. For surface-mounted device covers, the NEC requires full enclosure of conductors.
Expert Tips for a Flawless Installation
Achieving a professional and safe electrical box extension goes beyond the basic steps. Here are some insights from years of hands-on experience:
- Pre-plan for Thicker Finishes: If you know you’re adding tile or paneling, consider installing deeper electrical boxes initially or using adjustable depth boxes, which can simplify future changes.
- Use the Right Tools: A good quality non-contact voltage tester, a reliable screwdriver set, and a tape measure are essential. Consider a multi-tool for stripping wires if you’re also re-wiring the device.
- Maintain Box Fill: While an extender adds depth, it doesn’t always add volume for wire count. If your box is already near its maximum fill capacity, simply adding depth might not be enough. Consult NEC Article 314.16 for box fill calculations. For more on electrical wiring basics, see.
- Consider Adjustable Extenders: Some specialized extenders offer adjustable depth, allowing for fine-tuning after the wall finish is applied. These are particularly useful for uneven surfaces or when precise measurements are difficult.
- Grounding is Key for Metal Boxes: If using a metal box and a metal extender, ensure the extender maintains the grounding path. This usually means securing it directly to the metal box with metal screws, ensuring metal-to-metal contact.
- Seal Air Leaks: For exterior walls, consider using foam gaskets behind the device faceplate to prevent air infiltration, improving energy efficiency.
A simple step like ensuring the extender sits truly flush can prevent hours of frustration trying to get the cover plate to sit correctly. For understanding building codes, explore.

Frequently Asked Questions
Can I use an electrical box extender with any type of electrical box?
Generally, yes, but compatibility is important. Plastic extenders typically pair with plastic boxes, and metal extenders with metal boxes to maintain structural integrity and grounding. Universal phenolic extenders can often bridge both. Always ensure the extender’s screw holes align with your existing box for a secure fit.
What is the maximum depth an electrical box extender can add?
Extenders come in various depths, typically ranging from 1/4 inch to 1 inch. Plastic extenders are often stackable, allowing you to achieve greater depths by combining multiple units, but always ensure the combined depth is stable and secure for the device.
Are electrical box extenders up to code?
Yes, when installed correctly, electrical box extenders are fully compliant with the National Electrical Code (NEC), specifically Article 314.20. They are designed to bring the box flush with the finished wall surface, a critical requirement for electrical safety and proper device mounting.
Do I need an extender if my outlet is only slightly recessed?
Even a slight recess (more than 1/4 inch for combustible surfaces or any recess for non-combustible surfaces, according to NEC 314.20) requires an extender. Any gap around the device or cover plate can expose wiring, creating a safety hazard. It’s always better to be safe and ensure a flush mount.
Can I use wood shims instead of an extender?
No, using combustible materials like wood shims to extend an electrical box is not code compliant and creates a significant fire hazard. Electrical box extenders are specifically designed and tested for this purpose, made from non-combustible or fire-rated materials. Always use approved electrical components.
Where can I purchase electrical box extenders?
Electrical box extenders are readily available at most home improvement stores, hardware stores, and electrical supply warehouses. Popular brands include Carlon, Arlington, and Bell. Prices are typically modest, ranging from a few dollars to about ten dollars per unit as of July 2026.
Conclusion
Electrical box extenders are far more than just convenient accessories; they are fundamental to ensuring the safety and code compliance of your home’s electrical system. Whether you’re tiling a bathroom or simply installing thicker drywall, using the right electrical box extender correctly prevents exposed wiring, reduces fire risks, and allows for secure mounting of your devices. Prioritize these small but mighty components in your next renovation project for peace of mind and lasting safety. Information current as of July 2026; pricing and product details may change.
Related Articles
- Parts of a Door Lock: Dissecting Your Home's Security Core
- Driveway Repair: Essential Strategies for Lasting Curb Appeal
- Grade Home: Essential Land Grading for Residential






Repairs & Maintenance
Drain Cleanout: Your Home’s Essential Plumbing Access
A drain cleanout is a capped opening that provides direct access to your home’s drainage system, making it vital for efficient clog removal and overall plumbing health. Understanding its role can save you from costly headaches.

A slow drain or gurgling toilet isn’t just an annoyance; it’s a warning signal from your home’s complex drainage system. The honest answer to this problem often lies in understanding,, and utilizing your drain cleanout—a critical, yet often overlooked, component of your plumbing infrastructure. These access points are your first line of defense against stubborn blockages, allowing for direct intervention that can save you from messy backups and expensive emergency calls.
Key Takeaways
- Drain cleanouts are capped openings providing direct access to your plumbing system for efficient clog removal.
- Identifying your main cleanout and branch cleanouts is crucial for effective diagnosis and intervention.
- While some clogs are DIY-friendly, main sewer line blockages often require professional hydro-jetting or snaking.
- Always approach opening a cleanout with caution, wearing safety gear and anticipating potential pressure or hazardous waste.
- Proactive maintenance, including regular inspections and avoiding common mistakes, extends the life of your drainage system.
What Exactly is a Drain Cleanout and Why Does it Matter?
A drain cleanout is a capped pipe fitting that provides direct access to your home’s wastewater drainage system. Think of it as a strategic entry point designed specifically for clearing blockages. Without these cleanouts, plumbers would often need to remove sections of pipe or even break into walls or floors to access a clog, turning a routine fix into a major renovation project. Worth noting: they are mandated by most local plumbing codes for good reason. In real terms, a cleanout’s presence allows for targeted clog removal using tools like drain snakes or hydro-jetting equipment. This direct access minimizes disruption to your home and protects the integrity of your entire drainage system from unnecessary wear and tear caused by persistent clogs.

Locating Your Home’s Drain Cleanouts
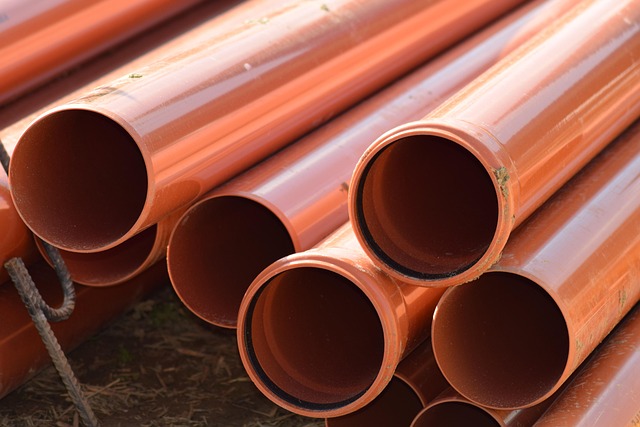
Finding your drain cleanouts is the first step towards taking control of your home’s plumbing maintenance. The most important one is typically the main sewer cleanout. This is usually located outside your house, near the foundation, often close to the bathroom or utility room. It appears as a 3-4 inch diameter PVC or cast-iron pipe with a threaded or rubber cap at ground level or just above. Beyond the main cleanout, you’ll find smaller branch cleanouts strategically placed throughout your home. These are commonly under sinks, in basement utility areas, or within crawl spaces, serving specific sections of your plumbing. For instance, a kitchen sink might have a 1.5-2 inch cleanout directly on the trap arm. The wrinkle here: older homes may have fewer, or less obvious, cleanouts. Some might even be buried or hidden by landscaping, making them harder to locate without professional help. For more on older home plumbing challenges.
Different Types of Drain Cleanouts and Their Purpose
Not all drain cleanouts are created equal; their size, location, and design correspond to specific sections of your drainage system. The main sewer cleanout is the largest, typically 3 to 6 inches in diameter, and provides access to the primary sewer line exiting your home. This is the point of entry for clearing whole-house backups. Branch cleanouts are smaller, often 1.5 to 2 inches, and are found on individual fixture lines or branch lines leading to a stack. These are ideal for localized clogs, like a perpetually slow shower drain. You might also encounter floor cleanouts in basements or utility rooms, designed for spills or overflows, and fixture cleanouts directly on the P-trap of a sink. Each type serves as a specific drainage access point, allowing targeted intervention. In my 15+ years working in residential and commercial construction, I’ve seen countless situations where knowing the right cleanout to open has saved homeowners significant time and money. Using a branch cleanout for a sink clog is far less invasive than opening the main line.
When to tackle a Drain Cleanout Yourself (DIY) and When to Call a Pro
Deciding whether to DIY a drain cleanout or call a professional plumber hinges on the nature and severity of the clog. For simple, localized blockages in a single fixture—like a slow bathroom sink—a DIY approach using a small drain snake or auger accessed via a branch cleanout might suffice. However, if you’re experiencing widespread backups affecting multiple fixtures, gurgling sounds from various drains, or sewage odors, these are strong indicators of a main sewer cleanout blockage. This type of issue often requires specialized equipment like a heavy-duty sewer snake or hydro-jetting, which are best handled by a professional. The wrinkle here: attempting to clear a main sewer line blockage yourself without the right tools or experience can push the clog further, damage your pipes, or expose you to hazardous wastewater. It’s a prime example of where a professional’s expertise pays off.
| Feature | DIY Drain Cleanout | Professional Drain Cleaning |
|---|---|---|
| Cost (Initial) | $30-$200 (for tools) | $150-$800+ (for service) |
| Risk of Damage | Moderate to High | Low (experienced pros) |
| Equipment | Manual snake, small auger | Power auger, hydro-jetting, cameras |
| Expertise Required | Basic plumbing knowledge | Advanced diagnostics, safety protocols |
| Scope of Clogs | Localized, minor blockages | Main sewer line, persistent, deep clogs |
The Process: How to Safely Use a Drain Cleanout
Approaching a drain cleanout requires caution and the right steps. First, gather your safety gear: heavy-duty gloves, eye protection, and old clothes. Have a bucket and towels ready for potential spills.
- Locate the Correct Cleanout: For a specific fixture clog, use the nearest branch cleanout. For widespread issues, identify the main sewer cleanout.
- Prepare the Area: Lay down tarps or old towels around the cleanout to catch any spills or wastewater. Ensure good ventilation.
- Carefully Open the Cap: Use a wrench or pliers if needed. Be extremely cautious as pressure can build up behind a clog, causing wastewater to erupt. If you feel significant pressure, open it slowly to release it gradually.
- Insert the Drain Snake/Auger: Feed the snake into the cleanout opening, pushing it until you feel resistance. Crank the handle to break up or retrieve the clog.
- Clear the Clog: Once the clog is broken, slowly pull the snake back out, cleaning off any debris as you go. Repeat as necessary.
- Flush and Reseal: Run water for several minutes to ensure the line is clear. Then, clean and securely replace the cleanout cap, ensuring a tight seal to prevent leaks and odors.
Worth noting: always start with the furthest downstream cleanout relative to the clog. This prevents pushing debris further into healthy sections of your drainage system.

Common Drain Cleanout Mistakes and How to Avoid Them
Even with good intentions, several common mistakes can turn a simple drain cleanout task into a bigger headache. One frequent error is forcing a cleanout cap that’s under significant pressure. This can lead to a sudden, hazardous eruption of wastewater. The solution: always open slowly, using a wrench to gently loosen, and step back if you hear hissing or see water beginning to seep out. Another mistake is using improper tools. A small household drain snake won’t effectively clear a large main sewer line blockage. Using an undersized tool often means you’re just punching a hole through the clog, not removing it, leading to a quick recurrence. Invest in the right size auger for the job, or call a pro for larger lines. Finally, ignoring persistent issues is a major pitfall. If a cleanout repeatedly clogs or drains slowly after clearing, it’s a sign of a deeper problem like tree root intrusion, a broken pipe, or significant buildup. Continuing to DIY at this point delays necessary professional diagnosis and can exacerbate the damage. According to the Environmental Protection Agency (2022), proper wastewater infrastructure maintenance is crucial for preventing costly repairs and environmental issues. Fix a Well Pump: Diagnosing & Solving Common Water Issues for more on common plumbing issues.
Proactive Drain Cleanout Maintenance for Long-Term Plumbing Health
Preventative maintenance is the best defense against plumbing emergencies. Regularly inspecting your outdoor drain cleanout caps for cracks or damage is a simple yet effective step. Damaged caps can allow debris, pests, or tree roots to enter your sewer lines, leading to severe blockages. Consider an annual professional plumbing inspection, especially if your home is older or you’ve experienced recurring issues. A plumber can use specialized cameras to inspect the sewer line through the cleanout, identifying potential problems like cracks, offsets, or root intrusion before they escalate. This can be a major shift for long-term plumbing health. The wrinkle here: while enzyme-based drain cleaners can be useful for preventative maintenance by breaking down organic matter, avoid harsh chemical drain cleaners. They can damage pipes, especially older ones, and are ineffective against serious blockages. Consistent vigilance and professional check-ups are far more effective.
Understanding Drain Cleanout Costs: What to Expect in 2026
The cost associated with drain cleanouts varies significantly based on whether you choose a DIY approach or professional service, and the complexity of the issue. For DIY, a basic manual drain snake can cost anywhere from $30 to $80, while a solid auger might run $100 to $200. Professional services, as of August 2026, typically range from $150 to $350 for a standard drain snaking of a branch line. However, clearing a main sewer cleanout blockage using a heavy-duty power auger or hydro-jetting can cost between $400 and $800 or more, depending on the severity, location, and regional pricing. Emergency calls often incur higher fees. Worth noting: if the problem requires camera inspection (often $200-$500) or pipe repair, costs can climb quickly. Always get a detailed quote from a licensed plumber before any significant work begins. Investing in preventative maintenance can significantly reduce these emergency expenses.

Frequently Asked Questions
What’s the difference between a drain cleanout and a sewer cleanout?
Technically, a sewer cleanout is a type of drain cleanout, specifically the main access point for your home’s primary sewer line. Other drain cleanouts are smaller and provide access to individual branch lines or fixtures. All are points for clearing blockages, but the sewer cleanout handles the largest volume and main line issues.
How often should I check my drain cleanout?
It’s advisable to visually inspect your outdoor main cleanout cap annually for any damage or signs of leakage. For active use, clear it whenever you notice slow drains or multiple fixtures backing up. Proactive annual professional inspection of your main sewer line via the cleanout is recommended for older homes.
Can I pour chemicals down my drain cleanout?
It’s generally not recommended. Harsh chemical drain cleaners can corrode pipes, especially older ones made of cast iron, and are often ineffective against serious blockages. They also pose a safety risk to you and plumbers. Opt for mechanical clearing (snaking) or enzyme-based cleaners for maintenance.
What if I can’t find my main drain cleanout?
If you can’t locate your main drain cleanout, it’s best to call a professional plumber. They have specialized equipment, like ground-penetrating radar or sewer cameras, to locate buried or hidden cleanouts without extensive excavation. This saves time and prevents unnecessary digging.
Is it normal for water to come out of the cleanout when opened?
If water or sewage immediately surges out when you open a cleanout, it indicates a significant blockage downstream from that access point. This can be hazardous. Close the cap securely, if possible, and immediately call a professional plumber. Never try to force past a major blockage yourself.
How do I know if my cleanout cap needs replacing?
Inspect your cleanout cap for visible cracks, chips, or signs of deterioration. If it doesn’t seal tightly, allows odors to escape, or appears to be leaking, it’s time for a replacement. A loose or damaged cap can lead to debris entering your sewer line, causing future blockages.
Conclusion
Your drain cleanout is a vital, yet often neglected, guardian of your home’s plumbing health. Understanding its purpose, knowing where to find it, and recognizing when to intervene yourself versus calling a professional are crucial skills for any homeowner. By implementing proactive maintenance and addressing issues promptly and safely, you can prevent minor clogs from becoming major emergencies, ensuring your drainage system functions smoothly for years to come. Information current as of August 2026; pricing and product details may change.
General
How to Clean Stone Countertops: Your Guide to Lasting Beauty
Wondering how to clean stone countertops without causing damage? This guide from B Collins Construction provides practical tips and specific advice for maintaining granite, marble, and quartz surfaces, ensuring they stay beautiful for years.

Why do some stone countertops look pristine for decades while others dull prematurely or show stubborn stains? The honest answer to this question lies not in complex treatments, but in consistent, correct cleaning and care habits. For homeowners and renovators, understanding how to clean stone countertops properly is essential to protecting a significant investment and maintaining the beauty of your kitchen or bathroom.
Key Takeaways
- Always use pH-neutral cleaners and soft cloths to avoid damaging stone surfaces.
- Identify your specific stone type (granite, marble, quartz) as each has unique care requirements.
- Address spills immediately to prevent deep staining and etching, especially on porous stones.
- Regularly test and reseal natural stone countertops to maintain their protective barrier.
- Avoid acidic cleaners like vinegar or lemon juice, and abrasive scrubbers, which can cause irreparable harm.
Understanding Your Stone: Not All Countertops Are Created Equal
Before you even grab a cloth, knowing your countertop’s material is paramount. Natural stone, such as granite, marble, travertine, and limestone, is inherently porous and reactive to acids. Engineered stone, like quartz, is less porous and more resistant to stains and etching, but still requires specific care. Granite, a popular choice, is durable but still needs sealing due to its porosity. Marble, renowned for its elegance, is much softer and highly susceptible to etching from acids. Travertine and limestone are even softer and more porous, demanding the gentlest approach. Quartz, though often lumped in with natural stone, is a composite material made from crushed quartz, resin, and pigments. Its non-porous nature means it doesn’t require sealing and is generally more forgiving, but it can still be damaged by extreme heat or harsh chemicals. In real terms, treating a delicate marble surface like a solid granite can lead to irreversible damage.

Your Daily Ritual: Gentle Cleaning for Lasting Beauty
For most stone countertops, the daily cleaning routine is surprisingly simple. The goal is to remove crumbs, spills, and everyday grime without stripping the sealant or damaging the surface. Start by wiping down the counters with a soft, clean microfiber cloth. For general cleaning, a spray bottle filled with warm water and a few drops of pH-neutral dish soap is all you need. Spritz the surface lightly, then wipe with a clean, damp cloth. Immediately follow up with a dry microfiber cloth to prevent water spots, especially on darker stones or if you have hard water in your area. Worth noting: For the best results and to prevent mineral buildup, consider using filtered water for cleaning, particularly if your tap water is very hard. This simple step can make a big difference in maintaining a streak-free shine.
What to Absolutely Avoid: Protecting Your Investment
This is where many common cleaning habits go wrong. While they might work on laminate or tile, certain cleaners are disastrous for stone. Never use:
- Acidic Cleaners: Vinegar, lemon juice, ammonia, and many commercial bathroom cleaners will etch and dull marble, limestone, and travertine. Even on granite, they can degrade the sealant over time.
- Abrasive Cleaners: Scouring powders, steel wool, or rough scrubbers can scratch the surface of any stone, making it more prone to staining and reducing its natural luster.
- Harsh Chemicals: Bleach, oven cleaners, drain cleaners, and paint removers can cause discoloration, etching, or other severe damage. Always check product labels for stone-safe certifications.
- Waxes or Oils: Unless specifically designed for stone, these can build up, attract dirt, and create a hazy finish.
The wrinkle here: many common household cleaners contain these damaging ingredients. Always read labels carefully, and when in doubt, stick to specialized stone cleaners or plain soap and water.
Tackling Tough Stains: A Targeted Approach
Even with careful daily cleaning, accidents happen. The key to successful stain removal is identifying the stain type and acting quickly. Oil-Based Stains (grease, cooking oil, cosmetics): These darken the stone. Create a poultice by mixing baking soda with hydrogen peroxide to a peanut butter consistency. Apply a thick layer over the stain, cover with plastic wrap, and tape the edges. Let it sit for 24–48 hours, then remove the plastic and allow the paste to dry completely. Scrape it off gently and rinse. The poultice draws the oil out of the stone. Organic Stains (coffee, tea, wine, food): These are often lighter than the stone. Mix hydrogen peroxide (3% solution) with a few drops of ammonia (if safe for your stone type; avoid on polished marble) and baking soda to form a paste. Apply as a poultice, leaving it on for 24–48 hours. For marble, a simple baking soda and water paste might suffice. According to the Natural Stone Institute, proper poultice application is crucial for success. Water Spots / Mineral Deposits: Hard water can leave unsightly rings. For fresh spots, a gentle rub with a soft, damp cloth might work. For tougher, older deposits, a specialized pH-neutral hard water remover designed for stone can be effective. Avoid acidic descales. For minor mineral buildup, a paste of baking soda and water can be gently rubbed on, then rinsed thoroughly. Rust Stains: These appear as orange or brown spots. Only use commercial rust removers specifically labeled as safe for stone countertops. Many rust removers contain acids that will etch your stone, so careful product selection is critical.

The Critical Role of Sealing: A Preventative Shield
For most natural stone countertops (granite, marble, travertine, limestone), sealing is your first line of defense against stains. Sealers penetrate the stone, filling microscopic pores and making the surface less absorbent. To test if your stone needs resealing, perform a simple water bead test. Place a few drops of water on the surface. If the water beads up, your sealant is still effective. If it soaks into the stone within a few minutes, it’s time to reseal. The frequency varies, typically every 1–3 years depending on stone type, usage, and sealer quality. Hunker.com suggests granite countertops in high-traffic kitchens might need resealing annually. The sealing process involves thoroughly cleaning the countertop, allowing it to dry completely, applying a stone-specific penetrating sealer according to manufacturer instructions, and then wiping off any excess before it dries on the surface. Worth noting: quartz countertops don’t require sealing due to their non-porous composition.
Choosing the Right Cleaners and Tools
Selecting the correct products and tools is as important as the cleaning technique itself. Your toolkit should be simple and stone-friendly.
Recommended Tools:
- Microfiber Cloths: Soft, highly absorbent, and lint-free. They won’t scratch your stone.
- Soft Sponges: For gentle scrubbing on tougher spots before resorting to a poultice.
- Spray Bottles: Ideal for applying diluted cleaners or water evenly.
Recommended Cleaners:
- pH-Neutral Dish Soap: A few drops mixed with warm water for daily cleaning.
- Specialized Stone Cleaners: Brands like StoneTech, Weiman, or Granite Gold offer pH-neutral formulas designed to clean and protect stone without damaging sealants.
| Cleaner Type | Pros | Cons | Best For |
|---|---|---|---|
| pH-Neutral Dish Soap + Water | Affordable, readily available, gentle, safe for all stone types. | May not tackle tough, set-in stains effectively. | Daily cleaning, light spills, general surface grime. |
| Specialized Stone Cleaner | Formulated for stone, often enhances shine, safe for sealants, can have stain protectors. | More expensive, specific brands needed for best results. | Daily cleaning, enhanced shine, light stain prevention. |
| Acidic Cleaners (Vinegar, Lemon) | Effective for some non-stone surfaces, natural. | Will etch and dull natural stone, degrade sealants. | Absolutely NOT for stone countertops. |
| Abrasive Cleaners (Powders, Pads) | Good for tough scrubbing on resilient surfaces. | Will scratch and damage stone surfaces irreversibly. | Absolutely NOT for stone countertops. |
Pros & Cons of pH-Neutral Stone Cleaners
Using pH-neutral stone cleaners offers significant advantages, but they also have limitations.
Pros
- Specifically formulated to be safe for all natural and engineered stone types.
- Helps maintain the integrity of your stone’s sealant, extending its life.
- Prevents etching, dulling, and discoloration often caused by harsh chemicals.
- Often leave a streak-free finish and can enhance the stone’s natural luster.
Cons
- Generally more expensive than generic all-purpose cleaners.
- May not be powerful enough for very stubborn, deeply set stains, requiring a poultice instead.
- Requires a specific purchase, rather than using readily available household items.
Common Mistakes and How to Fix Them
Even with good intentions, simple errors can cause significant damage to your stone. Here are the most common pitfalls:
- Using the Wrong Cleaner: This is the biggest culprit. An acidic cleaner on marble can cause immediate, irreversible etching. If you’ve accidentally etched a polished surface, minor etching might be improved by a professional honing and polishing service. For DIY, specific polishing compounds for stone can sometimes lessen the appearance of light etching.
- Not Wiping Spills Immediately: Especially on porous natural stone, a spill left for even a few minutes can penetrate and become a deep stain. Always have a soft cloth handy for quick cleanups.
- Over-Wetting Surfaces: Allowing water to pool, especially around sink edges, can lead to water spots, mineral buildup, or even penetrate seams causing structural issues over time. Always dry thoroughly.
- Skipping Sealing (for natural stone): An unsealed or poorly sealed natural stone is an open invitation for stains. If you’ve neglected sealing, clean your countertops thoroughly, allow them to dry for 24 hours, then apply a high-quality penetrating sealer.
Expert Tips for Long-Term Stone Countertop Care
Beyond daily cleaning, proactive measures ensure your stone countertops remain a stunning feature for decades. In my years working with residential renovations at B Collins Construction, I’ve seen firsthand how proper preventative care dramatically extends the life and beauty of a kitchen countertop.
- Use Trivets and Hot Pads: While some stone (like granite) can withstand heat, rapid temperature changes can still cause thermal shock and cracking. Always use trivets under hot pots and pans.
- Employ Cutting Boards: Never cut directly on your stone. Not only can you dull your knives, but you risk scratching the surface.
- Coasters are Your Friends: Place coasters under glasses, especially those containing citrus juices, alcohol, or anything carbonated, to prevent etching and water rings.
- Regular Inspections: Periodically check for any small chips, cracks, or signs of sealant wear. Addressing minor issues early can prevent them from becoming costly repairs. For extensive damage or dullness, consider professional deep cleaning, honing, or polishing services every few years. This specialized work can restore the stone’s original finish and luster.
This complete care approach extends the life of your entire kitchen and preserves the aesthetic appeal of your home for years to come.

Frequently Asked Questions
Can I use Lysol or Clorox wipes on stone countertops?
It’s best to avoid Lysol or Clorox wipes on natural stone. Many of these wipes contain acidic ingredients or harsh chemicals that can etch, dull, or degrade the sealant on granite, marble, and other porous stones. Stick to pH-neutral cleaners or plain soap and water for safety and longevity.
How often should I clean my stone countertops?
For optimal hygiene and appearance, clean your stone countertops daily with a soft cloth and a mild, pH-neutral solution. Promptly wipe up any spills. Deep cleaning or addressing specific stains can be done as needed, typically weekly or monthly depending on usage.
What should I do if my marble countertop gets etched?
If your marble countertop gets etched by an acidic spill, don’t scrub it. For minor etching, a specialized marble polishing powder or paste might help to restore the finish. For deeper or widespread etching, professional honing and polishing by a stone restoration expert is often required to repair the damage.
Are there natural cleaners safe for stone?
The safest natural cleaner for stone countertops is a mixture of warm water and a few drops of pH-neutral dish soap. While ingredients like baking soda can be used in poultices for specific stains, acidic natural cleaners like vinegar or lemon juice should never be used on natural stone.
Does sealing stone countertops prevent all stains?
Sealing significantly reduces the porosity of natural stone, making it highly resistant to stains, but it doesn’t make it stain-proof. Spills, especially acidic or oil-based ones, should still be wiped up immediately. Sealing provides a protective barrier, buying you time to clean before a stain sets.
Can I use glass cleaner on my stone countertops?
Most glass cleaners contain ammonia or other chemicals that are too harsh for natural stone countertops and can degrade their sealant or cause etching. While they might be acceptable for engineered quartz in small amounts, it’s safer and better for the stone’s longevity to use a pH-neutral stone cleaner.
Conclusion
Proper care for your stone countertops doesn’t have to be complicated. By understanding your specific stone type, committing to a simple daily cleaning routine with pH-neutral products, avoiding harsh chemicals, and maintaining your sealant, you can ensure your countertops remain a beautiful, durable part of your home for years to come. A little knowledge and consistent effort go a long way in preserving your investment. Information current as of August 2026; pricing and product details may change.
Repairs & Maintenance
Fix a Well Pump: Diagnosing & Solving Common Water Issues
When your well pump fails, it can be a major disruption. Learning to fix a well pump yourself can save significant time and money, addressing common problems like no water or low pressure effectively.

The moment your faucet runs dry, or water pressure drops to a trickle, the well pump immediately becomes the prime suspect. For homeowners relying on a private well, understanding how to fix a well pump can be a critical skill, saving both time and the considerable expense of an emergency service call. Most well pump issues aren’t catastrophic failures requiring a full replacement; often, they stem from easily diagnosable and repairable components within the well water system.
Key Takeaways
- Always check power supply and circuit breakers first when a well pump fails.
- A malfunctioning pressure switch is a frequent culprit for no water or constant cycling.
- Diagnose specific symptoms like low pressure or air in lines to target the correct component.
- Understanding if you have a submersible or jet pump guides your troubleshooting and repair approach.
- Consult your well log for crucial information on well depth, pump type, and installation details.
Initial Diagnostics: No Water or Low Pressure
When your well water system falters, the first step is a systematic check, starting with the simplest possibilities. Before you even think about complex repairs to fix a well pump, confirm that power is reaching the pump and that no common electrical issues are at play. Worth noting: A complete lack of water often points to an electrical issue or a critical component failure, while low pressure suggests a different set of problems. Many homeowners overlook the basics, rushing to more complicated conclusions.
Check the Power Supply
Start at your home’s main electrical panel. Locate the circuit breaker dedicated to your well pump. If it’s tripped, reset it. If it immediately trips again, a short circuit or an overloaded motor is likely, signaling a deeper electrical or mechanical problem that needs professional attention. Also, check for any external disconnect switches near the pressure tank or well head. In real terms, a tripped breaker is a safety mechanism, not just an annoyance. Repeated trips indicate the pump is drawing too much current, often due to a failing motor, seized impeller, or wiring fault. Ignoring this can lead to serious damage or fire hazards.
Inspect the Pressure Switch
The pressure switch is the brain of your well system, telling the pump when to turn on and off based on water pressure. It’s typically located near the pressure tank and connected to a small diameter pipe. If the power is on but the pump isn’t running, this switch is often the next component to inspect. Visually inspect the contacts inside the pressure switch. They can become pitted, burned, or corroded over time, preventing a proper electrical connection. If the contacts look bad, or if you hear a clicking sound but no pump activation, the switch is a prime candidate for replacement.
Understanding Your Well System: A Brief Refresher
Before attempting to fix a well pump, it’s crucial to understand the two primary types: submersible and jet pumps. Their location and operational principles dictate the troubleshooting and repair procedures.
Submersible Pumps
Submersible pumps are installed deep inside the well casing, below the water line. They push water upwards, making them highly efficient for deep wells (typically over 25 feet). Their main components include the pump motor, impeller stages, and an electrical cable running from the surface controller. The wrinkle here: diagnosing a submersible pump often requires pulling it from the well, a task best left to professionals due to the specialized equipment and safety risks involved. However, surface-level components like the pump controller or pressure switch are within DIY scope.
Jet Pumps
Jet pumps are located above ground, usually in a utility room or well house. They pull water from the well using suction, often with the assistance of an ejector assembly (venturi and nozzle) located in the well for deeper applications (deep well jet pumps). They are typically used for shallower wells (under 25 feet). For these systems, issues like loss of prime or suction leaks are common. Their accessibility makes them more amenable to DIY troubleshooting and repair, particularly for tasks like priming or checking connections.
Troubleshooting the Pressure Switch
A faulty pressure switch is a very common reason a well pump won’t run or cycles erratically. This small device plays a big role in your water supply.
Testing and Replacing the Switch
First, always turn off the power to the pump at the breaker. Remove the cover of the pressure switch. Use a multimeter to test for continuity across the contacts when the system pressure is below the cut-in setting. If there’s no continuity, the switch is likely faulty. A new pressure switch typically costs between $25 and $75 as of July 2026, making it an affordable first repair. To replace it, disconnect the wires, unscrew the old switch, apply thread sealant to the new one, and screw it in. Reconnect the wires, ensuring they match the original configuration (line voltage to one side, pump wires to the other).
Temporary Quick Fix (Caution Advised)
In an emergency, if the pressure switch contacts are merely stuck or slightly corroded, you might gently tap the switch housing with a screwdriver handle. This can sometimes dislodge the contacts and get the pump running temporarily. However, this is a very short-term solution and indicates the switch needs immediate replacement. Never manually hold the contacts closed; this can cause the pump to run dry and burn out.
Common Well Pump Symptoms and Fixes
Beyond a complete pump failure, several other symptoms point to specific problems within your well water system. Addressing these often involves targeting a particular component.
Pump Cycling On and Off Frequently
If your pump turns on and off rapidly, even when no water is being used, it’s called short cycling. This usually indicates a problem with the pressure tank, specifically a loss of air charge, or a leak in your plumbing system. A common issue is a ruptured bladder inside the pressure tank, which allows water to fill the air chamber. To check the pressure tank, turn off the pump and drain all water from the system. Use a tire pressure gauge on the air valve at the top of the tank. The pressure should be 2 PSI below the pump’s cut-in pressure (e.g., 28 PSI for a 30/50 switch). If it’s low, add air with a compressor. If water comes out of the air valve, the bladder is ruptured, and the tank needs replacement.
Low Water Pressure
Gradual drops in water pressure often point to issues like clogged sediment filters, a partially obstructed foot valve or check valve in the well, or even declining well yield. For jet pumps, a worn impeller can also reduce flow. For submersible pumps, wear and tear on the impellers over years of operation will diminish performance. Worth noting: If the low pressure is consistent across all fixtures, the problem is likely at the source (pump or tank). If it’s only at one fixture, it’s a localized plumbing issue. Checking and replacing filters (often found on the main water line or before a water softener) is a good first step.
Air in the Lines or Sputtering Water
Spitting or sputtering water, especially from a jet pump system, indicates air entering the suction line. This could be a loose connection, a cracked pipe between the pump and the well, or the well water level dropping below the intake pipe (drawdown). For jet pumps, a loss of prime is a frequent cause. To re-prime a jet pump, turn off the power, remove the priming plug, and slowly fill the pump housing with water until it overflows. Replace the plug and turn the pump back on. Listen for the pump to build pressure. If it loses prime repeatedly, a leak in the suction line or a faulty foot valve in the well is the likely culprit.
Submersible vs. Jet Pumps: Repair Considerations
The type of well pump you have significantly impacts the feasibility and complexity of DIY repairs. Knowing the differences helps you decide when to call a professional.
Jet Pump Repairs: More Accessible
Jet pumps are generally easier for homeowners to service because all major components are above ground. Common repairs include replacing the pressure switch, re-priming the pump, replacing worn impellers or diffusers (often found in a pump repair kit), and fixing suction line leaks. The motor itself can also be replaced independently of the pump housing in some models. The main challenge is ensuring a watertight seal on all connections to prevent air intrusion, which can cause priming issues. Tools typically needed include wrenches, screwdrivers, pipe sealant, and a bucket for priming.
Submersible Pump Repairs: Professional Territory
Submersible pump issues are far more challenging for DIYers. If the issue is within the pump or motor itself, the entire unit must be pulled from the well. This requires specialized lifting equipment, knowledge of well casing integrity, and the ability to work with heavy, submerged electrical components. A damaged submersible pump motor or impeller typically means replacing the entire pump assembly. However, surface-level components like the pump controller box (which houses capacitors and relays) are often repairable. A faulty capacitor can prevent the pump from starting, and these are often replaceable components within the controller.
Step-by-Step: Replacing Key Components
For common issues, a few key components are typically replaced. Always ensure the power is off at the breaker before starting any work.
Replacing the Pressure Switch
- Turn off Power: Locate the well pump’s circuit breaker in your electrical panel and switch it to the OFF position. Verify no power is present with a non-contact voltage tester.
- Drain System Pressure: Open a nearby faucet to relieve all water pressure in the system. The pressure gauge should drop to zero.
- Disconnect Wires: Remove the cover from the old pressure switch. Carefully note or take a photo of the wiring connections. Disconnect all wires.
- Remove Old Switch: Use a pipe wrench to unscrew the old pressure switch from the manifold. Be prepared for a small amount of residual water.
- Prepare New Switch: Apply PTFE thread sealant tape or pipe dope to the threads of the new pressure switch.
- Install New Switch: Screw the new switch firmly into the manifold, ensuring it’s oriented correctly. Tighten it securely but avoid overtightening.
- Reconnect Wires: Reconnect the wires exactly as they were on the old switch. Ensure all connections are tight and secure.
- Restore Power & Test: Turn the circuit breaker back ON. The pump should kick on and begin to build pressure. Monitor the pressure gauge for correct cut-in and cut-off points.
Replacing the Pump Controller or Capacitor
For submersible pumps, the controller box is usually mounted near the pressure tank. This box contains critical starting components like capacitors and relays. A common failure is a burnt-out capacitor, which can prevent the pump from starting or cause it to hum without turning.
- Safety First: Turn off the power at the main breaker. This box contains high voltage.
- Open Controller Box: Carefully open the cover of the controller box.
- Inspect Components: Look for swollen capacitors or burnt wires. Capacitors store a charge, so discharge them safely with a screwdriver across the terminals (wearing rubber gloves) before handling.
- Replace Faulty Part: Disconnect the old capacitor or relay, noting its orientation. Install the new component, ensuring proper wiring. New capacitors typically cost $50-$150.
- Close & Test: Close the box, restore power, and check if the pump operates correctly.
The Well Log Advantage: Your Hidden Diagnostic Tool
One often-overlooked resource for homeowners troubleshooting a well pump is the well log. This document, typically filed with your local health department or state environmental agency, contains vital information about your well’s construction and original pump installation. It’s a unique insight rarely mentioned in generic DIY guides. The well log provides details such as the total well depth, static water level, pump setting depth, casing diameter, and sometimes even the original pump model. Knowing the static water level and pump depth can help diagnose issues like well drawdown, especially if your pump is cycling frequently due to lack of water. If you’re consistently losing prime with a jet pump, the log might reveal a deeper well than the pump is designed for. Accessing this information provides a baseline for understanding your system’s capabilities and limitations, guiding more accurate diagnosis.
Repair vs. Replacement: Making the Call
Deciding whether to repair a well pump or opt for a full replacement is a crucial decision, balancing immediate costs with long-term reliability. The age of your pump, the cost of the repair, and the frequency of past issues all play a role.
| Factor | Repair | Replacement |
|---|---|---|
| Cost (July 2026) | $25-$400 (parts & minor labor) | $800-$4,000+ (pump, installation, labor) |
| Common Issues | Pressure switch, controller, minor leaks, priming | Motor failure, critical component wear, well depletion |
| Pump Age | Under 10-15 years (jet), under 15-20 years (submersible) | Over 15-20 years, frequent breakdowns |
| Reliability | Restores function, but old components may fail next | New warranty, improved efficiency, peace of mind |
| Efficiency | Maintains existing efficiency | Potentially higher efficiency with newer models |
Pros of Repair
- Lower upfront cost.
- Quicker resolution for simple issues.
- Extends the life of an otherwise functional pump.
Cons of Repair
- doesn’t address underlying system age.
- Risk of cascading failures in older systems.
- May only offer a temporary fix if the pump motor is nearing its end-of-life.
Common Mistakes to Avoid When Fixing Your Well Pump
Even experienced DIYers can make errors when working on well pump systems. Avoiding these common pitfalls can save you from further damage or injury.
- Forgetting to Turn Off Power: This is paramount. Working on electrical components with live power is extremely dangerous. Always double-check with a voltage tester.
- Incorrectly Wiring Components: Miswiring a pressure switch or pump controller can damage the pump motor or create a fire hazard. Always label wires or take clear photos before disconnecting.
- Ignoring Pressure Tank Issues: Many pump problems are symptoms of a failing pressure tank, not the pump itself. Replacing a pump without checking the tank is a wasted effort and expense.
- Using Improper Tools: Forcefully turning seized pipes or components can cause leaks or break fittings. Use the correct size wrenches and use.
- Disregarding Well Water Level: Running a pump dry, even for a short period, can severely damage the motor. Always confirm there’s adequate water in the well, especially for jet pumps during priming.
Expert Tips for Well Pump Longevity
Proactive maintenance and informed decisions can significantly extend the life of your well pump and minimize unexpected failures.
- Regular Pressure Tank Checks: Check your pressure tank’s air charge annually. Maintaining the correct air pressure reduces pump cycling and wear.
- Install a Sediment Filter: A whole-house sediment filter protects your pump and plumbing from abrasive particles, especially if your well produces sandy water. This is particularly crucial for jet pumps, where impellers can quickly wear down.
- Monitor Well Water Levels: If your well has historically low yield or you experience droughts, consider installing a low-water cutoff switch. This device automatically shuts off the pump if the water level drops too low, preventing it from running dry.
- Annual Professional Inspection: Even for DIY-savvy homeowners, an annual inspection by a licensed well contractor can identify subtle issues before they become major problems. They can check current draw, insulation resistance, and overall system health.
- Avoid Oversizing Your Pump: Installing a pump that’s too powerful for your well’s yield can lead to rapid cycling and premature failure. Always match the pump’s capacity to your well’s specific characteristics and household demand.
Frequently Asked Questions
Why is my well pump humming but not pumping water?
A humming pump often indicates an electrical issue preventing the motor from starting. This could be a faulty starting capacitor in the pump controller (for submersible pumps) or a seized impeller. Check the controller first, and if accessible for jet pumps, inspect the impeller for obstructions.
How long do well pumps typically last?
The lifespan of a well pump varies by type and usage. Submersible pumps can last 15-25 years, while jet pumps typically last 10-15 years. Regular maintenance, proper installation, and consistent well water levels contribute significantly to their longevity.
Can I fix a well pump if it’s completely submerged?
Most internal repairs for a completely submerged submersible pump are not DIY-friendly. Pulling the pump from the well requires specialized equipment and expertise. However, surface-level components like the pressure switch or pump controller are often repairable by homeowners.
What is the average cost to have a professional fix a well pump?
Professional well pump repair costs vary widely depending on the issue and pump type. Simple repairs like a pressure switch replacement might cost $300-$500, while pulling and replacing a deep well submersible pump can range from $1,500 to over $4,000, including parts and labor, as of July 2026.
How often should I check my pressure tank?
You should check your pressure tank’s air charge at least once a year. Maintaining the correct air pressure is vital for efficient pump operation and prevents short cycling, which can significantly extend the life of your well pump.
What if my well is running dry?
If your well is running dry, the pump will struggle, leading to premature failure. Consider installing a low-water cutoff switch to protect the pump. You may need to explore options like hydrofracking your well, drilling a deeper well, or even installing a storage tank system, which typically require professional consultation.
Conclusion
Diagnosing and repairing common well pump issues can be a manageable task for the informed homeowner. By systematically checking the power supply, troubleshooting the pressure switch, and understanding the specific symptoms of your well water system, you can often restore your water supply without professional intervention. Always prioritize safety, and remember that for deep well submersible pump issues, professional help is often the safest and most efficient path. Proactive maintenance remains your best defense against unexpected failures. Information current as of July 2026; pricing and product details may change.

Asiatic Lily Care: Avoiding Common Mistakes for Vibrant Blooms

Fountain Grass: A Guide to Graceful Garden Design

Gerbera Daisies: Vibrant Blooms for Your Home & Garden

Choosing Expert Foundation Repair Companies for Your Home

Bouncy Floors: Diagnosing Sagging & Stiffening Joists

Nellie Stevens Holly Planting: Your Guide to a Resilient Evergreen
-
 Repairs & Maintenance2 months ago
Choosing Expert Foundation Repair Companies for Your Home
-
 Repairs & Maintenance2 months ago
Bouncy Floors: Diagnosing Sagging & Stiffening Joists
-
 Outdoor & Garden2 months ago
Nellie Stevens Holly Planting: Your Guide to a Resilient Evergreen
-
 Tools & Materials1 month ago
Bolt Cutters: Your Essential Guide to Heavy-Duty Cutting
-

 Repairs & Maintenance2 months ago
Essential Furnace Maintenance for Peak Home Heating
-

 Home Improvement2 months ago
Water in Crawl Space: Identify, Fix, and Prevent Damage
-

 Outdoor & Garden1 month ago
Brush Cutter Essentials: Clearing Overgrown Land Effectively
-

 Home Improvement2 months ago
The Two Grades of Home: Condition and Land