
Outdoor & Garden
Cherokee Purple Tomatoes: Are They Really as Easy as Everyone Says?
Cherokee Purple tomatoes are legendary for their rich, complex flavor, but their ‘easy to grow’ reputation often overlooks specific challenges. Discover expert tips to truly unlock their potential in your garden.


Sarah’s garden yielded an abundance of bright red tomatoes last year, but her coveted Cherokee Purple plants produced fruits that often cracked before full ripeness, or just never developed that deep, complex flavor everyone raves about. It’s a common story. Many gardeners jump into growing Cherokee Purple tomatoes, lured by their legendary taste and unique appearance, only to find that these heirloom beauties demand a bit more nuanced care than their reputation sometimes suggests.
- Cherokee Purple tomatoes are heirloom varieties known for their distinct dusky-rose color and complex, rich flavor profile.
- Despite their reputation, they require specific care to prevent common issues like fruit cracking and uneven ripening.
- Optimal soil pH, consistent watering, and proper fertilization are crucial for maximizing both yield and flavor intensity.
- Identifying true ripeness involves looking beyond uniform color, often indicated by a slight softening and deep rosy hue despite green shoulders.
- Strategic pruning, sturdy support, and proactive disease management are essential for a successful and flavorful harvest.
The Allure of Cherokee Purple: Beyond Just Color
The Cherokee Purple tomato is an heirloom variety celebrated not just for its striking dusky-rose color, often with greenish shoulders, but for its incredibly rich, complex flavor. Originating from the Cherokee Nation, this cultivar has a history that speaks to generations of careful selection for taste and resilience. It was one of the first of the darker, often called “black,” tomato varieties to gain widespread popularity, distinguishing itself with a unique balance of sweetness, acidity, and a smoky undertone that makes it a favorite among chefs and home gardeners alike. According to Wikipedia, Southern Exposure Seed Exchange first offered it in limited quantities in 1993, quickly establishing its reputation. Worth noting, the deep crimson interior combined with its clear skin gives it that distinctive, almost bruised appearance. This isn’t a flaw; it’s a signature trait. Many gardeners seek out heirloom tomato seeds specifically for this kind of depth, which is often absent in modern hybrid varieties bred primarily for uniformity and shelf life. For those building a solid garden, choosing the right varieties is like selecting the best materials for a construction project – it sets the foundation for success.
Common Misconceptions About Growing Cherokee Purple Tomatoes
One prevalent myth about Cherokee Purple tomatoes is that, as an heirloom, they are inherently difficult to grow. While they do require specific attention, they aren’t fragile; they simply have particular preferences. The real wrinkle here: many guides oversimplify their care, leading new growers to assume a set-it-and-forget-it approach will work. Another common misconception is that all “black” tomatoes taste the same. While many share a rich flavor profile, the Cherokee Purple tomato flavor profile is distinct, often described as more earthy and less tart than some of its darker cousins. Their unique ripening process, where green shoulders persist, often leads gardeners to harvest them too early, missing out on their peak taste. Understanding these nuances is key to a truly rewarding harvest.
Essential Soil & Site Preparation for Optimal Growth
For Cherokee Purple tomatoes, starting with the right soil is paramount. These plants thrive in well-drained, fertile soil rich in organic matter. A slightly acidic to neutral pH, ideally between 6.0 and 6.8, is best. Before planting, consider a soil test to understand your garden’s baseline. Amending heavy clay soils with compost or well-rotted manure improves drainage, while sandy soils benefit from organic matter for water retention. In real terms, this means preparing your beds diligently. For new beds, working in 4–6 inches of good quality compost can significantly improve soil structure and nutrient availability. Choose a site that receives at least 6–8 hours of direct sunlight daily. Good air circulation is also vital to prevent fungal diseases, so avoid planting them in overly crowded areas.

Worth noting, proper staking or caging is critical from the start. These plants can grow quite large and heavy, and providing sturdy support early on prevents stem breakage and keeps fruit off the ground, reducing disease risk. Building solid supports is a foundational step, much like laying a strong concrete slab for a new structure.
Watering and Fertilization Strategies for solid Plants
Consistent watering is perhaps the single most important factor in preventing fruit cracking in Cherokee Purple tomatoes. Irregular watering—periods of drought followed by heavy irrigation—causes the fruit to expand too quickly, leading to splits. Aim for deep, consistent watering, about 1-1.5 inches per week, especially during fruiting. Drip irrigation or soaker hoses are excellent for delivering water directly to the root zone, minimizing evaporation and keeping foliage dry. When it comes to fertilization, a balanced approach is best. During initial growth, a fertilizer slightly higher in nitrogen can promote leafy growth. However, once flowers appear, switch to a fertilizer higher in phosphorus and potassium to support fruit development. Many gardeners opt for organic options like fish emulsion, bone meal, or a balanced granular tomato specific fertilizer. According to the University of California Agriculture and Natural Resources (2023), proper nutrient balance is crucial for heirloom varieties to develop their full flavor and resist stress. Over-fertilizing, especially with nitrogen, can lead to lush foliage but fewer fruits. In my years working in garden design and home improvement, I’ve seen countless times how a simple moisture meter can dramatically improve watering consistency, especially for sensitive heirloom plants. It removes the guesswork and helps prevent both overwatering and underwatering, directly impacting fruit quality and preventing common issues like blossom end rot.
Mastering the Harvest: When is a Cherokee Purple Truly Ripe?
This is where many new growers falter. Unlike uniformly red tomatoes, Cherokee Purple tomatoes often retain green shoulders even when fully ripe. The key indicators are a deep, dusky-rose or brownish-purple color across most of the fruit and a slight softening to the touch. The bottom of the fruit should feel tender but not mushy. The wrinkle here: don’t wait for the green shoulders to disappear completely, as you might end up with overripe, soft fruit. Instead, gently cup the tomato in your hand; if it feels heavy for its size and detaches easily from the vine with a slight twist, it’s likely ready. Harvesting at peak ripeness is essential for experiencing the full, complex Cherokee Purple tomato flavor profile. Picking them a little early can result in a less intense taste. In real terms, a slightly underripe heirloom tomato will be noticeably firmer and lack the aromatic depth. If you’re unsure, pick one and let it sit on the counter for a day or two; the color will deepen, and the texture will soften slightly. However, for the best eating experience, direct-from-the-vine at peak ripeness is unparalleled.
Protecting Your Investment: Pests, Diseases, and Cracking Solutions
Cherokee Purple tomatoes, like most heirloom varieties, can be susceptible to certain pests and diseases. Common issues include early blight, fusarium wilt, and verticillium wilt. Good garden hygiene, such as removing lower leaves to improve air circulation and pruning off diseased foliage promptly, is your first line of defense. Proper plant spacing also helps significantly. For pests like hornworms or aphids, manual removal or organic insecticidal soaps can be effective. The most common physical issue, however, remains fruit cracking. Beyond consistent watering, providing some afternoon shade during intense heatwaves can help. Mulching around the base of the plants also helps regulate soil temperature and moisture, further reducing the risk of cracking.

Worth noting, some cracks are unavoidable with large heirloom varieties, especially after a heavy rain following a dry spell. The goal is to minimize them, not eliminate them entirely. Timely harvesting of ripe fruit also reduces the exposure time to cracking conditions.
Cherokee Purple vs. Its “Black” Cousins: A Flavor Comparison
The world of “black” or dark-colored tomatoes is rich and varied, with many vying for the title of “best tasting.” While Cherokee Purple tomatoes are a benchmark, comparing them to other popular dark heirlooms highlights their unique qualities and helps gardeners choose based on their preferences.
| Variety | Flavor Profile | Ripening Characteristics | Key Growing Trait |
|---|---|---|---|
| Cherokee Purple | Rich, smoky, earthy, balanced sweetness/acidity. | Dusky rose with green shoulders; softens when ripe. | Good disease tolerance but prone to cracking if watering is inconsistent. |
| Black Krim | Slightly salty, intensely sweet, juicy. | Dark reddish-brown to black; often has dark green shoulders. | Can be very prolific; good for cooler climates. |
| Paul Robeson | Complex, sweet, almost spicy, with a hint of citrus. | Dark brick-red to mahogany with green/brown shoulders. | Excellent flavor in a wider range of climates; good productivity. |
| Black from Tula | Deep, smoky, rich, less sweet than others, solid. | Deep brown-black with dark green tops. | Cold tolerant; can be a bit more susceptible to disease. |
The honest answer is that personal preference plays a huge role. Many gardeners love the unique intensity of the Cherokee Purple, while others might prefer the sweeter notes of Black Krim or the spicy undertones of Paul Robeson. Trying a few varieties is the best way to find your ultimate favorite for organic tomato growing.
Maximizing Flavor and Yield: Expert Tips for the Dedicated Grower
To truly unlock the potential of your Cherokee Purple tomatoes, go beyond the basics. Here are some advanced strategies:
- Strategic Pruning: While some heirlooms benefit from minimal pruning, for Cherokee Purple, judicious removal of suckers (shoots growing in the leaf axils) can direct energy into fruit production and improve air circulation. Aim for a single or double leader system, especially for indeterminate varieties, to manage growth and focus on larger, higher-quality fruit.
- Companion Planting: Incorporating basil nearby is not just for culinary convenience; it’s believed to enhance tomato flavor and deter some pests. Marigolds can also help repel nematodes.
- Calcium Boost: To combat blossom end rot, which can sometimes affect heirlooms, ensure adequate calcium in your soil. While soil tests are ideal, a quick fix can be adding crushed eggshells or a calcium supplement to the planting hole.
- Morning Sun, Afternoon Shade: In regions with intense summer heat, providing some afternoon shade can prevent sunscald on the fruit and reduce plant stress, which contributes to cracking. This is particularly important for dark tomato cultivation, as darker pigments can absorb more heat.
The wrinkle here: don’t over-prune, as foliage protects fruits from sunscald. It’s a delicate balance. Observing your specific plants and climate conditions will guide your decisions.
Pros and Cons of Growing Cherokee Purple Tomatoes
Pros
- Exceptional, complex, and rich flavor profile.
- Striking, unique appearance for culinary appeal.
- Heirloom status means you can save seeds for future seasons.
- Relatively good disease tolerance compared to some other heirlooms.
- High demand, often fetching premium prices at farmer’s markets.
Cons
- Prone to cracking, especially with inconsistent watering.
- Uneven ripening (green shoulders) can be confusing for new growers.
- Requires strong staking due to large plant size and heavy fruit.
- Can be more susceptible to sunscald in intense heat without protection.
- Longer maturation time than many hybrid varieties.
Common Mistakes to Avoid with Cherokee Purple
Many common missteps with Cherokee Purple tomatoes stem from treating them like generic red hybrids. One frequent error is inconsistent watering. This stress leads directly to the dreaded fruit cracking, ruining a significant portion of the harvest. Instead, commit to a regular watering schedule and consider mulch to help maintain soil moisture. Another mistake is harvesting too early. Seeing green shoulders, gardeners assume the fruit isn’t ripe. This denies the tomato the crucial final days on the vine where its complex flavors fully develop. Learn the tactile cues – a gentle squeeze should yield slightly, and the fruit should separate easily. Finally, neglecting proper support for these vigorous plants can lead to broken branches and fruit lying on the ground, making them vulnerable to pests and disease.
Expert Tips for a Bountiful Cherokee Purple Harvest
For truly exceptional Cherokee Purple tomatoes, consider these insights. First, plant them deep: bury two-thirds of the stem, as tomatoes can root along the stem, creating a stronger foundation. This is a simple construction trick for plants. Second, ensure good air circulation around the plants by pruning lower leaves and maintaining adequate spacing. This is crucial for preventing common fungal issues like blight, which can quickly decimate a crop. Third, don’t underestimate the power of a strong support system. A solid cage or sturdy stake, ideally installed at planting, will prevent your heavy fruit-laden vines from collapsing. Consider a Florida weave system for multiple plants, which provides excellent support as the plants grow. Lastly, be patient with ripening. The green shoulders are normal; focus on the overall color and softness for the peak flavor that makes Cherokee Purple tomatoes so revered.

Frequently Asked Questions
What makes Cherokee Purple tomatoes unique?
Cherokee Purple tomatoes stand out due to their distinct dusky-rose to brownish-purple color with green shoulders, and their intensely rich, smoky-sweet flavor profile. They are also known for their heirloom status, meaning they are open-pollinated and have a long, storied history, often linked to the Cherokee Nation.
When is the best time to plant Cherokee Purple tomatoes?
The best time to plant Cherokee Purple tomatoes is after all danger of frost has passed in your region, typically when nighttime temperatures consistently stay above 50°F (10°C). This usually falls between late spring and early summer, depending on your local climate and last frost date.
How do I prevent cracking in my Cherokee Purple tomatoes?
Preventing cracking largely comes down to consistent watering. Avoid periods of drought followed by heavy rainfall or irrigation, which causes rapid fruit expansion. Mulching around the plants helps maintain even soil moisture. Providing some afternoon shade during extreme heat can also reduce stress and cracking.
Can I grow Cherokee Purple tomatoes in containers?
Yes, you can grow Cherokee Purple tomatoes in large containers, but they will require significant space. Choose a container at least 15–20 gallons (60-75 liters) in size, ensure excellent drainage, and provide sturdy staking or caging. Container plants tend to need more frequent watering and feeding than in-ground plants.
What are the common diseases affecting Cherokee Purple?
Like many tomato varieties, Cherokee Purple can be susceptible to fungal diseases such as early blight, fusarium wilt, and verticillium wilt. Good air circulation, proper spacing, removal of lower leaves, and crop rotation are key preventative measures. Using disease-resistant varieties when possible is also a good strategy.
How long does it take for Cherokee Purple tomatoes to ripen?
From transplanting, Cherokee Purple tomatoes typically take about 80–90 days to reach maturity and begin ripening. This is a relatively long season for a tomato, so starting seeds indoors 6–8 weeks before your last frost date is recommended for an earlier harvest.
Conclusion
Growing Cherokee Purple tomatoes is a rewarding effort for any gardener seeking truly exceptional flavor. While their reputation as an “easy” heirloom can be a bit misleading, understanding their specific needs for consistent care, proper soil, and timely harvesting transforms potential challenges into opportunities for success. By paying attention to details like watering, soil amendments, and strategic pruning, you can cultivate a plant that not only thrives but produces an abundance of those legendary, rich-tasting fruits. Your actionable takeaway: focus on consistent moisture and patience with ripening. These two factors alone will significantly elevate your Cherokee Purple tomato harvest, allowing you to savor the unique complexity that has made this heirloom a garden staple for generations. Building a foundation of good practices ensures your garden project, like any construction, stands strong and yields truly valuable results. Information current as of August 2026.



Outdoor & Garden
Asiatic Lily Care: Avoiding Common Mistakes for Vibrant Blooms
Asiatic lilies bring a burst of color to any garden. This guide shares essential care tips and common mistakes to avoid, ensuring your plants thrive for years, enhancing your home’s outdoor appeal.
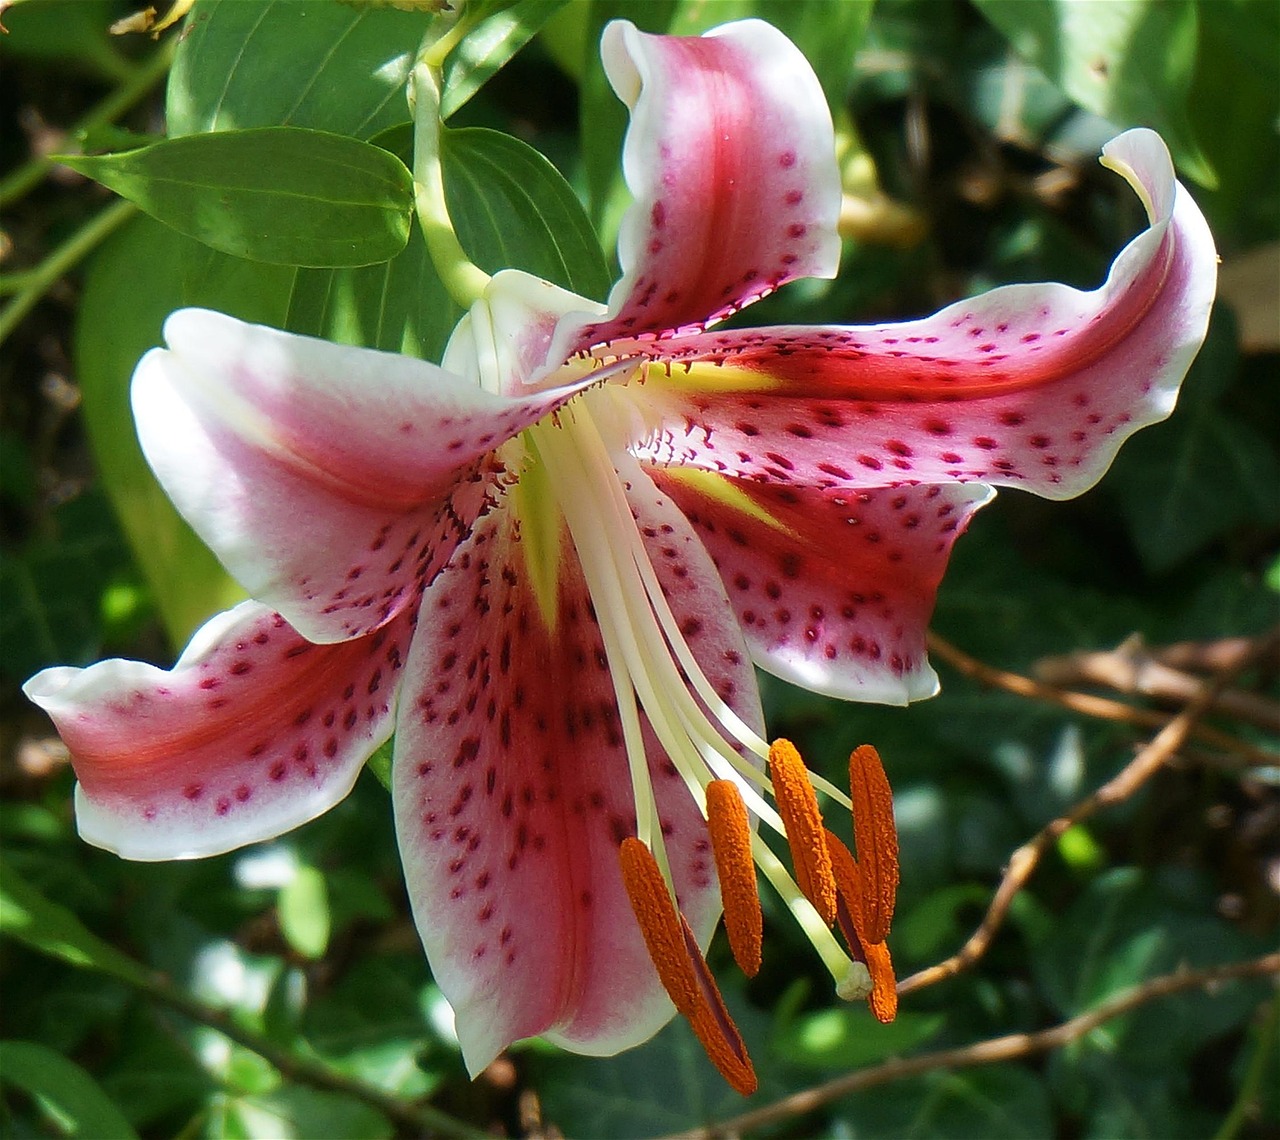
When planning a vibrant garden, few flowers offer the immediate, striking impact of the asiatic lily. These cheerful, upward-facing blooms are a staple for gardeners seeking reliable summer color, but cultivating them to their full potential requires understanding a few key principles and, more importantly, avoiding common pitfalls that can stunt their growth or even lead to their demise. Most gardeners assume all lilies are created equal, but asiatic lilies have distinct needs that, if overlooked, can lead to disappointing results. The honest answer to achieving a stunning display isn’t just about planting bulbs; it’s about meticulous site selection, proper planting, and consistent, informed care that anticipates their specific challenges.
Key Takeaways
- Asiatic lilies thrive in full sun with well-draining, slightly acidic soil.
- Incorrect planting depth is a common mistake, leading to weak stems or rot.
- Regular watering and balanced fertilization are crucial, especially during blooming.
- Vigilant pest and disease management, particularly for lily beetles and botrytis blight, protects your investment.
- These lilies are highly toxic to cats; consider this when planting in pet-friendly gardens.
Understanding the Asiatic Lily
Asiatic lilies, members of the Lilium genus, are prized for their hardiness, vibrant colors, and early-to-midsummer bloom time. Unlike some of their fragrant cousins, Asiatic lilies are largely unscented, making them ideal for those sensitive to strong floral perfumes or for cutting gardens where scent might compete. These lilies are typically compact, reaching heights of 2 to 4 feet, with sturdy stems that rarely require staking. Their flowers are often upward-facing, displaying a wide array of colors from brilliant reds and oranges to soft yellows, pinks, and pure whites, often with freckled throats. Worth noting, Asiatic lilies are among the easiest true lilies to grow, making them a fantastic choice for both novice and experienced gardeners looking to add vertical interest and bold splashes of color to their landscape design.
Choosing the Right Spot: Sun and Soil Essentials
The success of your asiatic lily hinges significantly on site selection. They are sun-worshipers, requiring at least six hours of direct sunlight daily to produce strong stems and abundant blooms. Anything less, and you’ll likely see leggy growth and fewer flowers. Equally critical is excellent soil drainage. Lily bulbs are highly susceptible to rot in waterlogged conditions. In real terms, this means heavy clay soils are a major problem. Amending such soil with generous amounts of organic matter—like compost or well-rotted manure—is essential to improve drainage and aeration. A slightly acidic to neutral pH (6.0-7.0) is generally preferred. When we’ve worked on projects involving lily beds, we often incorporate raised beds or amend existing soil with a mixture of sand and compost to ensure optimal drainage, especially in areas with naturally dense soil.
Planting Asiatic Lily Bulbs: The Right Way
Proper planting depth and spacing are paramount. Plant asiatic lily bulbs in spring or fall, once the danger of hard frost has passed for spring planting. Dig a hole that’s roughly three times as deep as the bulb is tall. For a 2-inch bulb, this means a 6-inch deep hole. Place the bulb with the pointed end facing up. Space individual bulbs about 6–8 inches apart to allow for good air circulation and future growth. Crowding can lead to disease. After placing the bulb, backfill with amended soil and water thoroughly to settle the soil around it. This initial watering is crucial for root establishment. The wrinkle here: planting too shallow can expose the emerging shoots to late frosts and lead to weaker stems. Planting too deep can cause the bulb to expend too much energy reaching the surface, delaying blooms or causing rot.
Watering and Feeding for Peak Performance
Consistent moisture is vital, particularly during the growing season and flowering period. Aim for about 1 inch of water per week, either from rain or irrigation. It’s better to water deeply and less frequently than to give shallow, daily sprinkles, as deep watering encourages stronger root development. Asiatic lilies benefit from a balanced fertilizer application in early spring as new growth emerges, and again after blooming. A slow-release granular fertilizer, or a liquid feed diluted to half strength, works well. Avoid high-nitrogen fertilizers, which promote leafy growth at the expense of flowers. Over-fertilization, especially with nitrogen, is a common mistake that can lead to lush foliage but sparse blooms, and may even burn the roots. Always follow product instructions carefully.
Asiatic Lily vs. Oriental Lily: What’s the Difference?
While both are popular garden lilies, Asiatic and Oriental varieties have distinct characteristics influencing their care and aesthetic use. Understanding these differences helps in selection for your specific garden needs.
| Feature | Asiatic Lily | Oriental Lily |
|---|---|---|
| Fragrance | None or very mild | Strong, sweet, often heady |
| Bloom Time | Early to mid-summer | Late summer to early fall |
| Flower Appearance | Upward or outward facing; varied colors, often bright | Outward or downward facing; larger, often white, pink, red with ruffled petals |
| Foliage | Narrower leaves | Broader leaves |
| Height | 2-4 feet (more compact) | 3-6 feet (taller, often needs staking) |
| Hardiness | Very hardy (Zones 3-8) | Less hardy (Zones 5-9) |
| Growth Habit | Sturdy stems, generally self-supporting | Often needs staking due to large flowers/height |
For quick, vibrant, and low-maintenance color, especially in colder climates, asiatic lilies are the go-to. If you desire intense fragrance and large, dramatic blooms later in the season, and are in a milder zone, Oriental lilies are a good choice, though they often require more support.
Tackling Pests and Diseases: Common Asiatic Lily Problems
Even hardy asiatic lilies aren’t immune to problems. The notorious lily beetle (Liliaceous lilii) is a major threat, capable of defoliating plants rapidly. These bright red beetles and their larvae (which often cover themselves in their own excrement for camouflage) should be hand-picked and destroyed. Fungal diseases like botrytis blight can also be problematic, especially in humid conditions or with poor air circulation. Symptoms include brown spots on leaves and flowers. To prevent this, ensure good spacing, avoid overhead watering, and consider a preventative fungicide if conditions are consistently wet. Early detection and treatment are key. In my years assisting homeowners with landscape design, I’ve seen entire lily beds decimated by lily beetles if not caught early. Regular inspection, particularly in spring as new shoots emerge, is crucial for effective pest control.
Winterizing and Long-Term Care
Asiatic lilies are generally hardy in USDA Zones 3-8, meaning they can typically overwinter in the ground. Once the foliage yellows and dies back in late fall, cut the stems down to about 2–3 inches above the soil line. This helps prevent diseases from overwintering. Applying a layer of mulch (2-4 inches of straw, shredded leaves, or wood chips) over the planting area provides additional insulation for the bulbs, especially in colder regions or during exceptionally harsh winters. Remove this mulch in early spring to allow new shoots to emerge. Division is rarely necessary for asiatic lilies, but if you notice a decline in bloom production after several years, or if clumps become too dense, you can carefully lift and divide the bulbs in early fall. Replant them immediately, following the original planting guidelines.
The Critical Pet Consideration: Toxicity to Cats
This is a non-negotiable point for any gardener with feline companions: asiatic lilies are highly toxic to cats. Ingesting even small amounts of any part of the plant—leaves, stems, flowers, pollen, or even water from a vase—can lead to severe kidney failure, which can be fatal if not treated immediately. According to the ASPCA, all true lilies (including asiatic lilies) pose this significant risk. If you have cats, it’s strongly advised to avoid planting asiatic lilies in your garden or bringing them indoors. If accidental ingestion is suspected, contact your veterinarian immediately. For homeowners with cats who still want the lily aesthetic, consider cat-safe alternatives like daylilies (Hemerocallis, which are not true lilies) or other vibrant, non-toxic flowering plants. This awareness is crucial for pet safety.
Common Mistakes to Avoid with Asiatic Lilies
Many gardeners inadvertently make errors that prevent their asiatic lilies from thriving. Here are the most prevalent, and how to sidestep them:
1. Incorrect Planting Depth or Spacing
Planting too shallow or too deep can stress the bulb, leading to weak growth or rot. Similarly, crowding bulbs inhibits air circulation, inviting fungal diseases. Always measure your planting depth and adhere to the recommended spacing.
2. Poor Drainage
This is arguably the biggest killer of lily bulbs. Standing water suffocates the bulbs and promotes rot. If your soil is heavy clay, don’t just dig a hole; amend the entire planting area or opt for raised beds to ensure water drains away efficiently.
3. Insufficient Sunlight
While some plants tolerate partial shade, asiatic lilies demand full sun. Planting them in a shady spot will result in leggy, weak plants that produce few, if any, flowers. Observe your garden’s sunlight patterns throughout the day before planting.
4. Premature Foliage Removal
After blooming, it’s tempting to cut back all the foliage for neatness. However, those green leaves are crucial for photosynthesis, which stores energy in the bulb for next year’s blooms. Wait until the foliage naturally yellows and dies back before cutting.
5. Ignoring Pests and Diseases
Lily beetles, aphids, and botrytis blight can quickly take over. Regular inspection, especially in spring and early summer, allows for early intervention. A small problem is much easier to manage than a full-blown infestation or infection.
Expert Tips for a Showstopping Display
To truly maximize your asiatic lily show, consider these insights from years of garden observation.
- Strategic Grouping: Plant asiatic lilies in groups of odd numbers (3, 5, or 7) rather than single rows. This creates a more natural, impactful visual display that draws the eye.
- Companion Planting: Pair asiatic lilies with plants that have complementary needs and foliage textures. Low-growing annuals or perennials like hostas, daylilies, or salvia at their base can keep the soil cool and shaded, protecting the lily’s ‘feet’ while their ‘heads’ enjoy the sun.
- Staggered Varieties: Choose a mix of early, mid, and late-blooming asiatic lily varieties to extend your season of color from early summer well into mid-summer.
- Deadheading for Aesthetics: While asiatic lilies don’t typically rebloom, deadheading spent flowers (removing just the faded bloom, not the stem or foliage) keeps the plant looking tidy and prevents it from expending energy on seed production.
- Container Growing: For smaller spaces or to manage cat toxicity risks, asiatic lilies can thrive in large pots (at least 10–12 inches in diameter) with good drainage. Asiatic lily allows you to move them to optimal sun or out of reach of curious pets.
Frequently Asked Questions
Do Asiatic lilies spread?
Asiatic lilies spread gradually over time by producing offsets from their main bulb. They are not considered invasive and will generally form a larger clump rather than spreading aggressively throughout the garden. Division every few years can help manage their density.
When is the best time to plant Asiatic lily bulbs?
The best times to plant asiatic lily bulbs are in early spring after the last frost, or in the fall, about 4–6 weeks before the ground freezes. Fall planting allows the bulbs to establish roots before winter dormancy, leading to stronger growth in spring.
How much sun do Asiatic lilies need?
Asiatic lilies require full sun, meaning at least 6 hours of direct sunlight per day. Adequate sunlight is crucial for solid growth, strong stems, and abundant flower production. Less light will result in leggy plants and reduced blooming.
Are Asiatic lilies perennial?
Yes, asiatic lilies are true perennials. They return year after year from their underground bulbs, typically increasing in vigor and number of blooms over time if provided with proper care and suitable growing conditions.
How do I care for Asiatic lilies after they bloom?
After blooming, deadhead spent flowers to tidy the plant and prevent seed formation. Allow the foliage to remain on the plant, as it photosynthesizes and stores energy in the bulb for next year’s growth. Cut back the yellowed foliage in late fall.
Do Asiatic lilies attract pollinators?
While asiatic lilies are not as strong a draw for pollinators as some other flowering plants due to their lack of fragrance, their bright, open flowers can still attract some bees and butterflies, especially those seeking visual cues for nectar.
What is the ideal soil for Asiatic lilies?
The ideal soil for asiatic lilies is well-draining, rich in organic matter, and has a slightly acidic to neutral pH (6.0-7.0). Good drainage is paramount to prevent bulb rot, so amend heavy clay soils with compost and sand. Information current as of August 2026.
Outdoor & Garden
Fountain Grass: A Guide to Graceful Garden Design
Fountain grass is a landscaper’s favorite for its elegant plumes and drought resilience. This guide covers everything from selecting the right variety to essential care tips, ensuring your garden thrives with minimal effort.

Sarah, a client in Phoenix, Arizona, once told me her biggest landscape challenge was finding plants that looked good without demanding constant water and attention. She wanted grace, not a burden. Her, solution? Ornamental grasses, and specifically, fountain grass. Fountain grass, encompassing species within the genus Cenchrus (formerly Pennisetum), offers an elegant solution for adding texture, movement, and year-round interest to almost any garden. Its arching form and feathery plumes create a distinctive visual appeal that’s remarkably low-maintenance once established, making it a favorite for both seasoned landscapers and DIY enthusiasts.
Key Takeaways
- Fountain grass (Cenchrus spp.) provides elegant texture and movement in diverse garden settings.
- Popular varieties like ‘Hameln’ and ‘Rubrum’ offer different sizes and foliage colors to suit various design needs.
- Planting in full sun with well-draining soil is crucial for healthy growth and prolific plumes.
- Be mindful of potential invasiveness, especially with certain species like P. Setaceous, and choose sterile cultivars where possible.
- Prune fountain grass annually in late winter or early spring for vigorous new growth and to maintain an attractive shape.
What Exactly is Fountain Grass? Understanding the Basics
Fountain grass refers to a group of ornamental grasses, predominantly from the Cenchrus genus, prized for their distinctive growth habit. The common name comes from their graceful, arching foliage that resembles water cascading from a fountain. These grasses are native to tropical and warm temperate regions across Africa, Asia, Australia, and the Americas. In real terms, these are perennial grasses, meaning they return year after year. They typically form dense clumps, with slender leaves and showy flower spikes, or plumes, which emerge in late summer and persist through fall and often into winter, providing seasonal interest. Many species are known for their drought tolerance and adaptability to various soil conditions.
Why Choose Fountain Grass for Your Landscape? Benefits & Aesthetic Appeal
Choosing fountain grass offers a multitude of benefits, particularly for those seeking a low-effort, high-impact landscape element. Its primary appeal lies in its aesthetic contribution, providing texture, movement, and sound as its plumes sway in the wind. This dynamism is something static shrubs simply can’t offer. Beyond beauty, many fountain grass varieties are exceptionally drought-tolerant once established, making them ideal for escaping or reducing water consumption, a significant consideration in increasingly arid regions. They generally require minimal fertilization and are rarely bothered by pests or diseases, further reducing maintenance demands. Worth noting, these qualities make them excellent choices for busy homeowners or commercial properties.
Navigating the Varieties: Popular Fountain Grass Cultivars and Their Traits
The world of fountain grass is diverse, with several popular cultivars offering different sizes, foliage colors, and plume characteristics. Selecting the right one depends on your specific design goals and local climate conditions. The most common species used in gardens is Cenchrus alopecuroides (formerly Pennisetum alopecuroides), known as Chinese fountain grass or hardy fountain grass. For example, ‘Hameln’ is a compact variety of Chinese fountain grass, typically reaching 2–3 feet tall and wide, making it perfect for smaller gardens or mass plantings. It features green foliage and creamy, bottlebrush-like plumes. On the other hand, ‘Rubrum’ (often sold as purple fountain grass, Cenchrus setaceous ‘Rubrum’) is renowned for its striking burgundy foliage and reddish-purple plumes, growing larger, often 3–5 feet tall, though it’s typically grown as an annual in colder climates (USDA Zones 5-7) due to its tender nature. Another excellent choice is ‘Moudry’, a larger, more solid Chinese fountain grass reaching 3–4 feet, known for its dark green foliage and abundant, dark purple-black plumes. For those in warmer climates (USDA Zones 7-10), Cenchrus orientalis (oriental fountain grass) is a less common but beautiful option, known for its pinkish plumes and shorter stature, usually 1–2 feet tall.
Planting Fountain Grass: A Step-by-Step Guide for Success
Proper planting is key to ensuring your fountain grass thrives. The best time to plant is in spring or early summer, allowing the plant ample time to establish its root system before winter. This foundational step ensures longevity and vigor.
- Choose the Right Site: Fountain grass prefers full sun, meaning at least 6 hours of direct sunlight daily. It also needs well-draining soil; soggy conditions can lead to root rot.
- Prepare the Soil: If your soil is heavy clay, amend it with organic matter like compost or grit to improve drainage. A slightly acidic to neutral pH (6.0-7.0) is ideal.
- Dig the Hole: Dig a hole twice as wide as the root ball and just as deep. Fountain grass provides ample space for roots to spread.
- Planting: Gently remove the plant from its container, loosen any circling roots, and place it in the hole so the top of the root ball is level with the surrounding soil. Backfill with soil, gently firming it around the base.
- Water Thoroughly: Water deeply immediately after planting to settle the soil and eliminate air pockets.
- Mulch (Optional but Recommended): Apply a 2–3 inch layer of organic mulch around the base, keeping it a few inches away from the crown. This helps retain moisture, regulate soil temperature, and suppress weeds.
Caring for Your Fountain Grass: Watering, Feeding, and Pruning
Once established, fountain grass is remarkably low-maintenance. However, a little care goes a long way in ensuring its vibrant display. Consistent, appropriate care means you’ll enjoy its beauty for years without significant effort.
Watering
During its first growing season, regular watering is essential to establish a strong root system. Aim for 1 inch of water per week, either from rainfall or irrigation. Once established, most varieties are quite drought-tolerant and only require supplemental watering during extended dry periods. Overwatering is a common mistake that can lead to root issues. The wrinkle here: even drought-tolerant plants appreciate consistent moisture during extreme heat.
Feeding
Fountain grass typically doesn’t need much fertilizer. If your soil is poor, a light application of a balanced, slow-release granular fertilizer in early spring can promote healthier growth. Avoid excessive nitrogen, which can lead to lush foliage but fewer plumes and floppier growth.
Pruning
The most significant maintenance task for fountain grass is annual pruning. In late winter or early spring, before new growth appears, cut the entire plant back to about 4–6 inches from the ground. Use sharp shears or a hedge trimmer. This encourages vigorous new growth and prevents the plant from becoming leggy or developing a dead center. For tender varieties like ‘Rubrum’ that may not survive winter in colder zones, you can simply remove the dead plant in spring.
Fountain Grass: Potential Drawbacks and Environmental Considerations
While fountain grass is highly ornamental, it’s crucial to acknowledge its potential downsides, particularly regarding environmental impact. Not all fountain grasses are created equal when it comes to behavior in the landscape. Ignorance of these traits can lead to unintended ecological consequences. The primary concern is invasiveness. Certain species, notably Pennisetum setaceous (now Cenchrus setaceous), commonly known as crimson fountain grass, can be highly invasive in warm climates, especially in regions like California, Arizona, and Florida. It readily reseeds, outcompeting native vegetation and altering ecosystems. According to the California Invasive Plant Council (Cal-IPC) (2026), C. Setaceous is considered a high-risk invasive species in many parts of the state, aggressively colonizing disturbed areas and natural habitats alike. This is a critical point that differentiates it from well-behaved cultivars like C. Alopecuroides ‘Hameln’. When selecting fountain grass, always research its invasiveness status in your specific USDA Plant Hardiness Zone. Many nurseries now offer sterile or low-seeding cultivars to mitigate this risk. Choosing these options is a responsible way to enjoy the plant’s beauty without contributing to ecological problems.
Pros
- Exceptional aesthetic appeal with graceful plumes.
- Generally drought-tolerant once established.
- Low maintenance, requiring minimal fertilization.
- Provides excellent year-round texture and winter interest.
- Deer and rabbit resistant in many regions.
Cons
- Some species (e.g., Cenchrus setaceous) can be highly invasive.
- Requires annual pruning for best appearance and health.
- Tender varieties may not survive winter in colder climates.
- Can develop a ‘dead’ center over several years, requiring division.
- Mature clumps can be difficult to divide or remove due to dense root systems.
Troubleshooting Common Fountain Grass Problems
Even with its reputation for hardiness, fountain grass can encounter issues. Knowing how to diagnose and address them quickly can save your plants and your peace of mind.
Flopping or Lodging
If your fountain grass starts to flop or fall over, it’s often a sign of too much shade, over-fertilization (especially with nitrogen), or excessive water. Evaluate its location and adjust care practices. Moving it to a sunnier spot or reducing watering can often resolve this. In my years working on various residential landscapes, I’ve seen homeowners inadvertently overwater these grasses, especially when grouped with thirstier plants.
Yellowing Foliage
Yellow leaves can indicate several problems: overwatering, poor drainage, or nutrient deficiency (iron chlorosis is common in alkaline soils). Check soil moisture first. If it’s consistently wet, improve drainage. For nutrient issues, a soil test can confirm deficiencies, and amendments like chelated iron can help.
Lack of Plumes
If your fountain grass isn’t producing its signature plumes, the most likely culprits are insufficient sunlight or immaturity. Ensure the plant receives at least 6 hours of full sun. Younger plants may take a season or two to establish before flowering abundantly. Extreme drought can also stress the plant, hindering plume production.
Design Ideas: Integrating Fountain Grass into Your Garden
Fountain grass is incredibly versatile in landscape design, capable of fulfilling various roles from a specimen plant to a mass planting. Its distinct form and texture make it a valuable asset for creating visual interest and flow.
Specimen or Focal Point
A single, well-placed clump of purple fountain grass (‘Rubrum’) can serve as a dramatic focal point in a mixed border, drawing the eye with its vibrant color. Its upright yet arching form creates a strong vertical element that softens harsh lines.
Mass Planting and Borders
Planting multiple ‘Hameln’ fountain grasses in drifts or as a continuous border creates a flowing, cohesive look. This is especially effective along pathways, at the front of a shrub border, or bordering a patio. The repetitive texture provides a calming, rhythmic effect. For surface-material comparisons, see.
Containers and Urns
Dwarf varieties of fountain grass are excellent choices for container gardening, either alone or as the ‘thriller’ in a mixed arrangement. They add height, texture, and movement to patios, decks, and entryways. Ensure containers have good drainage and provide adequate water, as container plants dry out faster. Explore more about choosing low-maintenance plants in.
Alternatives to Fountain Grass: When to Choose Something Else
While fountain grass is a fantastic choice, there are times when an alternative might be more suitable due to invasiveness concerns, specific climate needs, or a desire for different aesthetics. Expanding your ornamental grass knowledge ensures you pick the best plant for the job. Here’s a comparison of fountain grass with some popular alternatives:
| Feature | Fountain Grass (e.g., ‘Hameln’) | Maiden Grass (Miscanthus kinesis) | Little Bluestem (Schizachyrium solarium) | Switchgrass (Panicum virgatum) |
|---|---|---|---|---|
| Size (Avg.) | 2-4 ft tall & wide | 4-8 ft tall & wide | 2-3 ft tall & wide | 3-6 ft tall & wide |
| Foliage Color | Green, sometimes purple (‘Rubrum’) | Green, some variegated | Blue-green changing to copper/red | Blue-green changing to yellow/orange |
| Plume Color | Cream, pink, or purplish | Silver, pink, or burgundy | Silvery-tan seed heads | Airy, reddish-brown seed heads |
| Hardiness Zones | USDA 5-9 (some 7-10) | USDA 4-9 | USDA 3-9 | USDA 4-9 |
| Invasiveness Concern | High for C. Setaceous; low for C. Alopecuroides cultivars | Low to moderate for some species; can reseed | Very low; native | Very low; native |
| Best Use | Borders, mass planting, containers | Screening, backdrop, specimen | Native gardens, dry slopes, mass planting | Rain gardens, naturalized areas, erosion control |
For native plant enthusiasts, little bluestem and switchgrass are excellent alternatives, offering similar texture and movement with the added benefit of supporting local ecosystems. Learn more about garden design principles in.
Common Mistakes to Avoid with Fountain Grass
Even with a relatively easy-care plant like fountain grass, certain missteps can hinder its performance or inadvertently create problems. Being aware of these common pitfalls can save you time and effort. One frequent mistake is planting invasive species. As noted, Cenchrus setaceous can be problematic. Always verify the species and cultivar. Another common error is planting in too much shade, which leads to leggy growth and sparse flowering. Fountain grass truly needs full sun to maintain its compact, upright habit and produce abundant plumes. Also, overwatering is often more detrimental than underwatering for established plants, especially in heavy soils. This can cause root rot, a silent killer for many ornamental grasses. Finally, neglecting annual pruning can result in a buildup of dead foliage, reducing vigor and creating an untidy appearance. Pruning is not optional; it’s essential for plant health and aesthetics.
Expert Tips for a Stunning Fountain Grass Display
To truly maximize the impact of your fountain grass, consider these insights from years of landscape experience. These practical nuances can elevate your garden from good to truly exceptional.
- Pair with Contrasting Textures: Combine fountain grass with plants that have bold, broad leaves (like hostas or sedum) or upright, spiky forms (like salvia or liatris). This contrast amplifies the delicate beauty of the grass.
- Consider Winter Interest: Leave the plumes intact through winter. They provide architectural interest and can be stunning when dusted with snow or frost. The stems also offer some protection to the crown from extreme cold.
- Divide When Necessary: After 3–5 years, clumps of fountain grass may start to die out in the center. Dig up and divide the plant in early spring, discarding the old center and replanting the vigorous outer sections. This rejuvenates the plant.
- Mind the Wind: While fountain grass loves sun, strong, persistent winds can damage the plumes or cause flopping. Consider some windbreak protection if your site is exceptionally exposed, or choose more rigid alternatives.
- Fertilize Sparingly: If you must fertilize, do so very lightly in early spring. An organic, slow-release option is usually sufficient. Less is definitely more with these grasses.
Frequently Asked Questions
When is the best time to plant fountain grass?
The ideal time to plant fountain grass is in spring or early summer after the last frost. Fountain grass allows the plant’s root system sufficient time to establish itself before the heat of summer or the chill of winter arrives, leading to stronger, healthier growth.
Does fountain grass come back every year?
Yes, most popular fountain grass varieties, particularly those derived from Cenchrus alopecuroides like ‘Hameln’, are perennial in USDA Hardiness Zones 5-9 and will return year after year. Tender varieties such as ‘Rubrum’ are often grown as annuals in colder climates.
How tall does fountain grass get?
The height of fountain grass varies significantly by cultivar. Dwarf varieties like ‘Little Bunny’ might reach only 1 foot tall, while ‘Hameln’ typically grows 2-3 feet. Larger varieties, such as ‘Rubrum’, can reach 3–5 feet in height and spread, especially in warmer zones.
Does fountain grass spread aggressively?
Some species, notably Cenchrus setaceous (crimson fountain grass), are known to be aggressive self-seeders and are considered invasive in many warmer regions. However, common ornamental cultivars like C. Alopecuroides ‘Hameln’ are clump-forming and generally not invasive, making careful selection crucial.
Can fountain grass be grown in pots?
Absolutely, dwarf and medium-sized fountain grass varieties are excellent for container gardening. Ensure the pot has good drainage holes and is large enough to accommodate the root ball. Container-grown plants may require more frequent watering than those in the ground.
What plants pair well with fountain grass?
Fountain grass pairs beautifully with coneflowers, black-eyed Susans, sedum, salvia, and other perennials that enjoy full sun and similar soil conditions. Its fine texture provides a lovely contrast to broader-leafed plants and bright flowers, creating dynamic garden compositions.
Conclusion
Fountain grass, with its graceful form and low-maintenance nature, offers a compelling option for enriching your landscape. By understanding its specific needs, choosing appropriate cultivars, and being mindful of potential invasiveness, you can harness its beauty to create dynamic and resilient garden spaces. It’s an investment in texture and movement that pays dividends in year-round visual interest. Information current as of August 2026; pricing and product details may change.
Related Articles
- Romex Wiring: Your Essential Guide to Safe Home Electricals
- Toad Lily: The Unsung Jewel for Your Late-Season Shade Garden
- Asiatic Lily Care: Avoiding Common Mistakes for Vibrant Blooms
Outdoor & Garden
Gerbera Daisies: Vibrant Blooms for Your Home & Garden
Gerbera daisies are renowned for their cheerful, vibrant blooms, making them a popular choice for gardens and indoor spaces. Understanding their specific care requirements is key to enjoying their full potential and continuous flowering.
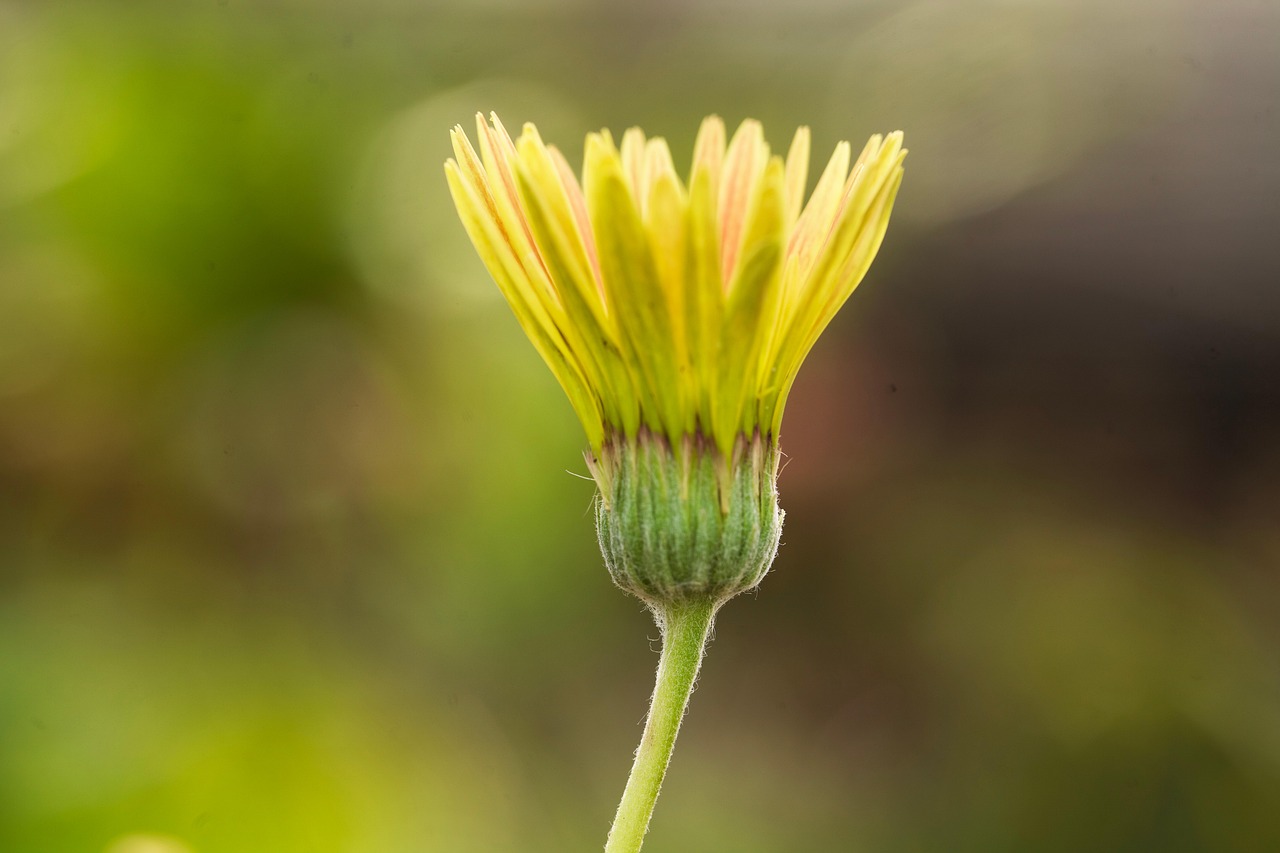
Gerbera daisies, with their striking colors and classic daisy form, are a favorite among gardeners and homeowners looking to add a splash of joy. These cheerful flowering plants can transform a garden bed, brighten a patio container, or bring life to an indoor space, but unlocking their full blooming potential requires understanding their specific needs. Many first-time growers find themselves frustrated by a lack of continuous blooms or wilting leaves. The secret often lies in precise environmental control and consistent care, from the moment you choose your plant to its ongoing maintenance through the seasons.
Key Takeaways
- Gerbera daisies thrive in full sun with well-draining, slightly acidic soil.
- Water consistently but avoid waterlogging, allowing the top inch of soil to dry.
- Choose varieties suited for your climate, treating them as annuals in colder zones or perennials in warmer regions.
- Proper deadheading and fertilization are crucial for continuous, vibrant blooms.
- Monitor closely for common pests like aphids and whiteflies, addressing issues promptly with organic solutions.
Understanding Gerbera Daisies: Their Origins and Varieties
Gerbera daisies (Gerbera Jameson) originate from South Africa, a clue to their preference for bright, warm conditions. They belong to the sunflower family (Asteraceae) and are admired for their large, colorful flowers that can range from vivid reds, oranges, yellows, and pinks to delicate whites and creams. These plants are typically grown as perennials in USDA hardiness zones 8-11, thriving in mild winters. In colder climates, they are often cultivated as annuals or brought indoors for overwintering. Worth noting: while many people buy potted gerberas for instant color, there’s a significant difference between florists’ potted varieties (often bred for short, intense bloom cycles) and garden-specific cultivars that are more solid for sustained outdoor growth. For example, some ‘Garvinea’ series gerberas are specifically bred for enhanced garden performance and cold tolerance down to zone 6, providing continuous blooms from spring until frost.
Choosing the Right Gerbera for Your Space
Selecting the ideal gerbera daisy depends on where you plan to grow it. For garden beds, look for varieties labeled ‘garden gerberas’ or ‘landscape gerberas.’ These often have stronger stems and a more spreading habit. If you’re aiming for a vibrant patio display, compact container varieties work best. For indoor cultivation, opt for smaller, often more delicate plants found in the houseplant section, as they are bred to tolerate lower light levels. Consider the color palette of your existing garden or home decor. Gerbera daisies offer such a wide spectrum that you can easily find shades to complement any aesthetic, from fiery reds and oranges that pop against green foliage to soft pastels for a calming effect.
Optimal Growing Conditions: Sunlight, Soil, and Temperature
Gerbera daisies are sun-lovers. They require at least six hours of direct sunlight daily to produce abundant blooms. In extremely hot climates, some afternoon shade can prevent scorching, but too little sun will result in leggy plants and sparse flowering. For outdoor planting, choosing a south-facing spot or an area that gets morning sun and some afternoon dappled shade is often ideal, especially in zones 9-11. The right soil is equally critical. Gerbera daisies need well-draining soil with a slightly acidic pH, ideally between 5.5 and 6.5. A good mix for containers or raised beds would be a high-quality potting mix blended with perlite or coarse sand to improve drainage. Heavy, clay soils will lead to root rot, a common killer of these plants. According to the Iowa State University Extension and Outreach, proper soil drainage is paramount for gerberas to prevent fungal issues (2023). Temperature-wise, gerberas thrive in daytime temperatures between 65-75°F (18-24°C) and nighttime temperatures around 50-55°F (10-13°C). Frost is detrimental, so gardeners in colder zones should plan to bring potted plants indoors before the first frost or treat them as annuals.
Watering and Feeding for Continuous Blooms
Consistent watering is vital, but overwatering is the most common mistake. Water deeply when the top inch of soil feels dry to the touch, then allow excess water to drain completely. For potted plants, ensure containers have drainage holes. In my experience, using a finger to check soil moisture rather than relying on a schedule prevents both underwatering and overwatering. Avoid getting water directly on the foliage, especially in the evening, as this can encourage fungal diseases. Gerbera daisies are hungry feeders, particularly during their active blooming period. Fertilize every 2–4 weeks with a balanced liquid fertilizer (e.g., 10-10-10 or 20-20-20) diluted to half strength. Many growers find that a fertilizer higher in phosphorus (the middle number) can encourage more flower production. Reducing feeding during cooler, less active periods is crucial to prevent nutrient burn.
A Step-by-Step Guide to Planting Gerbera Daisies
- Choose Your Location: Select a spot with full sun (6+ hours daily) and protection from harsh afternoon sun in hot climates. Ensure good air circulation.
- Prepare the Soil: Amend garden soil with compost and perlite to enhance drainage and fertility. For containers, use a well-draining potting mix. The soil should be slightly acidic.
- Dig the Hole: Dig a hole twice as wide as the root ball and just as deep.
- Planting Depth: This is critical for gerberas. Plant them so the crown (where the leaves emerge from the roots) is slightly above the soil line. Burying the crown too deeply can lead to crown rot.
- Water Thoroughly: After planting, water generously to settle the soil around the roots.
- Mulch (Optional for Gardens): A thin layer of organic mulch can help retain moisture and suppress weeds, but keep it away from the crown of the plant.
Common Problems and How to Solve Them
Even with the best care, gerbera daisies can face challenges. Yellowing leaves often indicate overwatering or nutrient deficiency. Check soil moisture; if it’s soggy, reduce watering. If dry, fertilize. Wilting, despite adequate water, might point to root rot (due to poor drainage) or severe pest infestation. Inspect the roots for mushiness and foliage for pests. Lack of blooms can be frustrating. This is usually due to insufficient sunlight, inadequate fertilization, or the plant being root-bound. Ensure your gerbera daisies receive enough light and are fed regularly. If in a container, consider repotting into a slightly larger pot if roots are circling the bottom. Another issue is bud blast, where buds form but fail to open; this is often caused by inconsistent watering, extreme temperature fluctuations, or low humidity.
Extending the Life of Cut Gerbera Flowers
Gerbera daisies are popular cut flowers, known for their long vase life if properly handled. When cutting from your garden, do so in the morning after the dew has dried. Use a sharp knife or shears to cut the stem at an angle, then immediately place the stems in water. For best results, re-cut the stems under water (this prevents air bubbles from blocking water uptake) and remove any leaves that would fall below the waterline in the vase. Change the water daily, adding a floral preservative, and keep the vase out of direct sunlight and away from ripening fruit, which releases ethylene gas that shortens flower life. I’ve found that a drop of bleach in the water can also help inhibit bacterial growth, extending the freshness by several days.
Gerbera Daisies in Garden Design and Container Gardening
Gerbera daisies are incredibly versatile in garden design. Their bold colors make them excellent focal points in mixed borders, especially when paired with contrasting foliage plants like dusty miller or complementary flowers such as salvia or petunias. For B Collins Construction clients seeking to enhance curb appeal, a well-placed planter of vibrant gerbera daisies can make a significant visual impact. In container gardening, gerberas shine. A single gerbera plant in a decorative pot can brighten a porch or balcony. For a more elaborate display, combine them with ‘spillers’ like creeping jenny or sweet potato vine, and ‘thrillers’ like ornamental grasses. Ensure containers are large enough to allow for root growth and have excellent drainage.
Pros and Cons of Growing Gerbera Daisies
Pros
- Vibrant, long-lasting blooms: Offer continuous color from spring to frost.
- Excellent cut flowers: Brighten indoor spaces with their cheerful appearance.
- Versatile: Suitable for garden beds, containers, and indoor growing.
- Attract pollinators: Bees and butterflies are drawn to their open flowers.
- Wide color range: Many varieties to match any aesthetic.
Cons
- Specific care requirements: Demanding regarding sunlight, soil, and watering.
- Susceptible to pests and diseases: Common issues include aphids, whiteflies, and powdery mildew.
- Not cold hardy: Often treated as annuals in colder climates, requiring replanting.
- Crown rot risk: Prone to rot if planted too deeply or overwatered.
- Can be short-lived: Some potted varieties are bred for temporary display.
Expert Tips for Thriving Gerbera Daisies
To truly get the most out of your gerbera daisies, a few expert insights go a long way. First, always deadhead spent flowers promptly. Pinch or snip off faded blooms at the base of the stem to encourage the plant to produce more flowers instead of putting energy into seed production. This practice significantly extends the blooming season. Secondly, pay close attention to air circulation, especially for indoor plants or those in humid environments. Good airflow helps prevent fungal diseases like powdery mildew. If growing indoors, consider a small fan to keep air moving. Finally, for those in borderline hardiness zones (like USDA Zone 7 or 8), a thick layer of winter mulch can sometimes help outdoor gerberas survive mild winters, though success isn’t guaranteed. For consistent results, consider lifting and storing the plant indoors in a cool, bright spot for the winter season.
Frequently Asked Questions
How often should I water gerbera daisies?
Water gerbera daisies when the top inch of soil feels dry. This typically means every 2–3 days in hot weather or once a week in cooler conditions. Always ensure excellent drainage to prevent root rot, which is a common issue with overwatering.
Can gerbera daisies be grown indoors?
Yes, gerbera daisies can thrive indoors if given adequate light. Place them in a south-facing window or under grow lights, ensuring they receive at least 4–6 hours of direct light daily. Maintain consistent moisture and provide good air circulation.
What type of soil do gerbera daisies prefer?
Gerbera daisies prefer well-draining, slightly acidic soil with a pH between 5.5 and 6.5. A good potting mix amended with perlite or coarse sand for drainage, and some compost for nutrients, works best for container-grown plants.
Why are my gerbera daisy leaves turning yellow?
Yellowing leaves in gerbera daisies usually indicate overwatering, which leads to root rot, or a nutrient deficiency. Check the soil moisture; if soggy, reduce watering. If dry, consider a balanced fertilizer application. Insufficient light can also cause yellowing.
Do gerbera daisies need full sun?
Gerbera daisies require full sun, meaning at least 6 hours of direct sunlight per day, for optimal blooming. In regions with intense summer heat, some afternoon shade can prevent leaf scorching, but consistent bright light is essential for flower production.
How do I make my gerbera daisies bloom more?
To encourage more blooms, ensure your gerbera daisies receive full sun, consistent moisture, and regular fertilization with a balanced, phosphorus-rich formula. Promptly deadhead spent flowers to redirect the plant’s energy into producing new buds. Embracing the charm of gerbera daisies in your garden or home is a rewarding effort. Their vibrant hues and classic appeal offer continuous cheer, making them a perfect addition for any homeowner looking to brighten their space. With careful attention to their specific needs for light, water, and soil, you’ll enjoy a long season of spectacular blooms. Information current as of August 2026; pricing and product details may change.

Asiatic Lily Care: Avoiding Common Mistakes for Vibrant Blooms

Fountain Grass: A Guide to Graceful Garden Design

Gerbera Daisies: Vibrant Blooms for Your Home & Garden

Choosing Expert Foundation Repair Companies for Your Home

Bouncy Floors: Diagnosing Sagging & Stiffening Joists

Nellie Stevens Holly Planting: Your Guide to a Resilient Evergreen
-
 Repairs & Maintenance2 months ago
Choosing Expert Foundation Repair Companies for Your Home
-
 Repairs & Maintenance2 months ago
Bouncy Floors: Diagnosing Sagging & Stiffening Joists
-
 Outdoor & Garden2 months ago
Nellie Stevens Holly Planting: Your Guide to a Resilient Evergreen
-

 Tools & Materials2 months ago
Bolt Cutters: Your Essential Guide to Heavy-Duty Cutting
-

 Outdoor & Garden2 months ago
Brush Cutter Essentials: Clearing Overgrown Land Effectively
-

 Home Improvement2 months ago
The Two Grades of Home: Condition and Land
-

 Home Improvement2 months ago
Water Softener Costs: Your Investment Guide
-

 Home Improvement2 months ago
Water in Crawl Space: Identify, Fix, and Prevent Damage