
Buying & Renovating
Home Additions: Beyond Square Footage – Building Smart
Home additions are more than just adding space; they’re about strategically enhancing your property. Learn smart planning, cost management, and practical tips to ensure your project adds lasting value.

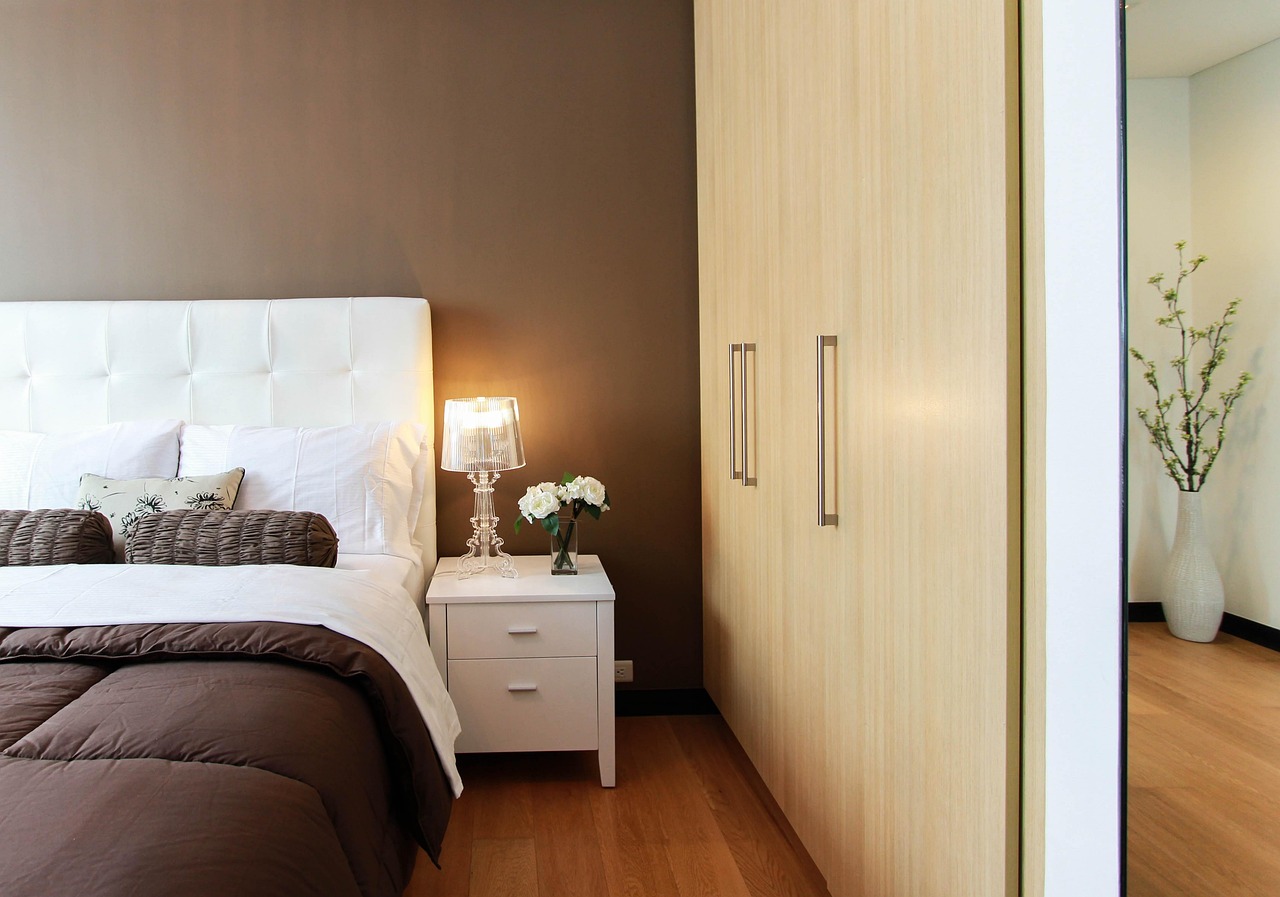
When homeowners consider expanding their living space, the immediate thought often turns to home additions. Yet, the honest answer to whether a home addition is a good idea isn’t a simple yes or no; it’s entirely dependent on thoughtful planning, execution, and a clear understanding of what you truly aim to achieve. Many start these projects solely focused on adding square footage, only to discover that a poorly integrated addition can actively detract from a home’s value and functionality.
Key Takeaways
- Successful home additions prioritize thoughtful integration over mere square footage, enhancing overall property value.
- Detailed upfront planning, including architectural design and understanding building codes, prevents costly project delays and errors.
- Budgeting must account for not just construction,, but also unforeseen costs like utility upgrades and landscaping.
- The long-term impact on your home’s energy efficiency and structural integrity requires careful consideration.
- Choosing the right contractor and maintaining clear communication are paramount to a smooth construction process.
It’s not just about more room; it’s about better room and a better home. In my two decades working in residential construction, I’ve seen countless home additions, and the most successful ones are those where homeowners looked beyond the immediate need for space and considered the long-term impact on aesthetics, flow, and structural integrity. A truly valuable addition should feel like it was always part of the original design, not an afterthought.
The Myth of ‘More Space’ vs. Integrated Value
Many homeowners initiate home additions with a singular focus: adding square footage. While expanding your living area is a primary benefit, fixating solely on size can lead to disjointed designs and diminished property value. The real goal should be to create an addition that enhances the home’s overall flow, functionality, and aesthetic appeal, feeling like an organic extension rather than a tacked-on box. For example, adding a large, ill-proportioned family room that blocks natural light to existing rooms or creates an awkward traffic pattern often results in a less comfortable home, even with more space. The value of a home addition lies in its ability to improve daily living and curb appeal, not just boost a number on a listing. Practical Insight: Always prioritize how the new space will interact with the old. Consider sightlines, natural light, and how people will move between the existing and new areas. This thoughtful approach ensures the addition truly elevates your home.
Planning Your Home Addition: The Critical First Steps
Effective planning is the bedrock of any successful home addition. This phase involves defining your needs, assessing your property’s potential, and assembling your professional team. Skipping vital steps here often leads to expensive change orders and frustrating delays down the line. Start by clearly articulating your reasons for the addition. Do you need a dedicated home office, an extra bedroom, or a larger kitchen? Then, evaluate your property’s setbacks, zoning restrictions, and available utility connections. This initial assessment helps determine the feasibility and scope of your project. Step-by-Step Planning Guide:
- Define Your Vision: Clearly outline the purpose, desired size, and functional requirements of your new space. Gather inspiration photos and ideas.
- Assess Your Property: Understand your lot lines, existing structures, and potential challenges. Consider soil conditions and existing landscaping.
- Consult an Architect/Designer: A professional can translate your vision into practical plans, identify potential issues, and ensure structural integrity. They’ll also help navigate local regulations.
- Review Preliminary Designs: Work closely with your architect to refine floor plans, exterior elevations, and material selections.
- Obtain Engineering Reports: Depending on the scope, structural, mechanical, or civil engineering assessments may be required.
- Secure Financing: Understand your budget and explore options like home equity loans, construction loans, or cash.
- Select a Contractor: Vet multiple experienced contractors, request bids, and check references.
Understanding the True Cost of Home Additions
The cost of home additions can vary dramatically based on size, complexity, location, and finishes. In August 2026, a typical room addition might range from $100 to $250 per square foot, but this is a very broad estimate. The true cost extends far beyond just the framing and drywall. Consider the “invisible” costs: architectural fees, engineering reports, permit fees, new utility connections (HVAC, plumbing, electrical system upgrades), landscaping restoration, and even increased property taxes. These can easily add 15-30% to your base construction budget. For example, extending your existing HVAC system might not be sufficient for the added square footage, requiring an entirely new unit or zone, a significant expense.

Worth noting: High-end finishes like custom cabinetry, natural stone countertops, or specialized flooring can push costs significantly higher. Always build a contingency fund of at least 10–15% into your budget for unforeseen issues, which are common in renovation projects involving existing structures.
Navigating Permits and Regulations
One of the most intimidating, yet crucial, aspects of building an addition is navigating local permits and zoning regulations. Ignoring these can lead to costly fines, demolition orders, and significant delays. Every municipality has its own specific requirements, which can include setback rules (how far your structure must be from property lines), maximum lot coverage, and Floor Area Ratio (F.A.R.) limits. According to the National Association of Home Builders (NAHB), permit processes can add weeks, if not months, to a project timeline (NAHB, 2026). Your architect or contractor will typically handle the permit application process, but understanding the basics empowers you to ask informed questions and track progress. Always ensure your contractor explicitly includes permit acquisition in their scope of work. The wrinkle here: Some homeowners attempt to bypass permits for smaller projects, a move that almost always backfires. Unpermitted work can complicate future home sales, void insurance policies, and pose safety risks if not built to code. Always pull the proper permits.
Designing for smooth Integration
The hallmark of a high-quality home addition is its smooth integration with the existing structure. This means matching architectural styles, rooflines, exterior materials, and even interior finishes. A well-designed addition should look like it was always there, enhancing the original home’s character rather than clashing with it. Consider rooflines carefully. A simple gable or shed roof addition might be more cost-effective, but it must align aesthetically with the existing roof. Material selection for siding, windows, and trim should also match or complement what’s already present. Inside, continuity in flooring, trim work, and paint colors helps the new space flow effortlessly from the old. A skilled architect will be invaluable in achieving this harmony. [Related Article: Interior Design & Décor Trends for 2026]
Structural and System Considerations
Adding a room isn’t just about building walls; it’s about connecting to your home’s existing skeleton and nervous system. This is where many DIY attempts falter and professional expertise becomes non-negotiable. The structural integrity of your existing home must be able to support the new load, especially for second-story additions. Your current electrical panel might need an upgrade to handle additional outlets and lighting. Your plumbing lines might need rerouting or extending, potentially requiring new vents and drains. And as mentioned, your HVAC system is critical; an undersized unit will struggle to heat or cool the expanded space, leading to discomfort and higher energy bills. We frequently review existing systems to determine if they can handle the increased demand or if upgrades are necessary, which adds to the overall budget but is non-negotiable for comfort and safety. Pros and Cons of System Upgrades:
Pros
- Ensures adequate power/heating/cooling for new space.
- Improves overall home efficiency and comfort.
- Complies with modern building codes, enhancing safety.
- Prevents future issues like tripped breakers or uneven temperatures.
Cons
- Adds significant cost to the overall project budget.
- Can extend construction timelines due to specialized work.
- May require temporary disruption to existing home systems.
- Requires coordination with multiple subcontractors (electrician, plumber, HVAC specialist).
Living Through the Construction Process
Home additions are inherently disruptive. Expect noise, dust, and temporary loss of access to certain areas of your home. A good contractor will work to minimize these disruptions, but realism is key. Setting up a temporary kitchen or living area can make the process more bearable. Before construction begins, discuss with your contractor how they plan to contain dust, manage debris, and ensure site safety. Ask about their communication plan – how often will you receive updates? Who is your main point of contact? Clear communication can significantly reduce stress during this period.
Common Pitfalls and How to Avoid Them
Despite careful planning, certain challenges can arise during home additions. Recognizing these common mistakes can help you steer clear of them. Mistake 1: Underestimating the Budget. Many homeowners only account for visible construction costs. Solution: Get detailed bids that include all permits, professional fees, utility upgrades, and a 15% contingency fund. Mistake 2: Poor Communication with the Contractor. Misunderstandings can lead to costly rework or dissatisfaction. Solution: Establish a clear communication schedule and method from the outset. Hold regular site meetings and document all decisions in writing. Mistake 3: Neglecting Existing Home Systems. Failing to assess the impact on HVAC, electrical, and plumbing can result in an uncomfortable or unsafe home. Solution: Engage engineers or specialists early in the design phase to ensure existing systems can support the addition or plan for necessary upgrades. Mistake 4: Ignoring Zoning and Building Codes. Building without proper permits or outside regulations can lead to forced demolition. Solution: Work with an experienced architect and contractor who are familiar with local zoning laws and building codes. Don’t cut corners here.
Expert Tips for a Successful Home Expansion
Beyond the basics, a few expert insights can make a significant difference in your home addition project. Think Long-Term Resale Value: Even if you plan to stay for years, consider how your addition will impact future buyers. Over-improving for your neighborhood can be a financial mistake. According to a 2026 report by Remodeling Magazine, certain additions like a mid-range bathroom addition or a deck typically yield a higher return on investment than others, so it’s wise to research local trends. Embrace Natural Light: Thoughtful window and door placement can transform a new space, making it feel larger and more inviting. Consider skylights or solar tubes for interior rooms. This is often an overlooked aspect of designing a home addition. Phased Planning: If your ultimate vision is extensive but your current budget is limited, plan for a larger project that can be built in phases. This ensures that the first phase doesn’t hinder future expansions. For example, design the foundation to support a second story, even if you’re only building a single-story addition now. Prioritize Energy Efficiency: Incorporate energy-efficient windows, insulation, and HVAC systems. This not only reduces long-term utility costs but also adds to your home’s appeal and value. [Related Article: Energy & Smart Home Upgrades]
- Don’t Forget Landscaping: The exterior integration is as important as the interior. Plan for landscaping around the new addition to help it blend seamlessly with the existing yard and enhance curb appeal.
Frequently Asked Questions
How long do home additions typically take?
Home additions can take anywhere from 4 to 12 months, or even longer, depending on the size, complexity, and local permitting processes. Design and planning alone can take several months before ground is even broken. Unexpected challenges with existing structures or weather can also extend the timeline.
What’s the difference between a bump-out and a full room addition?
A bump-out is a small extension, typically less than 10-15 feet, that expands an existing room without adding a full new foundation or roof system. A full room addition involves significant structural work, including a new foundation, walls, and roof, creating an entirely new habitable space.
Can I do any of the work myself to save money?
While some homeowners handle demolition or finish work like painting, it’s generally not recommended for the structural, electrical, plumbing, or HVAC components. Complex home additions require professional expertise to ensure safety, structural integrity, and compliance with building codes. DIY on critical elements can lead to costly mistakes.
Do home additions always increase property value?
Not always. A well-planned and executed home addition that seamlessly blends with the existing structure and neighborhood can significantly increase property value. However, a poorly designed, over-budget, or out-of-character addition can actually detract from value or offer a poor return on investment.
How do I choose the right contractor for my addition?
Look for licensed and insured contractors with specific experience in home additions. Check their references, review their portfolio, and ensure they provide detailed bids. A good relationship and clear communication are key, so choose someone you trust and feel comfortable working with. [Related Article: Choosing the Best Self-Propelled Lawn Mower for Your Yard & Budget]
Conclusion
Undertaking home additions is a significant project that extends far beyond simply gaining more space. It’s an opportunity to thoughtfully enhance your home’s functionality, aesthetic, and long-term value. By prioritizing meticulous planning, understanding the true costs, navigating regulations carefully, and designing for smooth integration, you can ensure your home expansion is a true asset. Remember, the goal isn’t just to build bigger, but to build smarter. Information current as of August 2026; pricing and product details may change.










Buying & Renovating
South-East Facing Homes: A Builder’s Guide to Optimal Design
South-east facing properties offer a unique blend of morning sunlight and moderated afternoon heat. Understanding this orientation is key to smart design choices.

This orientation is particularly beneficial in cooler climates, as it allows for significant passive solar gain during the colder months. Morning sun can naturally warm up living spaces, reducing the reliance on heating systems during the early part of the day. In real terms, this can translate to noticeable savings on energy bills. Consider a breakfast nook or a home office positioned on the south-east side. It will be bathed in cheerful, invigorating light as the day begins, providing a pleasant environment that feels bright and welcoming. This consistent, indirect light can also be ideal for indoor plants.

Illustration of the sun’s trajectory and its impact on a south-east facing facade.
Navigating the Nuances: Challenges of South-East Exposure
While the morning sun is largely positive, south-east exposure isn’t without its challenges, especially when not properly managed. The primary concern is managing heat gain during hotter months and mitigating potential glare. In summer, even morning sun can bring significant heat into a home, particularly through large, unshaded windows. This can lead to overheating by midday if the property lacks adequate insulation or shading solutions. Glare can also be an issue, making screens difficult to view or creating uncomfortable bright spots. Worth noting, properties with significant south-east exposure can sometimes experience dampness on north-west facing walls if they are perpetually shaded and lack adequate ventilation, particularly in humid climates. Proper drainage and material choices for these less exposed areas are crucial.
Passive Design for South-East Facing Homes
Passive design principles are exceptionally well-suited for south-east facing properties. The goal is to maximize the benefits of the sun while minimizing its drawbacks, primarily through architectural choices rather than mechanical systems. This approach emphasizes understanding the sun’s path and integrating elements that respond to it. One key strategy is the strategic placement of windows and thermal mass. Large south-east facing windows can be paired with interior materials like polished concrete floors, stone walls, or masonry. These materials absorb heat during the morning, storing it, and then slowly release it back into the space as temperatures drop, contributing to a more stable indoor climate. Another element is proper building overhangs. A well-designed roof overhang or an exterior awning can effectively block high-angle summer sun from penetrating windows while still allowing lower-angle winter sun to enter and warm the space. This is a subtle but powerful difference in comfort and energy use.
Window Wisdom: Glazing and Treatments for South-East Facing
Window selection is paramount for a south-east facing property. Modern glazing technology offers solutions that significantly impact thermal performance and light control. Low-emissivity (low-E) coatings are crucial. These microscopic layers on window glass reflect infrared light, reducing heat transfer without significantly impacting visible light transmission. For south-east windows, a low-E coating can help keep unwanted heat out in summer while retaining warmth in winter, striking a balance for year-round comfort. According to the U.S. Department of Energy (2024), low-E coatings can reduce energy loss by 30-50%. Interior window treatments also play a role. While not a primary thermal barrier, cellular shades or insulated drapes can offer an additional layer of insulation and light control. Exterior shading, such as adjustable louvers or roller shutters, provides the most effective control over heat gain and glare, allowing homeowners to adapt to daily and seasonal changes.

Comparing the performance of various window glazing options in terms of U-value and Solar Heat Gain Coefficient (SHGC).
| Window Type / Feature | Benefits for South-East Facing | Considerations |
|---|---|---|
| Low-E Glazing (High SHGC) | Maximizes passive solar heat gain in winter. | May lead to overheating in summer if unshaded. |
| Low-E Glazing (Moderate SHGC) | Balances winter gain with summer heat reduction. | Good all-around choice for most climates. |
| Double-Pane Argon Filled | Improved insulation, reduces heat loss/gain. | Standard choice, often combined with Low-E. |
| External Awnings/Overhangs | Blocks high summer sun, allows low winter sun. | Aesthetic impact, may require maintenance. |
| Interior Cellular Shades | Adds insulation, diffuses light, reduces glare. | Less effective at blocking external heat before it enters. |
Interior Strategies: Materials and Layout for Optimal Comfort
When renovating a south-east facing space, interior design choices can significantly enhance comfort and functionality. The goal is to use the morning light while preventing any discomfort it might cause. For rooms that receive a lot of morning sun, consider lighter paint colors on walls opposite the windows to help bounce and diffuse the natural light further into the space, reducing the need for artificial lighting. Conversely, darker, cooler tones on the sun-facing walls can absorb some of the light and heat, creating a more balanced visual and thermal environment. For surface-material comparisons, see on choosing interior finishes. Layout planning is also crucial. High-use areas like kitchens, dining rooms, and home offices often benefit most from south-east exposure, providing a bright start to the day. Bedrooms might prefer less direct morning sun, suggesting a different orientation or heavier window treatments. In my years working on residential projects, I’ve seen how strategically placing a well-insulated pantry or utility room on the south-east side can also act as a buffer against early morning heat for adjacent living areas.
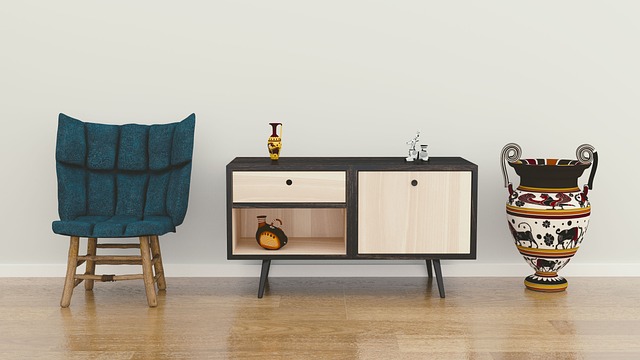
A south-east facing living room designed with light colors and natural materials to optimize morning light.
Exterior Solutions: Shading and Landscaping
Beyond the building envelope, exterior elements play a vital role in managing south-east exposure. Thoughtful landscaping and architectural shading can make a substantial difference in comfort and energy efficiency. Deciduous trees planted on the south-east side can offer natural shade during the summer months when their leaves are full, blocking direct sunlight and reducing heat gain. In winter, once the leaves have fallen, they allow the sun’s rays to penetrate and warm the home. This dynamic shading is an excellent example of working with nature. Consult a local arborist or landscape architect to choose appropriate species for your region. Permanent architectural features like pergolas, awnings, or deep eaves are also highly effective. A well-designed pergola, perhaps with climbing vines, can provide filtered light and shade. Adjustable external blinds or shutters can give homeowners precise control over light and privacy, adapting to changing conditions throughout the day and year. For more on exterior design elements, explore Driveway Repair: Essential Strategies for Lasting Curb Appeal on curb appeal improvements.
Renovating Your South-East Facing Property: A Builder’s Checklist
Renovating a south-east facing property offers a unique opportunity to enhance its inherent advantages. Here’s a practical checklist for contractors and homeowners:
- Assess Sun Path: Before any design decisions, accurately map the sun’s path across your property throughout the year. Consider how existing trees or neighboring structures impact light.
- Review Window Performance: Evaluate current windows. Are they single-pane? Do they have low-E coatings? Prioritize upgrading to high-performance, double-pane (or triple-pane in very cold climates) low-E glass.
- Plan Exterior Shading: Design fixed or adjustable shading solutions like overhangs, awnings, or pergolas. Ensure they effectively block summer sun while allowing winter sun.
- Consider Thermal Mass: Incorporate thermal mass elements (concrete, stone, tile) into flooring or exposed walls in areas receiving direct morning sun to store and release heat.
- Optimize Interior Layout: Position primary living areas and kitchens to benefit from morning light. Use bedrooms or less-used rooms as buffers against unwanted heat gain.
- Ventilation Strategy: Ensure adequate cross-ventilation, especially for parts of the home that might experience increased morning heat. Consider smart ventilation systems.
- Landscape for Shade: Plan for deciduous trees or strategic shrubbery to provide seasonal shading.
- Insulation Upgrade: While beneficial for any home, ensure superior insulation in walls and ceilings, especially on the south-east facade, to manage heat transfer effectively.
Common Mistakes and Their Solutions
Even with good intentions, several common mistakes can undermine the potential of a south-east facing home. One frequent oversight is neglecting summer heat gain. Many focus only on the pleasant morning light and forget that even eastern sun can cause significant overheating. The solution lies in proactive shading (external awnings, deeper eaves) and proper insulation, not just relying on air conditioning after the fact. Another mistake is using the wrong type of low-E glass; some low-E coatings block too much solar gain, hindering winter warming. Consult with a window specialist to select glass with an appropriate Solar Heat Gain Coefficient (SHGC) for your climate. Another error is underestimating glare. While not as intense as west-facing glare, morning sun can still be disruptive. Diffusing window treatments like sheer blinds or even interior light shelves can bounce light up onto the ceiling, spreading it more evenly and reducing direct glare on screens or surfaces.
Tips, Best Practices, and Expert Insights
From a construction perspective, maximizing the comfort and efficiency of a south-east facing home involves more than just individual components; it’s about integration. One key insight is to think of your home’s envelope as a dynamic system. For instance, combining high-performance windows with external shading and internal thermal mass creates a synergistic effect that’s far greater than each element alone. When we set this up for a client’s coastal home in Florida in 2026, the combination of specific low-E glass, automated external roller shades, and a polished concrete floor drastically reduced their cooling load compared to their previous home, despite having similar window sizes. Consider zoning your HVAC system. Rooms with significant south-east exposure might benefit from individual temperature controls, allowing you to fine-tune comfort without overcooking or overheating other parts of the house. This also applies to lighting design; use layered lighting that complements the natural morning light, rather than competing with it. For foundational home improvement insights, see.
Frequently Asked Questions
Is a south-east facing house good for energy efficiency?
Yes, a south-east facing house can be excellent for energy efficiency, especially if designed with passive solar principles. It allows for beneficial winter heat gain from the morning sun while minimizing the intense, prolonged heat of direct afternoon sun, which can reduce heating and cooling costs.
What are the drawbacks of a south-east facing property?
The main drawbacks include potential for unwanted heat gain during summer mornings and glare, especially in rooms with large windows. Without proper shading and ventilation, these spaces can become uncomfortably warm or bright, requiring active cooling or light management.
How does south-east facing affect natural light?
South-east facing properties receive consistent, gentle morning light. This light is often described as bright but not harsh, creating a warm and inviting atmosphere. It provides excellent natural illumination throughout the early part of the day, reducing the need for artificial lighting.
What type of plants thrive in a south-east facing garden?
A south-east facing garden typically receives morning sun and some afternoon shade, making it ideal for a wide variety of plants. Many flowering plants, herbs, and vegetables that prefer bright, indirect light or partial shade will thrive, such as hydrangeas, hostas, impatiens, and many leafy greens.
Should I install special windows for south-east facing rooms?
Yes, installing high-performance windows with low-emissivity (low-E) coatings is highly recommended for south-east facing rooms. These windows help regulate heat transfer, keeping the home cooler in summer and warmer in winter, while still allowing ample natural light to enter.
Does south-east facing impact home resale value?
South-east facing is generally considered a desirable orientation, often positively impacting resale value. Many buyers appreciate the morning sun and balanced light throughout the day, viewing it as a beneficial feature for comfort and energy savings.
Conclusion
Embracing a south-east facing property means understanding its unique light patterns and using them through smart design and construction choices. By integrating passive solar principles, selecting appropriate windows, and implementing thoughtful shading and landscaping, homeowners can create spaces that are not only energy-efficient but also profoundly comfortable and inviting. The actionable takeaway here is to view your home’s orientation not as a fixed characteristic, but as a dynamic design opportunity. Information current as of August 2026; pricing and product details may change.

Asiatic Lily Care: Avoiding Common Mistakes for Vibrant Blooms

Fountain Grass: A Guide to Graceful Garden Design

Gerbera Daisies: Vibrant Blooms for Your Home & Garden

Choosing Expert Foundation Repair Companies for Your Home

Bouncy Floors: Diagnosing Sagging & Stiffening Joists

Nellie Stevens Holly Planting: Your Guide to a Resilient Evergreen
-
 Repairs & Maintenance2 months ago
Choosing Expert Foundation Repair Companies for Your Home
-
 Repairs & Maintenance2 months ago
Bouncy Floors: Diagnosing Sagging & Stiffening Joists
-
 Outdoor & Garden2 months ago
Nellie Stevens Holly Planting: Your Guide to a Resilient Evergreen
-

 Tools & Materials2 months ago
Bolt Cutters: Your Essential Guide to Heavy-Duty Cutting
-

 Home Improvement2 months ago
The Two Grades of Home: Condition and Land
-

 Outdoor & Garden2 months ago
Brush Cutter Essentials: Clearing Overgrown Land Effectively
-

 Repairs & Maintenance2 months ago
Essential Furnace Maintenance for Peak Home Heating
-

 Home Improvement2 months ago
Water Softener Costs: Your Investment Guide